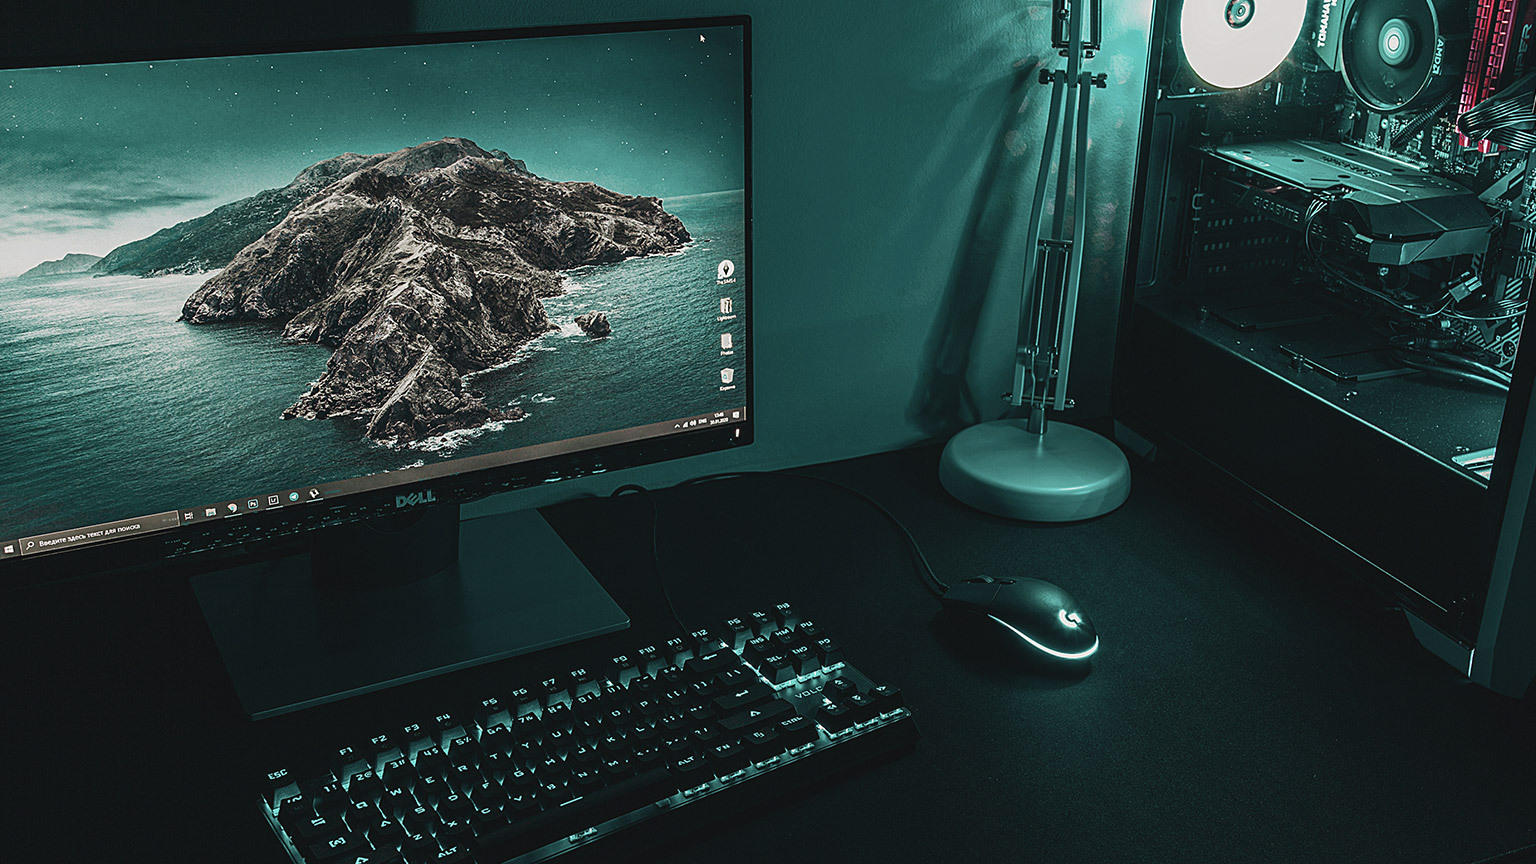
Practice
Go to the Yoobee Build Sandbox in Practice Labs and complete Best Practices.
Explore
Explore Lessons 8, 9 and 17 of the CompTIA A+ resource.
IT in an Enterprise Environment
Information Technology is composed of four key processes which have to be done in a secure manner. The processes are:
- Input
- Processing
- Storage
- Output
The enterprise environment is different from a home environment because the processes are done in a distributed manner. While the home computer typically does all four functions storage, at least, is done in a central location that can be backed up. Other functions, such as processing, can also be done remotely. The most typical case for this is something that used be called “Terminal Services” but is now called “Remote Desktop Services”.
The devices that people use can be “fat” or “thin” clients depending on the ability to do the processing. A thin client is used to access remote desktop services while a fat client does the processing locally.
Given that the work is being done in a collaborative environment the communication tools and transport of data has to be in a secure environment. This environment is typically separated from the external networks by a firewall. Atlassian (IT Asset Management, n.d.) describes IT Asset Management (ITAM) as “the process of ensuring an organisation’s assets are accounted for, deployed, maintained, upgraded, and disposed of when the time comes.”
Selecting the Right Hardware for the Environment
When choosing the hardware for the environment there are three main concerns that have to be considered:
- Functionality – will it do the tasks required of it?
- Cost – What will it cost?
- Required maintenance and support – does it require special maintenance and support, or can it fit with the other items that the company already has (e.g. Mac solution when all clients have Windows operation).
As the purchase of hardware is such a significant cost and has fixed capabilities the purchasing decisions can be difficult when trying to forecast the requirements three or four years in the future. The growth in the company can be unclear and the required capacity uncertain.
Virtual Hardware
The modern response to the increased capacity of the hardware and uncertainty of future needs has led to an increase in the use of “virtual hardware”. Virtualisation, the use of software to emulate hardware, means that a physical device can host a number of virtual servers which you studied in an earlier topic.
Historically the goal has been to have one service per server. This has been to reduce risk. If a server should develop a fault only one service would be affected, and the others would continue as per normal. Key services would have redundancy in order to keep the services running should the hardware fail.
With the increased computing power of hardware, the physical device will be running at less than 5% of capacity if it was only running one server. To ensure maximum value of the hardware the desire is to have it running at about 70% of capacity – typically limited by the CPU and/or RAM.
Using virtualisation, it is possible to replace twenty physical servers with two or three physical devices hosting the twenty virtual machines. The use of virtualisation has also allowed the development of cloud technologies. Companies can host their own virtual servers in a cloud environment or can lease the capacity of hosting companies such as Microsoft Azure, Amazon AWS, Google Cloud Platform (GCP), and IBM Cloud are major providers in this space, with Amazon’s AWS and Microsoft’s Azure dominating in 2024.
While much of the data processing and storage has moved to the cloud the key infrastructure roles are still “on-premise”. Devices to manage authentication, DNS, DHCP, output (particularly printing), and secure connections are still required.
IT in Corporate Environments Research Topics

Consider the possible research topics below and note down any responses you have in the Hardware Task Forum or in your next Live Session. If you are unsure of a solution that is fit for purpose, research!
- What is included in the “Total Cost of Ownership” of IT?
- What line of CPUs are typically used in servers?
- What is special about ECC RAM? What is the physical difference that makes it easy to spot?
- Why do servers often have 1RU, 2RU, or 4RU in the specifications? What is an RU?
- What are the common important ports on a thin client device? Why are thin clients commonly seen at sales counters?
- Are gaming laptops fat or thin devices? Why?
- What are the major brands of firewalls used by businesses?
- What are the key functions of a firewall?
- Why does Cisco call a firewall an “Adaptive Security Appliance” (ASA)?
- Why do firewalls require subscriptions to have full functionality?
- What are the differences between core and network edge (also called access) switches?
- What functionality does a “layer 3” switch have over a “layer 2" switch?
Activity
The questions above demonstrate how IT engineers need to be solution-focused in the workplace.
For example, the below question was asked on Reddit about how often to update firmware and operating systems of network infrastructure:
Question: How often do you update the firmware/iOS on switches and firewalls?
I'm a pretty new IT engineer so I want to know how others would handle this. Most of our infrastructure was replaced within the past 2 years so all the Cisco switches and ASAs are pretty new.
- How often do they need to be updated?
- How do you keep track of new releases and determine when you do update?
- For example, most our Cisco 3750 switches are 12.2 (55) SE10. Is that current enough or is it time to update?
Research what manufacturers (Cisco, Fortinet, D-Link, Allied Telesis) recommend, if anything. Then write your own response to the above query in your Hardware Task Forum thread. Include:
- What are some of the risks when updating device firmware?
- What are the benefits of updating firmware?
- Should it be a scheduled practice or as required?
Discuss with your peers your findings on this topic.
Next, review you answer with the ones provided on Reddit and see if your solution aligns with any of the vast the range of recommendations.
The purpose of networks and their typical layouts
The purpose of networks is to connect the users to IT services, be it from servers, or from the internet. This means that providers of the service (usually a server for this like storing files, printing, and key network services like authentication, DHCP, and DNS) and a way for the user to connect to the service. This could be over cables (which require switches) or via wireless (which requires Wireless Access Points).
The typical network layout has a central location which is where the servers are located, which has network cabling to connect to the different sites where users are located and a way for the users to connect to the network. Server rooms can be a cabinet that has a server and few other pieces of equipment in it, or something a bit more complex.
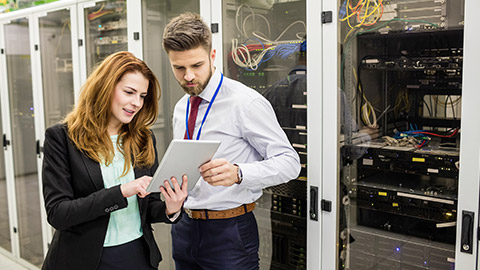
Curating IT Hardware Within a Business Environment
The enterprise environment uses IT hardware differently to a home environment. While it has a routing function, security is a lot more important so is at a different level. In this topic, we look at the pieces of hardware you would expect to see in a corporate environment.
There are three major IT risks to organisations. These are loss of Confidentiality, Integrity and Access.
Confidentiality
Confidentiality is very important. Under New Zealand law personal data can only be collected for specific purposes and accessed by those who have a right to access it unless the owner of the personal data (i.e., the individual that the data applies to) agrees to the sharing of the data. A breach of confidentiality can have serious consequences for any organisation. Ensuring the confidentiality of the data starts by restricting physical access to the locations where the data is stored.
Integrity
Integrity refers to data becoming corrupt in some way. Should this happen there should be systems in place to allow the data to be restored to a state where it has integrity.
Access
The final major risk is the user of the data losing access to the data at a time when it is required. This is most commonly due to hardware failure. The risk of loss of access due to hardware failure must be balanced with the cost of the systems to ensure that the data is always available.
When a managed service provider assumes responsibility for a site it is important to understand the state of the hardware on that site. The IT manager will also require periodic updates on how reliable the IT hardware is. It is, therefore, important to build a comprehensive inventory of the hardware on-site and the state of those devices. The report will be composed of:
- A list of the hardware
- Security considerations
- Recommendations
IT Asset Management (ITAM)
The core of this information is kept in a package that is classified as “IT asset management” (ITAM) and keeping the details up to date is very important. It not only lists what IT equipment the organization possesses, but also records the details such as manufacturer, model, date of purchase, and specifications.
Associated with the register of assets will normally be a record of work done. This will often be in the ticketing system. Two of the widely used systems in New Zealand are:
These systems monitor the devices against a baseline to ensure satisfactory performance and record changes made.
All software, including firmware and device drivers, can become targets for malware attacks if they are not kept secure. Because of the cost of updating firmware in devices like switches it is usually only done when become aware of a need to do it. A central communication device like a switch will need to be taken offline to update the firmware, causing everyone who connects through that switch to lose connectivity for the duration of the update. The risk of things having a problem during the update must always be factored in. Even when restarting a server may expect it to be five minutes but have to say 15 minutes in case it is exceptionally slow, or something happens. As always need to hope for the best however, prepare for the worst.
Inventories
An inventory will often use what can be seen, what can be found using a network discovery tool, and source documents such as accounts and ticketing information.
An inventory will normally start in the server room. Within the server room there will be items such as:
- Servers (usually rack mounted, but could be on server shelves)
- Core switches (high performance with mixture of ethernet and GBIC (for fibre) ports)
- Network Attached Storage (NAS) devices
- Uninterruptible Power Supply (UPS) devices
- Firewall devices
- Routers
Once you have identified all the devices in the server room, then you have to identify all the devices connected to the network cabinets. These will include:
- Switches
- Wireless Access Points
- Workstations
- Laptops (connecting directly or via wireless network
- Printers
- VoIP phones
- IP based security camera
The inventory will record for each of these items:
- Manufacturer
- Series
- Model
- Generation (mainly used by HP)
- Key specifications
- Serial Numbers
- OS
- Purchase Date
- Warranty Details
- Notes about the device
A lot of this information will be captured automatically by ITAM agents that are installed on computing devices, particularly servers, to monitor the device. These agents will not capture information such as purchase date or warranty details.
If it is a custom build the agents will not be able to extract the information. Businesses very rarely use custom build for servers because of the risk associated with getting replacement parts in the event of hardware failure. Despite having redundant servers, major businesses will have either 4-hour or next day replacement warranty on servers meaning that should a component fail, it will be replaced as soon as possible reducing the risk of the service becoming unavailable should the backup server also fail.
Physical Device Considerations in Asset Management
Other information about the physical devices may be obtained from accounting records. This will include information such as purchase dates, warranty details, and serial numbers.
In addition to the risk of hardware failure an IT professional must be aware of other risks to the security of the data. Physical access to the server is a risk that must be managed. If the server is under the desk in an open office, then anyone with access to the office has access to the server and can do anything from turning it off (and so preventing access to the data) to stealing the server or drives. For this reason, servers are usually kept in a separate server room, which should be kept locked. This is adequate for most businesses but corporations like Google, Amazon, Microsoft, etc., have complex rules around access where only certified people are allowed access on a highly regulated basis.
On a physical level major data centres will be paired with another data centre so that is one should have a major fault (e.g. earthquake) the other data centre will continue providing the services as per normal. The level of redundancy in these organisations is usually such that if the data is not accessible people have a lot bigger problems to worry about.
Security on a physical device level is concerned about:
- Reliability of the equipment
- Physical access to both the device and the data in transmission
- Firmware being updated
An Example of a Report to an IT Manager
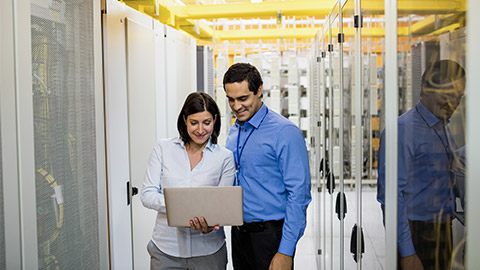
Hardware Details
Servers
- HP Proliant DL320 Gen 10/Intel Xeon 4210R CPU/32Gb RAM/4x 1.2TB SAS HDD
- Dell PowerEdge R720/2x Intel Xeon E5-2640 CPU/64Gb RAM/4x 1.2TB SAS HDD
Network Switches
- Cisco Catalyst 3850 Switch/48x 1Gbps ethernet
- Allied Telesis GS948MPX/48x 1Gbps ethernet + 2 combo + 2 10G SFP
- 3x D-Link DGS 1100-16/16x 1000Gbps ethernet POE
Firewall
- Juniper SRX340 Firewall | 8GB RAM, 16GB Storage
- Fortinet 70F | WAN, DMZ, Fortilink, 5x LAN Gbps ethernet ports | 128GB SSD Storage UPS
Security Considerations
Physical Access
These security considerations should be taken into account for physical IT assets:
- The servers are located in a locked room with access only by authorised people.
- All critical network equipment is in locked cabinets.
Small businesses often do not have the space to secure the server in a locked room. Therefore, the server should be in a room that does not get used much and has restricted access, such as a stationary room. In these cases, the server and associated devices will be in a small cabinet such as in the image below:
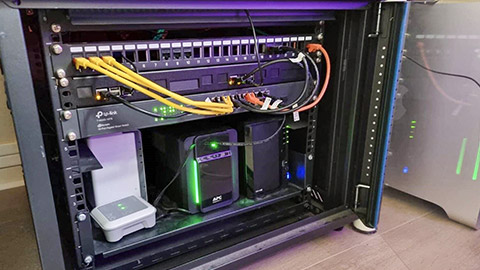
Note that the cabinet, even though in a locked room, should also be locked. Note that the core equipment (server and switch) is on a UPS in the image below:
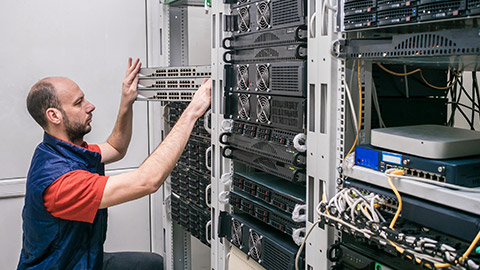
Larger organisations will have dedicated rooms.
Firmware and Root Admin Access
Firmware and root admin access should also be on an inventory which checks that:
- Firmware and security patches of all switches and routers have all been updated within the last six months.
- Firmware and security patches on all server firmware are checked monthly.
- All devices have had default passwords replaced with unique secure passwords which are recorded in a secure location.
- Firewall and IPS and IDS systems have current subscriptions and are configured and operational.
- Central logs are checked daily.
Recommendations
Here is an example of recommendations from a report and the level of detail required:
- There is currently no need for additional hardware.
- All equipment is working under 80% utilisation.
- There is no equipment over 5 years old, and servers are all under a 3-year next day warranty.
- One server is currently in year three of the three-year warranty and will either need to be replaced, the warranty extended or continue operating without warranty. The recommendation is to replace.
- Continue with the current IDS and IPS subscriptions for the firewall and schedule update of firmware of all network switches as per normal.
Much of the work you will perform as a PC technician will involve installing and configuring various hardware and software components. As an IT professional, you will often find yourself setting up end-user workstations or helping those users with the hardware they need to make their daily lives easier.
Installing and configuring peripheral components—like a keyboard and mouse, or even more specialised devices—are some of the more common tasks that you will perform.
Input Devices
Input devices—or Human Interface Devices (HIDs)—are peripherals that enable the user to enter data and select commands.
Computers need user input such as directions or commands and user interaction with the programs that are included in order to produce something of use. Keyboards and pointing devices are the standard input devices for personal computers and there is an ever-growing number of input devices available for the user to interact within a variety of ways.
As well as command input, security systems often require different ways for users to input credentials to access an account or authorise a payment.
Keyboards
The keyboard is the longest-serving type of input device. Historically, keyboards were connected via the 6-pin mini-DIN PS/2 port. (This is coloured purple to differentiate it from the identical form factor mouse connector.) All keyboards are now USB or wireless (typically Bluetooth), though.
Extended PC keyboards feature several special command keys (Alt and Ctrl plus keys such as Print Screen, NumLock, Scroll Lock, Start, Shortcut and Function). A numeric keypad can allow faster entry of numeric data or as an additional set of arrow keys (the function is toggled by NumLock). Multimedia keyboards may also feature programmable keys and buttons that can be used for web browsing, playing CDs/DVDs and so on.
When selecting a keyboard for a user, in addition to considering its ergonomics, you should also consider whether the keyboard offers additional features (such as customisable hotkeys and scrolling) as well as wireless connectivity.
Most keyboards designed for use with Latin scripts use the QWERTY key layout. There are different layouts, though, such as the small differences between US and UK layouts, the Dvorak alternative layout for Latin script, and keyboards for different scripts, such as Cyrillic.
The keyboard type must be set correctly in the OS. In Windows, the type of keyboard layout is configured through the Language applet in Control Panel/Settings so that the computer knows which symbol to use when a particular key or key combination is pressed.
Pointing Devices
While a keyboard can be used to navigate a window (using Tab and arrow keys, for instance), most operating systems are designed to be used with some pointing device. A pointing device is usually used to move a cursor to select and manipulate objects on the screen.
Mouse
The mouse is the main type of pointing device for graphical software, using the same interfaces as keyboards (the PS/2 port for a mouse is colour-coded green, though).
There are 3 main types:
- Mechanical mouse: this contains rollers to detect the movement of a ball housed within the mouse case. As the user moves the mouse on a mat or other firm surface, the ball is moved and the rollers and circuitry translate that motion to move a cursor on the screen. Mechanical mice are no longer in production.
- Optical mouse: this uses LEDs to detect movement over a surface.
- Laser mouse: this uses an infrared laser, which gives greater precision than an optical mouse. This can be customised to different functions, and the presence of a scroll wheel is used (obviously) for scrolling and as an extra clickable button.
A mouse can also be distinguished by size and shape (e.g. a smaller mouse is useful with portable systems; while some are marketed based on their ergonomic shape).
Touchpad
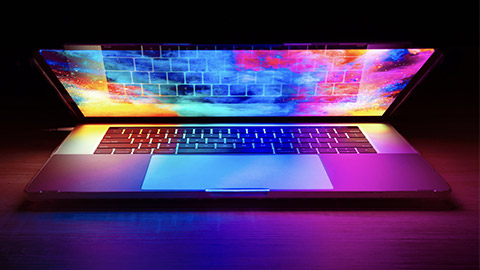
A 'touchpad' is a small, touch-sensitive pad. The user moves their fingertip across the surface, sending electronic signals to the computer to control the pointer on the screen.
They can also have buttons like a mouse or trackball, or can be configured to detect finger taps on its surface and process those signals like button clicks.
Touchpads are most closely associated with laptop computers, but it is possible to use them as peripheral devices with PCs, too. An external touchpad is connected using USB or Bluetooth.
Guidelines For Installing Internal Components
Follow these guidelines for working with peripheral devices.
Installing Internal components
Here are some guidelines for you to consider when you are adding or removing peripheral devices.
- Always read the manufacturer's instructions and check that the device is compatible with the PC and operating system.
- Hold the connector, not the cable, when removing a lead.
- Inspect the connector and port for damage (notably broken or bent pins) before attaching a lead.
- Take care to align the connector carefully and not use excessive force (to avoid damaging the pins).
- Check whether the device requires an external power source.
PC and Laptop Build Considerations
In this section of the course, we will be going through build considerations, including:
- Step 1: Plan and organise your work
- Step 2: PC case and examine the system
- Step 3: Remove expansion cards
- Step 4: Remove motherboard, PSU and drives
- Step 5: Put a computer back together
- Special considerations supporting laptops.
General Tools
- Tool kit containing various screwdrivers
- Pillbox or plastic bag or cup to hold system screws
- Screw grabber
- Assorted soft paintbrushes and wiping cloth
- Note pad and pen.
Anti-Static Precautions
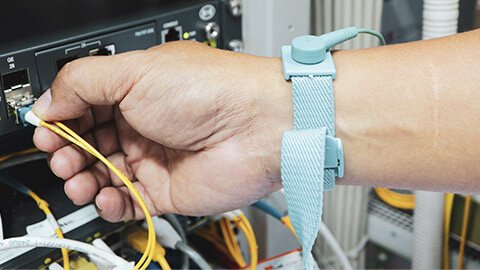
- Anti-static strap
- Anti-static mat
- Anti-static bags.
Step 1: Plan and organise your work
- Make notes for backtracking.
- Remove loose jewellery that might get caught.
- Stay organised by keeping small parts in one place.
- Do not stack boards on top of each other.
- Do not touch board chips:
- with hands, magnetised screwdriver
- fingerprints on edge connectors may later cause corrosion.
Step 2: PC case and examine the system
- Backup important data.
- Power down the system and unplug it.
- Unplug other peripherals as well.
- Press and hold the power button for 3 seconds (this will drain the power supply).
- Have a Pill Box, plastic bag or cup handy to hold screws.
- Open the case cover
- Many cases require you to remove the faceplate first
- Some older cases require you to remove a side panel.
- Place the computer on top of the anti-static mat.
- Clip your ESD strap to the side of the computer case
- If you do not have an ESD strap, then touch the case (do this every time you move from the computer).
- After opening, you will see the main components:
- Power supply
- Motherboard
- Drives.
- Follow cables from the motherboard to the component to know the purpose of each cable.
Step 3: Remove expansion cards
To remove expansion cards:
- Remove any wire or cable connected to the card
- Remove the screw holding the card to the case
- Grasp the card with both hands and remove it by lifting it straight up (can also rock the card from end to end)
- Don't put your fingers on edge connectors or touch a chip
- It is best to store cards in an anti-static bag or on an anti-static mat ensuring distance from other components cards etc.
Step 4: Remove Motherboard, PSU and Drives
You may have to remove the drives and/or power supply to get to the motherboard, depending on the system.
To remove motherboard:
- Unplug power supply lines
- Unplug SATA cables connected to the motherboard
- Disconnect wires leading from the front of the computer case to the motherboard (called front panel connectors)
- Make a diagram before disconnecting.
To remove the power supply from the case:
- Look for screws that attach the power supply to the computer case
- Do not remove screws that hold power supply housing together (do take the housing apart)
- Sometimes power supplies are also attached to the case on the underside by recessed slots
- Turn the case over and look for slots
- If present, determine in which direction you need to slide the power supply to free it from the case.
Tips to remove drives:
- Look for screws on each side of the drive attaching the drive to the drive bay
- There might be a catch underneath the drive
- You must lift as you slide the drive forward
- Some drive bays have a clipping mechanism to hold the drive in the bay
- Release the clip and then pull the drive forward
- You may have to remove the drive bay to remove the drives.
Step 5: Put a computer back together
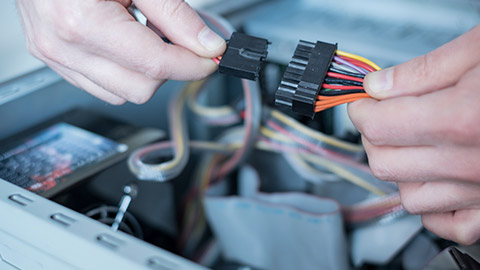
Connect the power cords from the power supply to the motherboard.
- You will always need the main P1 power connector and may likely need the 4-pin auxiliary connector for the processor.
- A board might have a 6-pin or 8-pin PCIe power connector
- If the power supply does not have this connector, use an adapter to convert 2 Molex connectors to a PCIe connector
- If the case fan is present, connect the power cord from the fan to pins on the motherboard labelled 'Fan Header'.
- If a CPU and cooler are already installed on the motherboard, connect the power cord from the CPU to pins on the motherboard labelled 'Fan Header'.
- Connect wire leads from the front panel of the case to the front panel header on the motherboard.
- Look for a small triangle embedded on the connector that marks one of the outside wires as pin 1.
- Line up pin 1 on connector with pin 1 marked on the motherboard.
- If labels on the motherboard are not clear, consult the user guide for help.
- Connect wires to ports on the front panel of the case (audio ports or USB ports are examples).
- Install the video card and other expansion cards.
- Double-check each connection.
- Plug in keyboard, monitor and mouse.
- Turn on the power and check that the PC is working properly (if not, there is most likely a loose connection).
Special considerations supporting laptops
Laptops and their replacement parts cost more than desktop PCs.
Factors to consider that apply more to a laptop than desktop computers include:
- original equipment manufacturer's warranty
- service manuals and diagnostic software provided by the manufacturer
- customised installation of the OS unique to laptops
- advantage of ordering replacement parts directly from the laptop manufacturer or authorised source
- it may become necessary to open a laptop case to upgrade memory, exchange a hard drive or replace a failed component
- replacing a broken LCD panel or motherboard can be a complex process
- screws and nuts on a laptop are smaller than a desktop, requiring smaller tools.
Work methodically:
- Keep screws and components organised
- Place screws in a pillbox, bag or cup (label each compartment or each type of screw in a separate container)
- Keep notes to help with reassembly.
Disassembly tips:
- Find the hardware service manual
- Consider the warranty might still apply
- Opening the case might void the warranty
- Take the time necessary, do not force anything
- Protect against ESD
- Plastic screws may be used only once
- Disassemble components in order.
Reassembly tips:
- Reassemble laptop in reverse order
- Tighten, but do not over-tighten, all screws
- Before installing the battery or AC adapter, verify there are no loose parts inside the laptop.
Once you have installed the OS, you need to maintain it on an ongoing basis and set up some basic preventive maintenance procedures to keep the computer working well.
Maintaining an OS might not seem as exciting or interesting as performing a new installation or replacing a hard disk, but it is actually one of the most crucial tasks for a support technician.
System maintenance is important for 2 reasons:
- proper maintenance can prevent system problems from arising
- proper maintenance of the system, including the creation of appropriate backups, can make recovery or troubleshooting operations much easier.
Disk Maintenance
Of all the computer's subsystems, disk drives and the file system probably require the most attention to keep them in optimum working order. They are subject to 3 main problems:
- Fragmentation: Ideally, each file would be saved in contiguous clusters on the disk. In practice, over time as files grow, they become fragmented (written to non-contiguous clusters), reducing read performance.
- Capacity: Typically, much more file creation occurs on a computer than file deletion. This means that capacity can reduce over time, often quite quickly. If the system disk has less than 20 per cent free space, performance can be impaired. When space drops below 200 MB, a Low Disk Space warning is generated.
- Damage: Hard disk operations are physically intensive and the platters of the disk are easy to damage, especially if there is a power cut. If the disk does not recognise that a sector is damaged, files can become corrupted.
These problems can be addressed by the systematic use of disk performance tools. These tools should be run regularly—at least every month and before installing software applications. In Windows, you can access tools to maintain and optimise a drive through the drive's Properties dialog box.
Windows Disk Maintenance Tools
There are several tools that you will find helpful when it comes to performing disk maintenance in Windows.
CHECK DISK (chkdsk)
The Check Disk Windows utility checks the integrity of disks and can repair any problems detected. Scheduling a check disk to run regularly will keep errors from accumulating on the hard disk. It is recommended that you run the Check Disk utility weekly.
There are 3 ways to run the tool.
- No option selected — runs in Read-Only mode.
- Automatically fix file system errors — file system errors are caused by crashes, power loss, and the like. At a command line, use chkdsk volume: /f, where volume is the drive letter.
- Scan for and attempt recovery of bad sectors — 'bad sectors' are damage to the actual drive. If a drive has many bad sectors, it is probably nearing the end of its useful life. You are prompted to save any recoverable data, which is copied to the root directory as filennnn.chk files. At a command line, use chkdsk volume: /r, where volume is the drive letter.
Check Disk cannot fix open files, so you may be prompted to schedule the scan for the next system restart. A version of Check Disk (autochk) will also run automatically if the system detects file system errors.
The other main parameters and switches for the command-line version are detailed below.
| Switch | Use |
|---|---|
| path | Specify a path (and optionally file name) to check. |
| /x | Force the volume to dismount. This will cause file errors for users with files open on the volume. If the volume is in use and you use the /f or /r switches without /x, you are prompted to schedule chkdsk for the next system restart. |
| /i /c | On NTFS volumes only, skips parts of the checking process. |
Disk Defragmenter
In Windows, the Disk Defragmenter reorganises a drive to store information relating to each file in contiguous sectors of the disk. This improves performance by reducing the time required to load a file.
The Disk Defragmenter can also move data to the start of the disk, leaving a single free area of disk for use by new files.
Note
Although it is possible to run this utility in the background while you work, it will slow your machine and prevent defragmentation of open files. It is usually better to run defragmenter when your computer is not being used.
Linux and MacOS disk maintenance tools
The file systems used by Linux and MacOS (ext and HFS Plus/APFS) are less prone to fragmentation than NTFS. However, regular use of disk maintenance utilities is still considered best practice.
Linux disk management tools
Linux file systems do not ordinarily require defragmenting.
Linux leaves gaps between each file, allowing the files to grow or shrink within their own 'space', avoiding the worst effects of fragmentation.
Performance will suffer if the disk is more than 80 per cent full, however. You can use the following tools to check the health of the disk and file system:
- df and du — check free space and report usage by directories and files
- fsck— check a partition for errors. Note that the partition should be unmounted before running this tool.
macOS DISK UTILITY
In MacOS, the Disk Utility app can be used to verify or repair a disk or file system. It can also be used to erase a disk with security options in case you are selling or passing on a Mac.
Patch Management
A patch, or update, is a file containing replacement system, or application, code. The replacement file fixes some sort of coding problem in the original file. The fix could be made to improve reliability, security or performance.
'Patch management' is the practice of monitoring, obtaining, evaluating, testing and deploying fixes and updates. As the number of computer systems in use has grown over recent years, so has the volume of vulnerabilities and corresponding patches and updates intended to address those vulnerabilities.
However, not every computer within an organisation will necessarily be compatible with a certain patch--whether because of outdated hardware, different software versions or application dependencies. Because of the inconsistencies that may be present within the various systems, the task of managing and applying patches can become very time-consuming and inefficient without an organised patch management system.
In typical patch management, software updates are evaluated for their applicability to an environment and then tested safely on non-production systems. If the patch is validated on all possible configurations without causing more problems, only the valid patch will be rolled out to all computers throughout the entire organisation.
A patch management program might include:
- an individual, responsible for subscribing to and reviewing vendor and security patches and updating newsletters
- a review and triage of the updates into 'urgent', 'important' and 'non-critical' categories
- an offline patch test environment where urgent and important patches can be installed and tested for functionality and impact
- immediate administrative push delivery of approved urgent patches
- weekly administrative push delivery of approved important patches
- a periodic evaluation phase and full rollout for non-critical patches.
Many organisations have taken to creating official patch management policies that define the who, what, where, when, why and how of patch management for that organisation.

Updating
While working within patch management procedures, you also need to know the processes involved in performing updates in different operating systems.
Windows update
Windows Update is a website (update.microsoft.com) hosting maintenance updates for different versions of Microsoft Windows. A control installed on the computer enables it to browse the site and select updates for download and installation, using the Background Intelligent Transfer Services (BITS) protocol.
Windows Update hosts critical updates and security patches (code to fix security vulnerabilities in Windows and its associated software) plus optional software and hardware updates to add or change features or drivers. There is also a complementary program, called Microsoft Update, which can be used to keep Microsoft Office software patched at the same time
During setup, Windows can be configured to check for system updates (via the internet) and download them as needed.
Update settings can be reconfigured via the Windows Update applet in Control Panel.
Application updates
Software applications (especially those with browser plug-ins) may also need updating with the latest patches. Applications can contain security vulnerabilities in the same way as the OS; in fact, applications are targeted more aggressively than Windows itself as attackers recognise that they are less likely to be patched than the OS.
Microsoft software (such as MS Office) can be updated via the same update interface by selecting 'Give me updates for other Microsoft products when I update Windows'. Most third-party vendors install auto update software with their applications.
Linux updates management
To manage updates and software in Linux, the package manager (such as yum or aptget) needs to be configured with the web address of the software repository (or repositories) that you want to use. It can then be used to install, uninstall or update the software.
Most Linux software is configured by editing one or more text files with the required parameters, though some software may provide a GUI front-end. Updates to the Linux kernel and drivers and a distribution's software tools and applications can be obtained via the package manager.
For example, you can edit a configuration file in the unattended-packages package to allow apt to obtain different types of updates.
macOS Patch management
In MacOS, the App Store checks daily for automatic updates and releases of installed apps. If a new version is available, a notification will be shown against the App Store icon in the dock. Also when you open the App Store, it will highlight that updates are available against the Updates button in the App Store window menu bar. To update the app, run App Store and click the Updates button in the top bar of the window.
You will have a choice to either update the apps individually or update all from the button at the top. It is recommended to choose Update All so that the latest versions of your apps and updates to MacOS (not necessarily new versions) are on the Mac.
It is also possible to automatically update apps to the latest version. To do this, go to App Store → Preferences and configure the appropriate settings.
Most apps that are downloaded and installed from a third-party developer will automatically check if updates are available each time they are run. A prompt will be displayed to update or to cancel. It's also possible to manually check for updates using the Check for Updates menu option in the app itself.
Driver and Firmware Updates
Windows ships with a number of core and third-party device drivers for system components and peripheral hardware.
Updates for these devices can be obtained via Windows Update, though they will be listed as optional updates and might not install automatically. You might need to use the device vendor's website to obtain a driver.
To update, you download the driver files and install them using the supplied setup program or extract them manually and save them to a local folder. You can then use the device's property dialog box in Device Manager to update the driver. You can either scan for the update automatically or point the tool to the updated version you saved locally.
Driver updates
Unlike Windows-based PCs, where desktops are made from various hardware components from different manufacturers, each requiring its own driver, Apple's integrated approach to system building means that drivers are easier to manage.
All drivers for display, network interfaces, drives, and so on, are integral to MacOS and will be updated (where necessary) either through software updates through the App Store or even new releases of MacOS itself.
Where third-party devices are installed, always make sure that the latest version of the driver is installed. Use the About button from the device's page in System Preferences to verify the current driver version.
Check the manufacturer's website to see if this is the latest version.
If installing a new driver, first remove the old driver from MacOS. You would use the Wacom Utility under Applications, then click Remove under Tablet Software to delete the driver and utilities. You may be prompted to enter an administrator password to do this.
Next, download the latest version from the manufacturer's website. This will almost certainly take the form of a .dmg disk image. Double-click the package and follow the instructions to install the driver.
Complete the process by verifying that the updated version number is shown via System Preferences.
Windows backup
The backup tool included with Windows 7 has the ability to backup selected locations. The home editions are restricted to backing up to local drives or removable media, whereas the business/Ultimate editions can backup to a network share.
MacOS backup
In MacOS, the Time Machine utility enables data to be backed up to an external, attached drive.
To enable Time Machine, go to System Preferences→Time Machine and slide the switch to On. Select the disk where the backups are to be stored. Under Options... it is possible to unselect certain files, folders, or even drives from a backup plan.
By default, Time Machine keeps hourly backups for the past 24 hours, daily backups for a month, and weekly backups for all previous months. When the drive used to store backups becomes full, Time Machine removes older backups to free up space.
To restore files from Time Machine, a timeline on the right-hand side of the screen will show the available backups. Using the Finder window in Time Machine, find the folder with the file (or files) that you want to restore. Then slide the timeline back to the date/time of the previous version.
Storage for a computer system is important. The operating system and applications need space, and the user needs space to store documents, files and folders.
Types of storage
Storage devices commonly fall into 2 of 4 categories:
- Mechanical
- Solid-state
- Internal
- External
Mechanical
For decades, magnetic mechanical Hard Drives (HDDs) have been the standard for internal storage on a computer system.
HDDs use spinning platters and read/write heads connect to an actuator to read and write data in circular tracks (see below).
- platters
- spindle
- read/write head
- actuator
HDDs come in 2 common form factors:
- 3.5” – often found in desktop computers
- 2.5” – often found in laptop computers.
Over generations of development, HDDs have increased in the number of platters and speeds that they spin, improving data density. Having over a terabyte (TB) is now commonplace and some vendors now offer drives up to 20TB capacity.
HDDs are generally cost-effective, offering large storage capacity for a lower cost than other storage technologies.
Solid-State
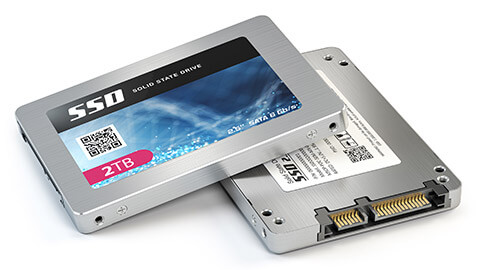
Solid-state drives (SSDs), as the name suggests have no moving parts, making them less prone to damage from movement. They use non-volatile flash memory and commonly come in the 2.5" form factor.
SSDs are known for their high data rates, meaning they are faster for reading and writing than traditional magnetic drives.
Newer motherboards may also support PCIe-based SSD storage using the
M.2 formats. These devices offer even greater speeds and performance as they are connected directly to the PCI Bus.
The main disadvantages of SSDs are the cost and more limited storage capacity.
Internal Storage
3.5" or 2.5" drives connected to the inside of a computer will usually use a Serial Advanced Technology Attachment (SATA) port and cable.
SATA is a 7-pin hot-swappable interface supporting data rates up to 6 Gbit/s.
Each SATA port on a motherboard can accommodate one drive. Each drive also needs to be supplied power from the power supply.
PCIe-based storage is usually attached directly to the motherboard.
External Storage
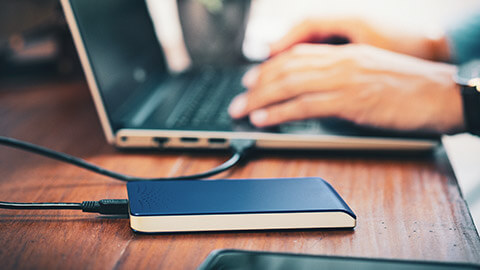
Both HHDs and SSD can be used as external storage to increase the capacity of a system or to provide portable storage when needed.
USB enclosures can be found for 3.5”, 2.5” and M.2 form factor drives. 3.5” enclosures will need an additional power supply (often a 12v DC wall plug), while 2.5” and M.2 enclosures will likely run on power supplied by the USB port.
There are many vendors offering ready-to-use external drive solutions.
