As you know, a building project has many components running throughout various timelines and phases, with numerous people involved, regulations, precautions, and a host of unforeseen elements that all need to be guided along the process in a specific order for a successful outcome.
The key to all of these components running smoothly is the management of the Project Schedule.
The Project Schedule
A project schedule is a plan of all the tasks and activities that need to be completed on your building project. It shows the order in which these are to be done and provides a timescale for the completion of each activity. It's a living document that needs tracking and revision throughout the project's phases to ensure it's completed on time.
When you prepare a project schedule, you will:
- plan the sourcing and ordering of materials and sequence of trades
- produce labour and materials schedules
- produce a cashflow chart
- regularly monitor and update the schedules.
Keeping to your schedule requires you to:
- establish a critical path of events
- analyse the project performance against milestones and targets in real time
- pay attention to the tasks on their critical path
- take action on tasks falling behind or costing more than planned to ensure that the entire project does not end up running over time or budget.
Further Reading
Menlo AssociatesThe Critical Path is the longest unbroken sequence of tasks running from the start of the project through to the finish, which then determines the shortest time possible in which to complete the project. Contrary to popular belief, the Critical Path is not fixed, it is constantly changing.
Read Critical Path Analysis on the website of Menlo Associates, an Auckland-based construction business.
Scheduling will help plan the following:

In a nutshell, a schedule is a listing of the goals and tasks of a project, usually with intended start and finish dates.
These objects and scheduled activities are often calculated in terms of resource allocation, budget, and length. Schedules are widely used in the project planning portfolio. The schedule creator should provide a time estimate for each job before a project schedule can be produced and a resource list with availability for each resource.
Further Reading
Understanding the different types of project scheduling can be beneficial to your project. Read this blog on GoBridgit.com, How to pick the right construction schedule for your company, which outlines seven types of construction schedules, looking at each of their distinct advantages.
Project administration
Project administration refers to the implementation of administration and business processes for the works involved in a project. An effective project administration system is in place when deadlines and compliance requirements are met.
Tasks involved in project administration are to:
- coordinate with the site manager and project manager and assist in project management processes
- supervise the team in administrative functions
- perform analysis and evaluation of project progress
- conduct meetings and consultations for administrative discussions and project updates
- coordinate with the supplier, prepare invoices and purchase orders
- document and manage the contract and other project administrative documents
- accomplish other day-to-day administrative tasks related to the project.
Although specific project administration tasks are already assigned to certain individuals, the supervisor is expected to make sure that project administration requirements are achieved.
Contracts
The supervisor is expected to be on top of current administration procedures, related to matters of contracts.
The role of the contracts administrator
In bigger construction projects the contracts administrator is responsible for the management of the building contract on behalf of the project and organisation.
This includes:
- managing paperwork associated with contracts
- managing variation orders
- liaising with:
- suppliers
- subcontractors
- traders
- project managers
- clients.
Types of construction contracts
In the building industry, the contract is a legally binding agreement between two parties these could be the client and the contractor. This contract specifies the scope of work, project schedule, total project cost, payment details, terms, schedule, and provisions for dispute resolution.
- the scope of work
- project schedule
- total project cost
- payment details
- terms
- schedule
- provisions for dispute resolution.
One of the key elements to understanding the administrative implications of the construction contract is to determine the type it falls under.
In New Zealand, most construction contracts are either fixed-price (lump sum) or cost-plus contracts.
NewBuild Residential Construction Lending defines fixed price and cost-plus contracts as shown in the following table.
| Terms | Context | |
|---|---|---|
| Fixed price contract | The contractor agrees to a fixed contract price, or a fixed rate per unit of output, which in some cases is subject to cost escalation clauses. | Often used in projects where the design is either completed or detailed enough for the contractor to accurately price, or in projects where the nature of work is well defined. |
| Cost-plus contract |
The contractor is reimbursed for allowable or otherwise defined costs, plus a percentage of these costs or a fixed fee. Cost plus contracts may either be:
|
Often used when the scope of work is not yet clearly defined and when the client’s budget has not been finalised. |
Standard contract forms
After you have established the contract type, you will need the standard form used for the contract.
Getting to know standard contract forms will give you a general idea of its provisions and required guidelines, which will help you identify the project administration requirements involved in the contract.
In New Zealand, construction contracts are usually established using standard forms as a basis. It has been found that the use of standard forms varies depending on the contract value, project location, contracting sector, and whether the contracts were head contracts or subcontracts/trade contracts.
In summary, any employment contract for workers must be provided in writing and include terms like wages, hours, and entitlements if appropriate. There are minimum standards for pay and conditions, and workers may be covered by collective company agreements.
Further Reading
This website article, New NZS Construction Contracts, discusses the New Zealand Standard NZS 3910:2013 for construction contracts.
This standard is a widely used contract for building projects in New Zealand and sets out the terms and conditions for the delivery of certain construction work. The article provides an overview of the changes and features of this standard, including provisions for dispute resolution, variations to the contract, and payment mechanisms.
Generally, all the costs that occur throughout your building work are the “construction costs” itself, which include all costs associated with the build, purchase, or government fees.
Usually, the construction cost is indicated in the project contract. However, even if the contract has a described fixed price, many project costs cannot be accurately predicted.
Can you think of some reasons for these variations?
These variations can arise due to these and other unforeseen issues:
- Design Changes: Changes in the project design or scope can significantly impact costs. If the client requests alterations or additions after the initial estimate, it can lead to additional expenses (going over budget) or savings (if changes result in cost reductions).
- Material Costs: Fluctuations in the cost of construction materials can affect the overall project budget. Changes in market prices for lumber, steel, concrete, etc., can lead to unexpected cost increases or decreases.
- Labour Costs: Variations in labour costs, including wages, overtime, and availability of skilled workers, can impact project costs. Delays or shortages in labour can lead to increased expenses due to extended project timelines.
- Site Conditions: Unforeseen conditions at the construction site, such as poor soil quality, unexpected environmental issues, or hidden underground obstacles, can necessitate changes to the construction plan and increase costs.
- Project Management and Planning: Effective project management can help control costs by anticipating and addressing issues early. Poor planning, inadequate risk management, or inaccurate initial estimates can result in cost overruns. Conversely, efficient management practices can lead to cost savings by optimising resources and schedules.
-
Subcontractor Claims:
- for Loss: This refers to financial losses incurred by the contractor or subcontractor due to circumstances beyond their control. Examples could include delays caused by client changes, adverse weather conditions, unexpected site conditions, or delays in receiving materials.
- for Expense: This refers to additional costs that the contractor or subcontractor has had to bear as a result of the aforementioned delays or unforeseen circumstances. This could include extra labour costs, extended equipment rental fees, costs related to accelerated work schedules, or increased overheads.
That's a fair few balls to keep in the air. So, having systems to monitor these changes is essential to maintaining cost control throughout the project. Procedures for project control and record-keeping are necessary to indicate progress and detect any potential problems on-site as early as possible.
To effectively monitor the costs that occur in the project, you must first refer to the project’s estimated cost. This estimated cost would have been established before construction activities began on a project.
As we mentioned, the estimation may differ from the actual costs incurred at each stage of the build. By comparing the estimated cost and actual cost on a regular basis, trends can be picked up, and decisions made in a timely manner about whether the project is operating beyond budget and needs to look at where to cut costs. Exceeding the estimated cost is a clear indication that something must be done, and control financing measures should be tightened. This overspending can happen due to several factors as you reflected on above.
To monitor a project's costs, you must first know the kinds of expenses that a project incurs during the construction process. The project costs could include the following:

In most cases for project control and monitoring purposes, the cost estimate is converted into a project budget and used as a guide for management. The expenses that occur as the project progresses are then recorded in specific job cost accounts and compared to the original cost estimate in each category. As we've indicated, a good signal of possible problems would be the occurrence of overruns against a budget.
Explore
Watch: Good building site management by the Auckland Council (3:40 minutes)
This is a quick informative guide on how to manage your building site to prevent mud, concrete, water, and sediment from being swept off-site by rain.

Costing out the details of the build
Start by compiling these costs:
- Production costs
- Labour costs
- Physical resources costs
Production costs
To plan, you'll need to consolidate information. This phase of planning is when you'll need to take all the project data on the costs and compile them into one place.
Like most of the procedures, this process will vary between organisations. It's important to access and review your organisation's procedures for compiling project costs.
Most organisations use digitally-based applications to make compiling costs more manageable and more precise. Before specifying the unit costs needed, these applications require pre-programming to include the materials, consumables, and off-site production costs associated with them. Reviewing and compiling these costs is essential before producing any estimated costs.
These collective practices will help you keep track of what costs have already been reviewed and compiled and will lessen the possibility of you missing an item:
- Check against the design requirements: When reviewing these costs, you should ensure that all details are correct, such as the quantity of the materials and consumables and their specifications.
- Check service fees and costs: Ensure you are including materials transportation costs such as delivery charges of certain building elements produced off-site.
- Learn and use appropriate software: Using digital applications to maintain records will help you streamline this process by keeping all relevant documents in a single, convenient space.
- Monitor and update apps frequently: To improve your project efficiency, try to make sure to enter new costs into your organisation's software often, as things change and you can review these and manage costs accordingly.
Labour Costs
Another cost to compile is about putting the team together — labour costs.
Labour costs should include:
- the contractor's and subcontractors' project rates
- the employees' work rates
- the employees' entitlements, such as annual and sick leave.
This process will vary between organisations, so you must access your organisation's procedures for compiling project costs.
Review the appropriate work rates, project rates, and entitlements specified in your organisation's policy for hiring labour and input the data in the appropriate fields of whatever software your organisation uses to compile costs.
Physical resources costs
The final costs to compile are the physical resources costs, including the operational and transportation costs associated with each physical resource. Again, access and review your organisation's procedures for compiling project costs.
Always review the itemised list of physical resources and their associated costs that the project would have already made previously. Make sure all of these costs associated with the operation of the physical application have in fact been accounted for.
Input this data in the appropriate fields of whatever software your organisation uses to compile costs.
Overheads and margins

This photo shows a group of workers in an office collaborating at a table. That the shot is taken from overhead is a bit of a visual pun. See if you get the joke after reading the next section.
The materials, consumables, labour, and physical resources are not the only costs considered when producing the project's estimated cost. Next, you'll need to take into account how much the business spends to run the business, and these costs are usually not specific to any one build.
These are referred to as overhead costs and they generally include:
- rent for their office
- utilities
- supplies
- time spent during take-offs
- anything that cannot be directly contributed to a project expense.
Organisations typically want to recover some of that expense by charging a margin to make up for these costs. They often apply a set markup percentage to their quoted prices called the overhead recovery rate to achieve this margin.

The overhead margin is the percentage difference between the direct costs (i.e. material, labour, physical resources) and the total project cost that an organisation wants to meet to make up for its overhead costs and is usually expressed as a percentage.
Suppose your organisation makes use of digital software to produce project costs. In that case, the organisational overhead margin can be automatically applied to the resulting estimated project cost once the direct costs have been inputted.
Again, it is crucial to confirm the rates with your organisation and check whether they have already been applied to the produced estimated cost.
Reflect for a moment on what would be a likely outcome if you didn't consider the overhead costs when compiling all of the costs for a job. Do you think it would matter much?
Without applying these rates, you might be producing an estimated project cost that results in a loss instead of a profit for your organisation!
Example Scenario
John's organisation applies an overhead margin of 5% to all building costs in a construction project to cover their overhead costs.
John applies this to all previously identified costs.
If the labour cost of laying the foundation for building ABC is $23,228.52, to cover the overhead cost, what would John increase the cost to for his project cost estimate?
The cost is increased by 5% to $24,389.95.
23,228.52 + 1,161.426 = 24,389.95
Produce estimated project costs
The estimated project cost is the sum of all the estimated costs of the resources needed to complete the building project with allowance to account for price fluctuations and the overhead margin. This document will include all the specifically identified materials, construction methods, human and physical resources needed for the construction project, and the associated costs for each item required.
Now that the costs, both direct and overhead, necessary for the building project have been compiled, it is time to produce the estimated project cost for the tender or bill.
Tender: In building and construction, the tender is a document containing an organisation's offer to supply construction services to a client who has invited them to make the offer.
Project costs may also be produced by getting the sum of all the unit costs of the project. Unit costs refer to the cost of each activity in a building project. Calculating for unit cost involves getting the sum of the material, labour, and physical resources costs of a building activity and dividing the sum by the length, depth, area, or other forms of measurement covered by the activity.
Examples of unit costs and how to calculate them
Click on the plus (+) icons to learn how to calculate unit costs.
Although the procedure for calculating the estimated cost of a construction project will vary between organisations, it is common for organisations to use a software program to make the calculations for this.
Further Reading
You'll need to be familiar with the process and importance of tendering for subcontractor operations. Read this article, Tenders and Quotes at building.govt.nz, to ensure you have a clear understanding.
The estimated project cost included in a tender or bill is essentially your organisation's bid for a project. If it is too low, the client may have questions about the quality of service they will receive from your organisation. If it is too high, they may decline the bid. The estimated project cost must be enough to cover all the project's expenses, variations due to price fluctuations, and profit.
Putting it into context
Read the following Case Study and analyse the data tables so you have a clear picture of how to estimate the cost of a construction project.
Case Study - Foundations
The year is 2016, and John works for AtoZ Construction. He needs to know how much the laying of a mat foundation per metre is for the construction of building ABC. To get this unit cost, he first identifies the material cost associated with laying the foundation for the details of building ABC and inputs this data into the cost-estimating program used by his company:
| Material | Measurement | Cost per qty | Quantity | Total Cost |
|---|---|---|---|---|
| Concrete mix | N/A | $20/kilogram | 80 kg | $1,600.00 |
| Waterproof plastic sheet | 10m x 5m | $385.60/sheet | 3 sheets | $1,156.80 |
| Flat hot-rolled structural steel | 12m, 150 x 75 x 150mm | $25.70/piece | 45 pcs | $1,156.50 |
| Total Material Cost for Laying the Foundation of Building ABC | $3,913.30 | |||
Next, he identifies the labour costs associated with laying the foundation of building ABC. Eight workers will be laying the building's foundation, with one of the workers acting as supervisor. Supervisors have an hourly rate of $32.60 while the rest of the construction workers have an hourly rate of $15.40. The expected time to finish laying the foundation is 107.8 hours or 14 days, daily on-costs of $45.60 and $63.70 for the construction workers and supervisor respectively, and daily worker insurance costs of $24.40 for all the workers.
He inputs all of this data into the software:
| Construction Worker | Supervisor | Total Cost | |
|---|---|---|---|
| Total Hourly Rate × Estimated Total Labour Hours | $11,620.84 | $3,514.28 | $15,135.12 |
| On-costs × 14 days) × No. of workers | $4,468.80 | $891.80 | $5,360.60 |
| (Worker Insurance Cost × 14 days) × No. of workers | $2,391.20 | $341.60 | $2,732.80 |
| Total Labour Cost for Laying the Foundation of Building ABC | $23,228.52 | ||
Next, John identifies the physical resources costs associated with laying the foundation of building ABC. He inputs the physical resources required for laying the foundation of building ABC, together with their associated costs, into the cost-estimating program used by his organisation:
| Physical Resource | Timeframe of use | Cost to use per day | Total Cost | |
|---|---|---|---|---|
| Description | Cost | |||
| Excavator | Three days | Hiring Price | $158.70 | $476.10 |
| Fuel | $42.60 | $127.80 | ||
| Maintenance | $18.00 | $54.00 | ||
| Operator's wage | $84.20 | $252.60 | ||
| Total cost of Excavator | $910.50 | |||
| 4x Handheld cutting saws | Four days | Electric Consumption | $98.00 | $98.00 |
| Total Physical Resource Cost for Laying the Foundation of Building ABC | $1,008.50 | |||
Finally, John inputs the depth of the mat foundation of building ABC, which is 4.5 metres, into the cost estimating program. The program calculates the cost to lay the foundation of building ABC per metre using the formula below:
1)
| = | Sum of Material, Labour, and Physical Resource Cost of Laying the Foundation |
| Depth of Mat Foundation in Metres |
2)
| = | $3,913.30 + $23,228.52 + $1,008.50 |
| 4.5 metres |
3)
| = | $28,150.32 |
| 4.5 metres |
4)
| = | $6,255.62667/metre (expressed as $6,255.63 metres) |
John's software indicates that the cost of laying the foundation of building ABC per metre is: $6,255.63
John has now produced the estimated cost for his construction project. However, as a seasoned pro, he knows that there are several risks associated with the long process of estimation. He knows he needs to double-check everything against his organisation's most recent procedures for estimating project costs.
Hopefully, you followed John's process, and the final projected cost made sense. You may have noticed that just when you thought you were done, you learned you had to go back and double-check your procedures and policies against the organisation and, ideally, the design details as well! That's good practice.
Your organisation's policies and procedures are likely based on historical data from previous projects. These historical data enable the organisation's estimators to make better estimates as they are based on objective facts, which can change over time, so it's important you are working with the most recent policies and procedures.
Materials and Plant Requirements
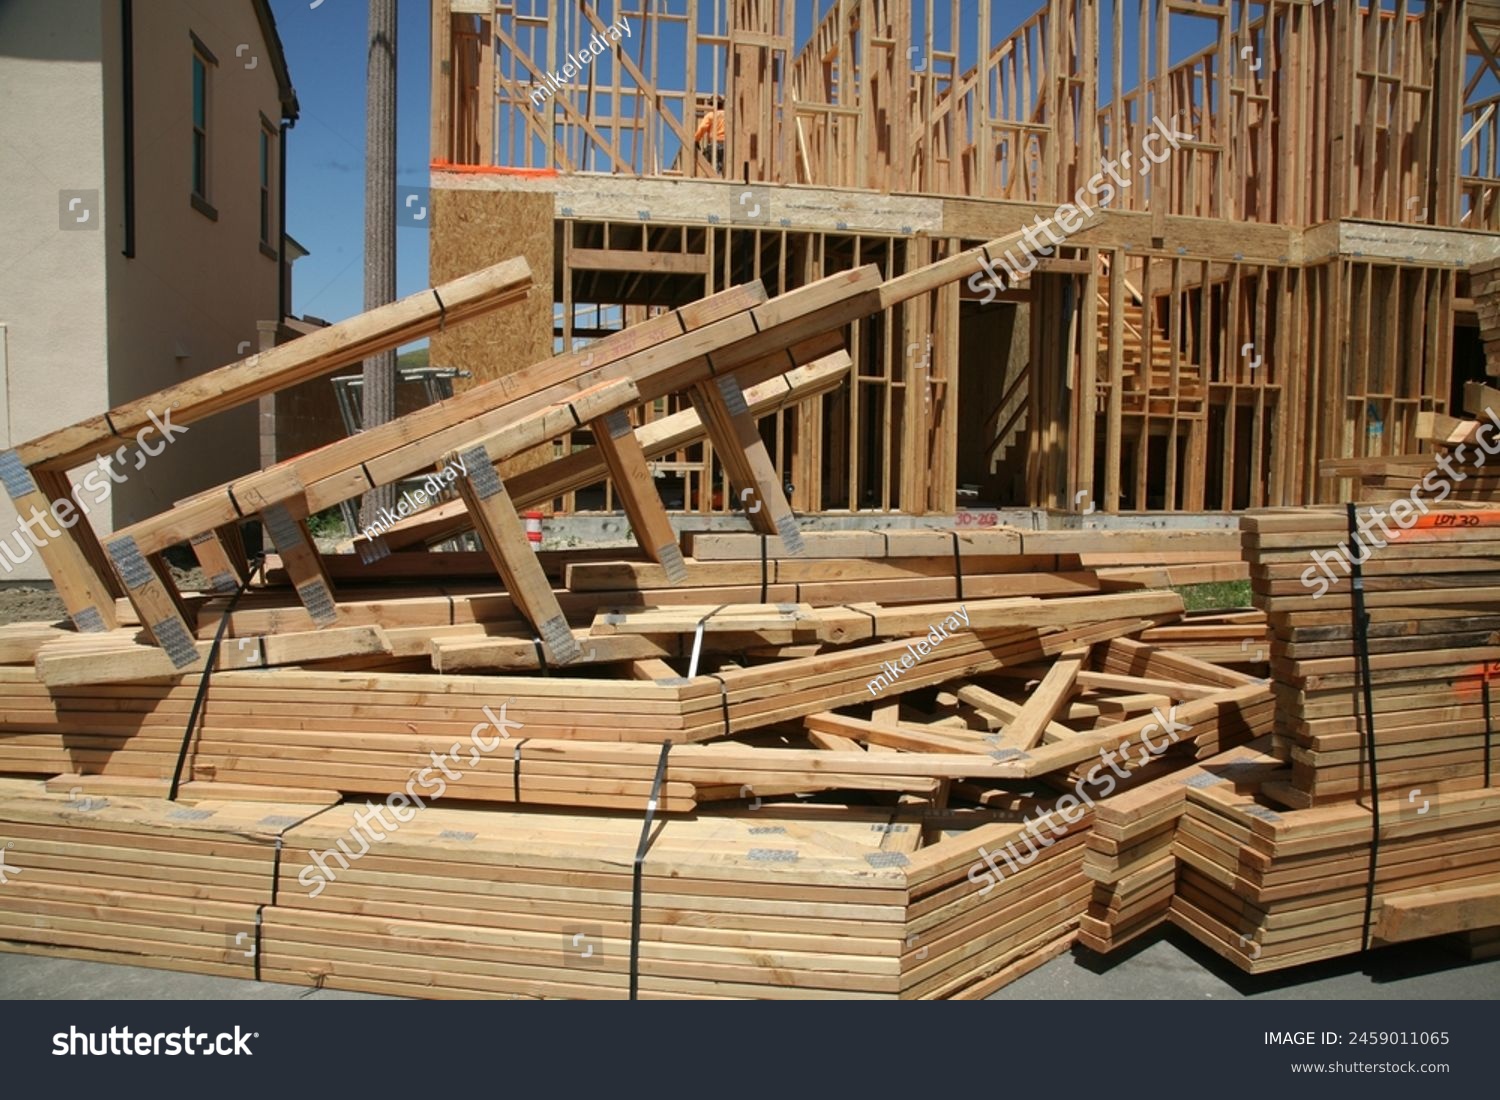
Throughout your building project, you will need to order the materials necessary for the building to proceed. It is important that the quantity of materials is accurate and the delivery is timely.
Too many materials on site too soon can be a waste of money. They can also take up valuable space on the site and become weather-damaged or even be stolen. Too few materials can lead to delays in building work while waiting for additional deliveries. You'll need the correct equipment to work with the materials at the right time in the project as well. The planning phase is important to ensure these events are coordinated.
| Organise materials and plant needs | Careful planning of materials used in a building project means less waste and therefore cost savings. Careful choice of plant and equipment is also important, as equipment failure or other results of poor choices result in delays and lower productivity. Good organisation of materials and equipment requires planning the timing for calling orders and deliveries. |
|---|---|
| Prepare materials list | To organise the materials for a building project you first need to know what materials are required. Sometimes a list of materials is available from the estimator/scheduler. If not, you need to start by looking at the contract documentation to see what is needed. Once you have a list of materials you then need to decide where you will source the materials. |
| Sourcing materials | You need to decide where to purchase the materials. You may choose a local supplier such as a timber yard or the usual supplier for your company. Sometimes a wholesaler will be able to meet your requirements. Quotes can be called from your company's usual suppliers. |
| Checking materials availability | To check materials availability, phone around to find out who has good supplies. If enquiries are being made through suppliers other than the usual ones, alternative sources of information are the internet, timber industry sources or other known suppliers. |
| Obtaining quotes from suppliers | The next stage is the calling of quotes from these suppliers so you can find the supplier with the most economical price and service. |
| Purchasing Processes | It is advisable to place orders as early as you can for a specified delivery date. This can be several weeks in advance as you often wish to check for the availability of a certain material at the same time. |
| Site deliveries | It is important that deliveries are brought onto the site just in time, neither too early nor too late. Always provide a delivery date when an order is placed. You should generally allow three days from the date of call-up to the date of delivery. A call-up is the placing of an order or confirmation of an order for materials or labour. |
Invoices
Apart from payment claims and payment schedules, parties engaged in the building work also issue invoices to document transactions. Unpaid invoices can harm builders and subcontractors, but the Construction Contracts Act 2002 can help expedite payment.
Designing Buildings UK defines an invoice as:
A document issued by a vendor to a purchaser, setting out the products or services that they have purchased (or have agreed to purchase) and the payable amount. Invoices can be sent before or after the delivery of products or services, and typically include a payment due date. An invoice can also be sent after a purchase order has been agreed.
Further Reading
Read this article, Show Me the Money: Seven Things to Remember When Preparing a Payment Claim to read about seven key points to consider when sending invoices to ensure prompt payment.
In summary, while it likely isn't one of your primary responsibilities, it's still good to know that to issue an invoice, you'll need to consider the following:
- Determine the type of invoice needed. A list of the various types used can be found at Zoho.com.
- Use your organisation’s standard invoice layout.
- Make sure the invoice covers the required information.
- Make sure all details indicated in the invoice are correct and up to date.
- Send the invoice promptly and securely.
- Keep a record of the invoice.
We have covered documentation and consent extensively in Construction Planning - Knowledge and Compliance - Knowledge, so the content here is a refresher. If you are struggling, you may want to go back and look at the original content again.
Remind yourself of these essential terms around Working Drawings with this three-question quiz.
Within these documents are the Design Drawings, which have to be presented precisely and clearly so that anyone with knowledge of construction can understand them, which have to be presented precisely and clearly, so that anyone with knowledge of construction can understand it.
They need to show:
- the building's shape, size and position on a site,
- the composition of the materials used,
- how the building will be constructed or put together
- the bulk of the project's location to obtain resource planning consent, which is always required before or alongside a building consent application.
Building Consents
As this is more review, let’s do it with some activities.
See if you remember which types of building work don't need consent, then check your answer against ours.
- Minor building repair: Small-scale repair work that doesn't impact the structure's integrity, like fixing minor leaks or repairing non-structural elements.
- Temporary structure construction: Building temporary structures for events or short-term use that don't affect the environment or existing buildings.
- Replacement of fixtures and fittings: Swapping out fixtures and fittings, such as replacing kitchen cabinets or light fixtures, without altering the building structure.
- Garden and fencing work: Basic landscaping, putting up fences, or erecting small garden sheds, provided they meet specific size and height criteria.
- Certain plumbing and electrical work: Limited plumbing and electrical tasks within specific criteria, like replacing taps or installing light switches, that don't compromise safety or compliance standards.
Generally, the square metre limit for a building to be exempted from requiring building consent is around 30 square metres. However, the threshold may vary depending on regions and local council regulations.
The Building Act states that the owner is responsible for the application for consent.
However, owners can delegate the responsibility to the architect, designer or builder to obtain all the appropriate consents required for the project before any work begins. It is common practice that the main contractor include a service under their contract with the owner to inform the BCA, as the owner's agent, of when these stages are reached and when all work has been completed.
Consent can take time to organise, and needs to be included in the project schedule. Here is another look at this graphic from earlier in the course. Review the original content in Construction Planning - Knowledge, Documentations Required for Construction, Key Documentations if you need to brush up on the terms and meaning of each step in the process. You may want to do the activities there as well.

For this activity, you'll need to answer Yes or No as to whether these documents are required for a consent application on a commercial project build.
Note, while the The Project Information Memorandum (PIM) is not mentioned as a necessary document, it is a critical document offering key details about a potential construction project.
Once your building consent has been issued, by the Building Consent Authority (BCA), the construction work has the green light to proceed.
As a Construction Site Supervisor, one of your main objectives is to obtain the Code Compliance Certificate at the end of your build. This is what you and your team are aiming to achieve at the end of a long construction journey.
Resource Consent
Environment.govt.nz | Resource ConsentA resource consent is permission from the local council for an activity that might affect the environment, and that isn’t allowed ‘as of right’ in the district or regional plan.
Types of resource consent applications:
- Publicly notified
- Limited notified
- Non-notified
Download and save this resource, Everyday Guide to the Resource Management Act (PDF) for more information about resource consents.
As a reminder, the Ministry of Housing and Development, together with the Ministry of Environment, has started some reforms that are affecting the Resource Management Act 1991 with the introduction of three new Acts:
- Natural and Built Environments Act – the main replacement for the RMA, it will protect and restore the environment while making development easier.
- Strategic Planning Act – provides a strategic and long-term approach to how we plan for using land and the coastal marine area.
- Climate Change Adaptation Act – will address issues associated with managed retreat.
With the October 2023 election results, the newly elected National government are implementing changes pertaining to these new legislations in phases.
In order to navigate your responsibilities around resource consent, it will help you to have a clear understanding of the considerations impacting a need for resource consent. Use the following activity to help consolidate your learning by thinking about the details of each consideration before turning the card to review our information and example.
This four questions quiz provides more opportunities to test your knowledge of terms before the assessment.

Once the project is green-lit, and the preliminary details and designs have been determined, the project site must be set up for safe and effective construction work.
Temporary Services
Temporary services and site accommodation requirements need to be determined as part of the plant and equipment requirements. Generally, these factors have been built into the quote, however, a site supervisor must be aware of these points in the planning process.
Councils and health and safety requirements make it a condition of the building contract for the following temporary services to be supplied from the start of the building process.
These include the following:
- Temporary electrical pole or power box built into its permanent position. If a slab is being poured on the ground, the power is brought on-site and the power board is put into its permanent place. Sometimes the location of the existing service will determine this. The setback distance and overhead or underground supply need to be considered.
- Chemical toilet, which, in certain circumstances, needs to be permanently plumbed
- Waste management
- Temporary fencing around the site so that the public does not have access
- Water tapping to supply water to the site. This may be a short tapping (on the same side of the street) or a long tapping which requires piping under the road (if the supply is on the other side of the street)
- Seepage barriers (in some cases) across the front of the site to stop water and soil from running onto the footpath
- 'Tiger stripes' if work is to take place close to overhead powerlines
- Barricade to meet the local municipal by-laws. If the site cut is over one metre, a barricade is erected to prevent public access. If the site cut is less than one metre, a temporary fence is erected.
The Office
A job site office is essential for most commercial building projects. The jobsite office is the superintendent’s headquarters, even when the superintendent is in the midst of construction activities for most of the day.
Depending on the project, the job site office ranges from a clipboard in a pickup truck to multi-storey office facilities, depending upon the scope of the project. If there is a physical office, it will typically house the builder's telephone and or computer system.
Details of the job site office are often documented in the General Requirements of your project documents.
This place of business is where various stakeholders enter the job site to contact the appropriate management personnel.
These people may be:
- visitors
- salespeople
- architects
- owner's representatives
- subcontractors
- direct labour.
Documents
The office is also for keeping a complete and updated set of documents.
These include:
- addenda and changes: which must be kept at the job site for reference by architects, owner's representatives, building inspectors, subcontractors, and the builder's personnel.
- drawings: showing the actual (current, updated) dimensions and locations of the project as constructed
- employee information: such as safety posters, posters informing employees of their rights and obligations, and company policy statements, should be posted on a bulletin board.
- first aid information and equipment: must be readily available, including emergency phone numbers and first aid kits, with major first aid equipment stored in this job site office.
Security

The jobsite office must be lockable and secure off-hours, as it contains valuable equipment making it a frequent target for burglaries, prompting many project managers to install security systems.
Labour Requirements
During the inital project planning phase, you will need to have worked out the project's on-site labour needs, whether it's covered by workers you have or by subcontracting labour.
You need to successfully schedule and distribute human capital. We'll cover more about scheduling in the following section.
Subcontractors
We advise that all interaction is done in writing while using subcontractors, so there is documentation of decisions and agreements along with a formal contract. The subcontractors need to fit in with the project schedule, which would have been one of the criteria for their hiring.
It is necessary to have a written plan when using company workers so that this labour is available when needed for the project.
If there are several projects in the organisation and the work is to be divided amongst these projects, then those directing the allocation of work must be mindful of the time necessary for this work to be carried out on certain projects.
For this to be done, there must be clear coordination within the organisation, and those who are allocating workers must have a written copy of the project schedule and on-site labour specifications.
Construction worker employee

The construction workers are the most significant component of labour in buildings. They are also known as the builder's labourer. Construction workers aid with a variety of manual labour work on building and construction sites.
To perform a variety of Restricted Building Work (RBW) on your project you would need to consider specialised positions, such as:
- brick/masonry veneer workers
- concrete or timber pile foundation workers
- scaffolders or steel fixers
- skilled construction workers who may obtain licensing under the government's Licensed Building Practitioners scheme.
These license classes represent broad types of work that a person is competent and licensed to undertake on-site.
Further Reading
More information on Licensed Building Practitioners can be researched at the Licensed Building Practioners website.
Preparing for safe handling and storage of materials
Safety measures must be observed in the workplace during actual project building and installation, but also, and more especially, during handling of the materials.
Mishandling the materials does not only mean potential damage to the building products or components themselves but also potential damage to the lives of everyone involved in the site project.
Limitations on the effect of materials
Once an agreement has been made with your suppliers, mainly through the purchase, the next step is for the arrival of materials on site. With this, it is best to take into account how the materials and components will be transported to the project site.
Although transportation of materials is a key step in the acquisition of the necessary materials, it has its limitations and negative effects on the project. Therefore, it is best that you determine these limitations and effects during the planning phase so that you can develop actions necessary to limit the damage they can cause.
Limitations
Limitations of transportation are circumstances that restrain the time or quantity of materials being delivered to your project. Below are some factors that can limit or restrict the transportation of materials.
- Traffic Conditions: Most likely, the transport of materials will be through roads and highways going to the construction site. Although there are instances where air or water transport is viable, it is through the most economical land transport. The downside is that it is subjected to various road and traffic conditions that can delay delivery.
- Weather Conditions: Weather can also slow down the transport of materials. Inclement weather such as heavy rain and snow and heat waves can slow down or even halt material delivery as it can be unsafe to travel with heavy materials in those conditions.
- Quantity: There is only so much that you can procure in one delivery as there is only a limit to the number of materials the supplier can deliver. This can be due to several factors, like the size of the material itself and the weight and height limit of the transport vehicle.
- Costs: Economic changes for the materials itself, fuel price, maintenance of transport vehicles and other relevant factors can influence the total cost of delivery. Another limitation is that construction projects operate only with a limited and predetermined budget.
These limitations can affect the materials and components being delivered in the following ways:
- Decay or damage: Rough weather and traffic conditions can result in the presence of degradation and damage to materials. For instance, bumpy roads can cause deformation of some materials (e.g. sheet materials) which can render them unusable when delivered.
- Poor quality: Even though decay or damage did not occur in the materials delivered, they may exhibit poor qualities as time passes. For example, due to humidity during transport, timber can expand from its normal size. This can compromise the structural use of the timber as it can shrink down if it is exposed to a less humid condition.
- Loss: Suppliers may lose the materials they were delivering when unfortunate events such as theft or accidents occur. Although the supplier may provide a new set of materials in these cases, there is also a loss of time when the materials should have been on site already.
- Unavailability: Granted, loss of materials happens rarely. What happens more often is that when materials delivery gets delayed, they may become unavailable when they are already needed on site. Sometimes, due to damage or decay in materials, there are not enough materials to use to carry out construction work.
All of these can contribute to delays during the construction project. Without the materials, or if the materials present do not comply with quality standards, workers cannot perform construction work, putting the project to a standstill. These can cause financial damage to the project as additional time means additional costs, such as compensation for workers, utilities and equipment hire. Safety can also be compromised since workers would have extended time exposed to hazards, increasing the risk of harm. Contractual obligations may also not be met, specifically project schedules and deadlines. Therefore, it is important to take action to be able to minimise the damage to the project.
On-site storage space

You need to provide enough storage space for the various materials kept on site. Since there are times that materials not yet needed arrive on-site, allocation of on-site storage space for building materials must be planned properly and beforehand.
In allocating storage space for materials in the construction site, you should consider the following to provide the adequate necessary space:
- Physical characteristics: You should consider the dimensions, shape, and weight of the materials in providing space for them. You do not want to make the simple error of materials not fitting into the allotted storage space, as this may compromise:
- safety (when materials are exposed to workers)
- quality (materials are not stored properly)
- costs (damages to materials render them defective).
- Location and access: You should also take the location of the storage space into account. Ask yourself: does the location give enough room for materials in a way that they are easily accessible by workers and equipment when needed? Usually, storage areas are either near the delivery area and the work area or another area that workers have easy access to. Since assorted materials are used in construction, there are instances that there may be additional storage areas that are near the relevant work areas.
- Safety: You should also take into consideration the safety of workers when allocating storage space for materials. As mentioned, inadequate storage space may result in certain materials inadvertently being exposed to the site and its workers. In turn, this brings a hazard with the risk of harm. For example, steel rods sticking out of their storage areas can bring the risk of physical injury (e.g. being hit or stabbed by the rod).
- Align timing to the Project Plan: You should also consult project plans, specifically the resource or materials schedule, wherein the tasks are assigned with the estimated materials and their time of delivery and arrival on-site. With this, you can approximate the adequate size of space since you can predict the total amount of materials arriving at the site.
Space is limited on a project building site, and space is important for the other, usually more productive, areas of the site so allocating large areas for storage without careful timing to mitigate storage needs isn't best practice. Using that space just for material storage can hinder productivity and compromise safety. Therefore, you need to allocate just enough storage space so that materials have room to be kept while they are on standby at the site.
Some of the most important storage planning issues that must be considered in your worksite include the following:
- Stability: Properly secure all materials stored in tiers stacked, blocked, interlocked and limited in height. Heavy materials, such as pipes, steel beams, poles, etc., can tilt or slide if not stacked or blocked appropriately.
- Fire protection: Keep flammable and combustible materials in fire-resistant containers.
- Floor weight limit: Determine and publish in visible and prominent areas the maximum safe load limits of floors where materials are stored. Make sure to not exceed those limits.
- Floor layout: Maintain clear passageways and aisles when moving materials.
- Foot traffic: Construct ramps or walkways between work areas on different levels to minimise the occurrences of accidents and spills.
Storing materials safely
Apart from allocating space for materials, you should also protect and secure the materials to make sure the risk of damage and theft does not occur. There are many considerations in storing various building materials, depending on the different environments you work in. Therefore, you should ensure that security and protection are provided appropriately.
The below table shows some common building materials and ways to protect and secure them on your site.
| Blocks | Blocks must be delivered to the site of construction, either loose or strapped in timber pallets. They should be covered by a protective sheet while staked in columns, with a recommended maximum height of eight courses. |
|---|---|
| Bricks | Given the nature of bricks, they are to be transported from the storage space using a forklift as they are heavy and taxing to manually move. Bricks must be stored on level, dry ground and covered with a protective sheet to prevent the risk of degradation from moisture and other weather elements. |
| Cement | Make sure that the storage area for cement is dry as water and air moisture may let the cement set. Cement bags may be stacked together onto a timber pallet and should be covered. If bagged cement comes in larger numbers, it would be best to have its own storage space that is watertight and fire-resistant. |
| Corrugated and similar sheet materials | These building materials must be stored flat on a level, dry surface, and covered with a protective polythene sheet to ensure protection from corrosion and damage. They should not be deformed when stored to ensure that there is no compromise in the quality and form. |
| Drainage pipes | Just like bricks, drainage pipes can be delivered loose or in plastic-wrapped packs. These should be stacked horizontally with their ends reversed in alternating rows. |
| Roofing tiles | Much like blocks and bricks, roofing tiles must be delivered either loose or in unit loads on timber pallets. These materials must be stacked vertically with a maximum of six tiles in height. All tiles at the end of every row should be laid flat. |
| Timber and wood | Usually, wood and timber should be stored and covered in a scaffold rack. Take note that timber of the same dimensions should be grouped together and separated from timber of other sizes. |
Providing safe storage will ensure the protection of the materials from damage and defects. As discussed previously safety also means the safety of the workers from hazards brought about by materials incorrectly stored or transported.
Material Handling Equipment

As a supervisor, you should make sure that the transportation of hazardous materials does not cause harm to the workers. The storage and handling of the received materials require the use of manual and mechanical handling equipment.
Material handling is defined as the carrying, moving, or lifting of materials, components, products or any other article used in a building. It can be done either manually or with the help of a mechanical plant.
Because manual material handling poses health and safety risks such as musculoskeletal disorders and the risk of slips or falls, it may sometimes be necessary to use equipment to move or carry the materials.
The equipment used in mechanical material handling comes in three common types, based on how they function.
- Transportation Equipment: These handling equipment are responsible for horizontal transportation or movement of building materials. Industrial trucks and other similar vehicles belong to this classification.
- Lifting and Lowering Equipment: equipment aiding in the vertical movement of materials. Essentially, when something needs to be lifted to a certain level.
- Combination of Transport and Lifting: A conveyor is the most common equipment that can be used to transport materials horizontally and lift materials from a vertical distance.
Activity: Is your site set up?
This drag-and-drop activity ensures you know the essential requirements of a project site setup. When you are done, you may find one fairly obvious amenity missing. See if you can guess what it is after you complete the activity.
Can you think of an important amenity that's missing from a large commercial build project site?
Toilets! Chemical toilets ensure no one has to go too far when they need to go.