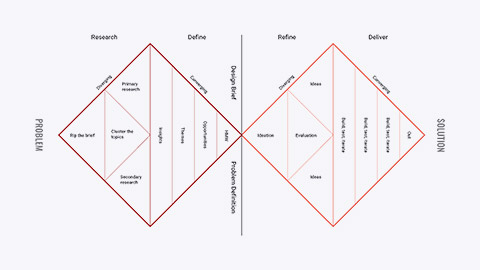
While everyone may approach a client brief differently, understanding the standard process will help you work through your very first design project. let's take a look at how it works.
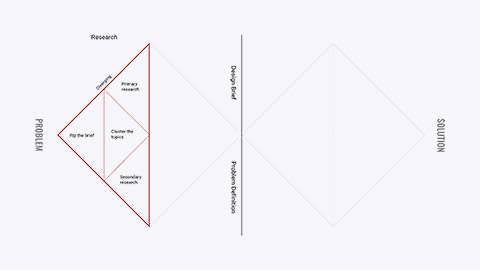
For a successful outcome, you need to begin any project by conducting the necessary research, which are:
- the client’s requirements
- the target audience
- a competitor analysis
- project constraints
When deadlines are tight, you might be tempted to race through—or completely skip—the research stage of a project. Doing so will leave you without the context needed for informed decision-making throughout the life of the project. This can result in sub-standard work and is often the cause of designers "Missing the brief".
Research sometimes reveals unexpected results. For example, your research may show the problem that needs to be solved is not the original problem that the client identified. You may even have to carry out additional research to justify why your time would be better spent solving the problem that was overlooked by the client. This has the added benefit of demonstrating to the client that you are committed to and engaged in the project.
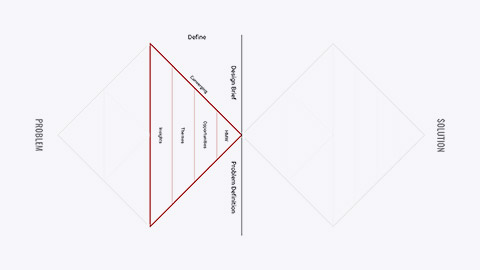
Once you've completed the research stage and successfully identified the problem, you can focus on defining an appropriate solution. This is often the stage that the designer finds most rewarding—conceptualising and developing their ideas into feasible outcomes.
Sometimes a large brief can be intimidating. When this is the case, think about dividing the brief into a series of smaller, more manageable tasks. This is a great way to make seemingly insurmountable problems less daunting. Don't bite off more than you can chew—take it one bite at a time.
Visual concepts
As designers, we often think visually. It's a good idea to develop visual concepts that reflect the objectives and outline of the brief. Collect reference imagery relating to the aims of the project—Pinterest is a great resource for this. You might also consider using mood boards to help reflect your ideas.
The ideation stage can move quickly. If this happens, refer back to the initial brief to ensure you're ideas appropriately align with its direction.
Presenting ideas
Using your professional judgement as a creative, you should begin filtering your various ideas and designs, retaining the strongest relevant material. Limiting your presentation to no more than three ideas provides the client with options, but not so many that they become overwhelmed.
Present your work to the client in their preferred method of communication. Explain how each design successfully solves the problem that you set out to, then provide an opportunity for the client to provide feedback.
Getting feedback
Receiving feedback quickly allows you to keep the momentum and iterate over the project efficiently. It's always a good idea to confirm the date and time of your next meeting, during any feedback session.
Make sure you always have a copy of client feedback in writing. If you're fortunate enough to receive feedback face-to-face, send a follow-up email outlining the feedback you've received and request their confirmation.
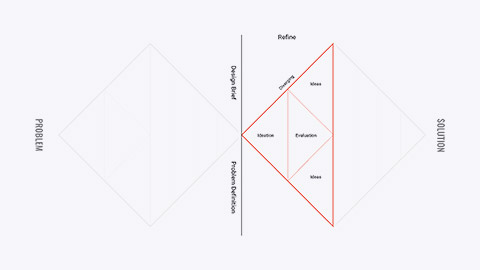
Imagine the client’s feedback has just arrived in your inbox. It's now time to refine your original designs, action any change requests from the client and amend human error you might pick up on with a fresh perspective. This process will firm up your solution as the final version begins to take shape.
One thing that can assist in refining your design is testing. Having a test audience trial with what you've designed can provide valuable feedback during the refining stage. At times, your test audience may even catch something you've overlooked (or notice a spelling mistake that you hadn't seen).
The video below provides great reminders to check before sending any design to clients. When viewing the video, document the tips that were provided. Revisit this list during module three and four.
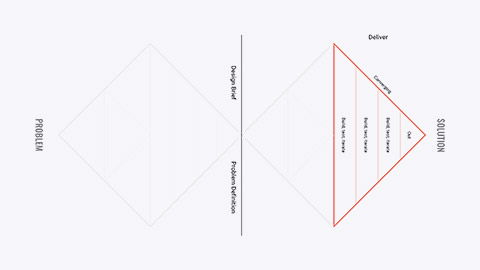
No matter how confident you are with your design, you'll need to sell your solution to the client during the delivery stage. Doing this face-to-face is advantageous as you'll be in a position to read the room and better understand your client's responses to the solution you are putting forward. However, keep in mind you'll still want a written copy of the feedback for your records, should you need to refer back to them in the future.
Successful presentations are well-planned and practiced (80% planning and 20% practice is an appropriate ratio for an effective slide deck). There are plenty of resources to help you assemble a great presentation, but the most important thing is being comfortable with the concepts and content that you're communicating, so that every pause, every reaction, is natural.
The client may be happy with your presentation and be prepared to sign off on the work that you've presented. This may not be the case and you may have to defend your design decisions and reiterate how your solution solves the problem. If the client is still unhappy, then be prepared to take on board more feedback and revisit the refining stage.
The key to great ideas is not having them, it is executing them. And great ideas come from problems. As designers we call problems, briefs and we call reactions to problems, concepts. – Kate Moross
!!-781-LMS
WARNING
This material has been reproduced and communicated to you by or on behalf of UP Education in accordance with section 113P of the Copyright Act 1968 ( the Act ).
The material in this communication may be subject to copyright under the Act. Any further reproduction or communication of this material by you may be the subject of copyright protection under the Act.
Do not remove this notice.

