When you consider working with animals, you must be prepared for the possibility of injury. But what do you think is one of the most common causes of injury to animal handlers?
The answer is poor handling technique. As with any of the animals discussed, always consider the need for handling before starting and select a method of restraint appropriate for the animal.
Before you approach an animal, you should be observing its demeanour. This means you will need to observe the nature of the animal; for example, if you are handling a dog, does the dog bear teeth, or is it snarling or growling? It is not likely you will approach the dog and try to handle it if their teeth are baring and they are barking aggressively at you. Assessing the demeanour of the animal will give you clues as to whether the animal is friendly, excitable, shy, nervous, or anxious and will help you to modify your approach accordingly.
Dogs are easily excited and can be quite boisterous and generally respond positively to humans. Larger dogs can easily knock people over, bump into equipment, and cause damage. Correct handling and restraint are essential to avoiding injury and damage. It is also important to never assume a dog is friendly; always conduct a thorough observation before approaching to avoid being bitten. If you do not feel confident in making this assessment, you should seek assistance from a more experienced colleague or a veterinarian. In the event you have consulted for someone else to help you, ensure you watch the vet (or another person) and the techniques they use to assess the dog; for example, they may talk gently to the dog, crouch down and allow the dog to sniff their hand before they try to handle it.
Preparation
Some vital steps need to be considered when you are preparing to move or handle a dog.

Dog handling or movement steps
- Be organised
- Know your route
- Check the doors
Signs of stress or unusual behaviour include:
Approaching a dog
The techniques for approaching a dog in a kennel environment, follow similar techniques to that of when you are approaching a dog out of a kennel in the initial stages.
Tip
If the dog is presenting signs of over-excitement, walk away from the kennel until the dog is calm. Usually, turning your back to the dog and not showing attention will encourage the dog to calm down. This action may need to be repeated several times, depending on the nature of the dog.
When using a treat, tossing the dog a treat onto the floor before entering the kennel can serve as a distraction and enable you to enter the kennel. This also helps if the dog can be snappy when taking treats from the hand. Ensure that when you are offering a treat as a reward, you do so immediately after the dog has shown that it is calm, even if it is just a few seconds.
Always remember that if you are not sure or you do not feel confident, you should speak to senior staff or the veterinarian. It may also be a good idea for you to observe how experienced members of your team carry out this task to help develop your understanding.
The following video demonstrates the process of using the kennel approach.
Restraint
At any point when you are handling a dog, they will need to be restrained, and the most common form of restraint is the use of a lead, collar and harness. Each of these is generally used in conjunction with one another; however, a leash can be used as both if need be. There is, however, a specific technique to apply the leash to use it as both leash and collar.
Collars and harnesses
There are several types of collars available for dogs; some even have the use for preventing fleas! Regardless of the type of collar chosen for the dog, you need to ensure it is fitted properly. If the collar is too tight, you risk strangulation and the dog not being able to breathe properly, and if it is too loose, you risk it slipping off the dog’s head and the dog having no restraint. In addition to a collar, you can use a harness. A harness slips over the dog’s head and under the armpits, and the leash is attached to the back of the harness. The harness, like the collar, must be fitted correctly to prevent the dog from being uncomfortable. If the harness is too tight, it will rub under the dog’s armpit and may cause a rash, and when it is too loose, it can result in less control when walking the dog.
Checking the collar
The collar should always be snug but not too tight, there is a simple way to check the collar and that is by using the two-finger rule. You can apply this rule by simply slipping your pointer and middle finger between the collar and the dog’s neck. You must regularly check the collar to make sure the fit is always correct.
The following diagram provides you with a labelled description of each part of a dog collar. It is important that when you are using a dog collar, it is neither too tight nor too loose.7

- Adjustable strap
- D-ring
- Strong buckle
- Identification tag holder
This table outlines the indicators of the collar and whether it is too loose or too tight. You should also note that the two-finger rule also applies to a harness. Place your pointer and middle finger between the top of the harness as you would with the collar. 7
| Two-finger descriptions | Indicator |
|---|---|
| Fingers cannot fit between the collar and the dog's neck without force | The collar is too tight |
| Fingers slide easily but are snug between the collar and the neck | The collar is the right fit |
| Fingers slide effortlessly through the collar and the neck with room to spare | The collar is too loose. |
The following video illustrates the various types of collars that can be used for dogs and how best to fit and check them.
Leash
A dog leash can come in various lengths and types, and suitability will depend on what you need for the dog. Typically, you will be using a standard dog leash like the following image.

- D-ring
- Leash length
- Leash handle
The dog leash is one item you should always have on hand when restraining the dog. The length of the leash will help the level of control you have when you need to move the dog from one area to another. The longer the leash the further reign the dog will have, the shorter the lead, the less reign. Often, a shorter leash may be more suitable in animal care settings as you will need maximum control over the dog, especially when you are bypassing other animals when moving them. When moving a dog out of a kennel or housing, you should never attempt to do it without a leash. To ensure you always have accessibility to the leash, you can have it stored outside the front of the kennel for easy use.
If the dog does not have a collar on, you can use the leash to help create both a collar and leash; this is as simple as creating a loop with the leash. Ensure when you have threaded the loop, it is roomy enough to slip over the dog’s head and minimises the risk of the dog biting you if they are known for being on the snappy side.
-
Be organised
When collecting a dog from a cage or run area, it is important to think ahead and be prepared. Ensure you have everything you will need, including:
- lead
- collar
- muzzle
-
Know your route
Once you have the equipment you need, you must know where you are going, that is what route you will take and check that the area is set up and ready to go- winging it and hoping for the best is not a good idea especially if you are handling a dog in an unfamiliar environment with unfamiliar people. You need to consider if you need to pass other animals and make sure they are adequately contained/restrained- remember, not all dogs play nicely with others.
-
Check the doors
Ensure that any doors you are passing through to get to the area you need to have been checked. You will also need to ensure external doors are closed so the dog remains contained if it tries to escape.
-
Safe approach
When you are approaching the dog, always be aware of the dog's body language and overall behaviour and try to approach it in a non-threatening manner. This is best achieved by allowing the dog to come to you whenever possible.

Normal behaviour for a dog includes:
- Wagging tail
- Relaxed or happy/playful
- Digging, chasing, barking and/or chewing.

Unusual behaviour for a dog includes:
- Panting.
- Lip licking.
- Whale eye (showing the whites of the eyes).
- Growling.
- Hiding.
- Be organised, and ensure you have the leash ready to put on the dog before you open the gate. You should always have a treat on hand as a reward and distraction.
- Assess the behaviour of the dog from the outside of the kennel before you enter the space. Do not enter the kennel if you see the dog jumping at the gate or exhibiting aggressive behaviour. Wait for the dog to calm down before you enter.
- Wait for the dog is on all four legs and offer a treat for sitting.
- Gates generally swing both ways- use the latch of the gate as a bolt, ensuring the latch is positioned on the inside of the kennel, and push the gate inwards in case the dog jumps. That way, the latch will prevent the gate from swinging.
- Use your body to help prevent the dog from lunging forward. Ensure you are standing directly in front of the gate with your feet firmly on the ground.
- Enter the kennel, closing the gate behind you.
- Pat the dog rewardingly and place the leash on the dog to prepare to walk it out. Make sure the lead is secure and will not slip off the dog.
- Ensure the dog is calm, either sitting or standing, before you exit the kennel.
- Proceed to exit.5

Cats can take a considerable amount of time to relax in new situations. You must take this into account when dealing with them and allow them some time to adjust to your presence before trying to handle them.
When handling cats, you should consider their well-developed sense of smell, and that they are very sensitive to loud noises and sudden movements. One way of doing this is to try to keep them in an environment that is as familiar as possible and avoid talking too loudly or making large gestures with your hands.
Preparation
You should always be organised before you attempt to move a cat. Cats can very easily become agitated and will often hiss and scratch if they are feeling threatened, especially when they are in unfamiliar territory. Some things to consider when preparing to handle/move a cat include:
- Transport them in their own carry basket with a familiar-smelling object (such as a bed, towel or similar). if needed cover the pet carrier with a towel if that cat is not doing well.
- Use an artificial feline facial pheromone (FFP), such as Feliway:
- FFPs replicate the happy scent that cats produce from the glands on their chin and forehead and use it to mark items that they like. Stroking that cat around its head can help to get this scent on your hands (if the cat will tolerate it).
- Artificial FFPs are currently available as a diffuser (to create a calming scent in the room) and a spray that can be used on the handler's clothing, holding cages and other objects. The FFP spray should be used at least 10 minutes before handling, as it has an alcohol base that must fully evaporate before the scent will be at full effectiveness.
- Before you get the cat out of the cage, ensure you have a clear route. Shut any doors to other rooms/areas, especially those that allow access outside. Restrain other animals, especially dogs (it is preferable to pick a path that avoids them).
Safe approach
Before you handle the cat, you must assess their behaviour. It is not advised you attempt to move a cat if they are showing signs of distress or fear. The following list provides you with some indicators of the general normal behaviour of a cat versus stress or unusual behaviours.

Normal behaviour for a cat includes:
- relaxed
- playful
- purring
- sleeping

Signs of stress or unusual behaviour include:
- hiding
- hissing or growling
- swishing tail
- avoidance.
If the cat is showing signs of distress, you need to as much as possible, give the cat as much time as you can to calm down before attempting to move it. Cats are known for wanting to do things in their own time, they will often take their time or hide before they are ready to be moved or even petted. Remain as calm as you can use a soft voice and approach the cage slowly. When you approach the cage, rather than opening it immediately, gently put a finger through the cage and allow the cat to approach you and sniff your hand while gently talking to it. Ensure you have Feliway close by or on your clothing to encourage a sense of calm. Once the cat is calm, then you can attempt to move the cat.
Restraint
There are some basic techniques you can apply when restraining a cat. However, remember, cats can sometimes become scared easily. You must remain as calm as you can before attempting to restrain the cat.
The following are some examples of how you can restrain the cat if it is required.
Three-fingered grip
The three-fingered grip or hold can be applied when restraining a cat for examination and is an alternative to scruffing. This technique is executed by using the whole hand on and positing three fingers on the top of the cat’s head, you can gently massage or stroke the head of the cat to keep it calm during the examination.
Ring grip
In most cases, cats prefer as minimal restraint as possible. The ring grip can be used to help gently restrain a cat when they are being examined, especially if the examination requires checking of the neck. Place both your hands together so both of your pointer fingers and thumbs join to make a diamond or ring. Stand behind the cat and position your hands over the cat’s head with the ‘ring’ aligning just below the chin. Avoid applying too much pressure as this will scare the cat, and it will become difficult to restrain it.
Towel wraps
In some cases, cats may like to be swaddled or wrapped in a towel. The towel often makes the cat feel secure and comfortable, particularly if the towel has Feliway sprayed on it before wrapping. Before you wrap the cat in a towel, ensure the towel is big enough to fully wrap around the cat. Be mindful, however, if you are using this restraining technique, you are aware that it does not eliminate the risk of the cat scratching or biting, however, it can minimise it.
Several wrapping techniques can be applied however, you have been provided with two of the most common examples of towel wraps
- The burrito wrap where the cat's head and neck are exposed, but the rest of the body is wrapped in the towel
- The scarf wrap, similar to a cape, where the towel is used under the cat’s chest and wrapped behind leaving the front and hind legs exposed.
Cages
Finally, if the cat is displaying signs of distress, it may need to be restrained in a cage. Some cages are specifically designed so the veterinarian can administer an injection through the holes of the cage. If a cat is being moved or transported in a cage, it needs to hold blankets or towels with familiar scents, and Feliway needs to help keep the cat as calm as possible while it is in there.3

Bird handling can be quite tricky because birds stress very easily, and excessive handling and chasing them can cause exhaustion and, in extreme scenarios, death.
Preparation
The most important part of bird handling is in the initial stages and being prepared. Have a smaller cage or a box ready with a secure lid and adequate ventilation. Remove excess cage furniture, as these not only create unnecessary obstacles when trying to catch the bird but also have the potential to injure a panicky bird.
Before you try to catch a bird, make sure the room is secure, just in case they escape, and always have nets on hand.
Safe capture
Birds can interpret your body language, so ensure you stay calm with no sudden movements. Always speak softly to the bird while you are approaching it and when you are handling it. If you are catching a particular bird out of a group, stay focused and try to separate it as quickly as possible. You may have to use a net if the bird is being captured from an aviary. However, if you are capturing a bird from a cage, it is advised you use a towel and avoid a firm grip around the bird because you may crush it. Gently rubbing your hand under the chest of the bird can also encourage the bird to climb onto your pointer finger. When possible, cup your hand around the bird, preferably closer to the neck rather than the chest to avoid obstructing the airways.
Restraint
Restraining the bird is the hardest part of bird handling. When you are attempting to restrain the bird, you will need to consider restraining the parts that can hurt you (talons/beaks) and avoid putting pressure on the bird's chest and abdomen.
Where appropriate, use restraint aids, such as tea towels or small bath towels, to reduce stress and the chance of injury to the bird (and you). The technique you use will vary depending on the bird you are restraining.
If you are transporting a bird, consider whether you can transport it in its current cage. If you can, simply cover the cage with a towel or sheet to provide protection and reduce stress. Do not attempt to move the bird with only your hands or on the shoulder from one area to another; the bird may become distressed at any time, which may result in the bird flying away.

Handling reptiles can be tricky when you are gaining experience. You may be handling animals from snakes to lizards, geckos and so on. It is important to remember that reptiles are not always ‘domesticated’ and have a tendency to show their defence through hissing or striking; some may even secrete scents to warn off a thread.
Preparation
Plastic containers with holes in the lid for ventilation can be used to transport reptiles or contain them for examination; have one of these ready. Wash your hands and/or apply a reptile appropriate hand sanitiser, this reduces the risk of salmonella infection which is a common risk when handling reptiles. Remember, do not handle reptiles, especially snakes, if they are hungry or have just eaten. If the reptile is a pet, you will need to communicate with the owner regarding when the snake last ate.
Safe approach
When you are approaching a reptile, you must always do so carefully and safely. Just like approaching domesticated dogs or cats, you will need to observe the animal's behaviour before attempting to handle it.

Normal behaviour for a reptile includes:
- basking in the sun or under their heat lamp
- hiding in their hide
- eating (although it is best not to handle this during this time).
- moving around / swimming.

Signs of stress or unusual behaviour include:
- hissing
- Loss of appetite (unless brumation is in effect)
- change in skin colour (unless the species/breed is known for this)
- fewer faeces
- lethargy in a normally active animal
Lizard restraint
The main thing to remember when restraining a lizard is to ensure the body and tail are supported in some way; this is achieved by holding around the pectoral girdle (shoulders) and pelvic girdle (hips). This may be done one-handed in a smaller lizard or may require two people in a larger monitor. It can be done by holding over the top of the lizard or from underneath.
Restraining from underneath should be avoided in more wriggly lizards, as their nails can scratch your arms. Members of the skink and gecko families should never be restrained by their tails, as these breeds can detach their tails, especially when a perceived threat is present.
Snake restraint (non-venomous)
Consider using a canvas bag to transport and assist with restraint. Always ensure you are providing support for the body; this can be done by allowing the snake to use you like a tree. Do not drape the snake around your neck/shoulders, as this increases the possibility of dangerous constriction.
If the snake is not accustomed to being handled, you will need to control the head by holding it just behind the base of the skull. Larger snakes will require two or more people, which ensures the safety of the handlers and prevents injury to the snake.
Remember, non-venomous snakes can and will bite, especially if they are hungry. Smaller python breeds will not necessarily hurt you; however, it can be quite difficult to remove the snake from your finger or whatever it has chosen to latch onto. Larger python breeds can cause quite a bit of damage if biting. Use an ethanol-based hand gel/sanitiser before handling, as the snake will not associate your hands with food and will not strike.
Note: Venomous snakes require a very different type of handling and this should only be attempted by trained professionals, ensure you have the correct level of training before attempting this task.
Turtle/ tortoise restraint
Turtles and tortoises are often common pets with people. A turtle or tortoise will disappear into their shell when they feel threatened. These reptiles can be restrained by holding the shell between the front and back legs, thumbs on top, and fingers underneath.

Small mammals refer to rabbits, mice, guinea pigs, rats, and ferrets. One of the most important things to remember when handling these animals is that most of them (except for ferrets) are prey species. This means that you are automatically regarded as a potential predator, and the animals will be very nervous and prepared to take flight.
For this reason, fast or sudden movements and loud noises should be avoided as they will further stress the animals and may cause them to take flight, which could result in them being dropped or falling from a height and injuring themselves if they are not correctly restrained.
Animals that have been kept as family pets may adjust to being handled more readily, but unexpected noises and sudden movements can still elicit this flight response.
Rabbit handling
Take your time, give the rabbit a few moments to adjust to your presence and it may relax and become easier to handle. Stroke their forehead, rabbits create bonds with other rabbits by social grooming, this can be replicated by your stroking it gently.
The correct rabbit handling technique is as follows:
- Never lift the rabbit by its ears or scruff.
- Turn the rabbit around so its bottom is facing the door of the hutch/cage.
- Take the chest in one hand to prevent forward movement, and with the other hand, manoeuvre the hind end towards you.
- Ensure you support the chest with your hand and the torso with your arm. Their spine must be supported.
- Tuck the rabbit's head under your arm, this will cover their eyes reducing their stress level.
- Always return the rabbit to its cage bottom first. If the rabbit is facing forward, it may try to jump out of your restraint and could get injured.
Mice handling
Handling mice requires some speed and accuracy, as mice are very quick and chasing them around the cage trying to catch them can cause unnecessary stress.
One of the most common mistakes people make is trying to pick the mouse up by grasping it around its body. This is very threatening to a mouse as it replicates the sensation of being grabbed by a predator and the mouse will usually respond by wiggling to get away or by biting.
Remove all furniture from the cage, then pick the mouse up by the base of its tail. A mouse's tail can support its entire body weight but should only be held by the proximal third, as holding further down may cause the delicate skin to tear.
Once you have caught the mouse, support its body weight on your hand whilst holding on to its tail. Pet mice may be relatively tame and may sit on your hand quite happily without restraint - remember, mice are quick, and a sudden noise or movement might frighten it, causing it to fall/jump off your hand or run up your sleeve (under your clothing).

Normal behaviour for a mouse includes:
- nesting
- exploring/playing
- foraging for food
- grooming.

Signs of stress or unusual behaviour include:
- ruffled fur
- hunched posture
- hiding away from the group
Rat handling
Rats are very sensitive to their surroundings and will become nervous around people who are not confident with their handling skills. Where time permits, take a few minutes with the rat on your arm to allow it to adjust to your presence.
Picking a rat up is like picking a mouse up, however, a rat's tail cannot support its entire body weight. The rat should always be supported with your other hand.
Remove all furniture from the cage and grasp the tail as close to the base as possible. The skin on a rat's tail is even more likely to be damaged due to the additional strain created by the increased weight. Lift the rat's back legs and slide your free hand underneath the rat's body to support its weight.
Allow the rat to rest along your arm whilst retaining a firm grip on its tail. Many rats will nestle comfortably in the crook of your arm and, as with mice, may not NEED to be physically restrained, although for safety reasons, restraint should be maintained.
Some things to consider when handling rats include:
- Handle them away from their cage. Rats have a well-developed 'homing' instinct and will try to return to their cage if handled within close proximity to it.
- Where possible, handle them on smooth surfaces. Rats have quite delicate nails, and they will catch and tear off readily on clothes and cage bars.
- Be firm but gentle. Rats are surprisingly strong and will pull out of the restraint if they are not held firmly enough.
Guinea pig handling
Guinea pigs are relatively easy to handle; sometimes, the most challenging part is catching them. This usually requires two hands and a speedy approach. Once caught, simply hold gently around the chest area with one hand and support their weight under their bottom with the other. Guinea pigs are very vocal so don't be alarmed if they squeal or chatter, you are probably not hurting them.
Ferret handling
Ferrets can be very wriggly and have a nasty bite. They also have quite long bodies, and care should be taken to ensure their weight is supported and that undue strain on their spine is avoided.
Ferrets may be picked up under the chest and supported by laying their body along your arm. A towel should be used if you lack confidence or suspect the ferret may bite. It is preferable to keep them in a carry basket when possible. If you are not confident or you need extra support, always ask for it, you will learn as you go and the best resource you can learn from is through observing the experienced people in your clinic or facility.

Fish need to be ‘handled’ when the tank is being cleaned or when they are being sold to a customer. Efforts should be made to reduce the stress level for the fish during this time.
Preparation
When you are preparing to handle fish, ensure you are organised and have the relevant resources and equipment with you on hand for the process. The other environment should be set up and ready for use before attempting to capture the fish, if possible, use a portion of the original tank water for this purpose to maintain the same pH levels and temperature.
Safe capture/rehousing
Using a small net, fish can be captured individually and quickly moved to a new environment. When returning them to the tank, float the temporary container or bag in the new tank water for a short period to acclimatise the fish to the new water temperature.

Livestock is animals that are quite large and often roam paddocks or are in stables. Livestock can include cows, horses, goats, or sheep. Livestock may be housed in paddocks; however, it is best to catch the animal in a contained area, so they will need to be herded into a smaller yard or crushed. The owner will more than likely undertake this task before your arrival; however, you may be required to assist.
Cows are likely to be grazing and roaming in a paddock with a herd. They are generally gentle and placid animals, but they are quite large and will be protective of their young. When you are planning on handling cows, you need to ensure you are organised and prepared.
Preparation
Handling livestock such as cows should not be attempted by yourself. These animals can be quite large and powerful and are subsequently dangerous. Ensure there has been proactive communication with owners before arrival. This sort of information will be beneficial when you are packing equipment to take with you for examination. All the items for the examination are set up and ready to use before the animal arrives at the target destination.
Safe approach
When you are attempting to approach the animal or animals, make sure the animal knows you are approaching; never approach from the rear. Animals may be charged to protect their young if they perceive a threat. You need to ensure you observe the animal’s behaviour and consult with the owner before you attempt to approach the animal.
Normal behaviour in livestock includes:
- grazing in groups (herds)
- cud-chewing
- social interactions
- eating well 6
Signs of stress or unusual behaviour include:
- isolated animals (livestock are herd animals; if one animal is isolated, there is a good chance it is unwell).
- panting/open mouth breathing.
- ears back.
Restraint
When restraining cows, you must exercise caution, these animals are large and heavy and when they feel threatened may run or charge towards you. When trying to restrain the animal, consider the following:
- avoid isolating individual animals
- use separate yards for males
- make sure there is enough room for the animal to move
- try to work beyond the kicking range of the animal
- use headrails, cradles and crushes to restrain animals when necessary.

Horses may be located in a paddock or a stable. Often, horses will approach their handler upon being called. However, they can also be nervous or unfamiliar with you and will not approach you. In this case, you may need to herd them into a smaller paddock or enclosure.
Preparation
Set up the destination location before attempting to herd the horse/s from a larger paddock. If it is possible, use a halter and lead rope to have these items ready. If necessary, you might need to consult with the handler to support moving the horse into the alternative paddock. Ensure you are wearing appropriate protective clothing, including long pants and boots.
Safe approach
Horses, much like cows, are rather large and heavy, and before you approach the animal, you need to observe its behaviour. Always remember never to attempt to approach the horse from the rear; likely, they will become threatened and will buck or kick. The animal must be able to see you.
Normal behaviour for horses includes:
- grazing
- mutual grooming
- playing
- relaxed lips and nostrils
- ears will be relatively still and pointed sideways
- head movement, the horse will focus on grazing
- running (cantering) around. 4
Signs of stress or unusual behaviour include:
- ears pinned back
- sweating
- Sudden head movements, constant alertness to surroundings, especially when eating
- pawing the ground.
Restraint
When attempting to restrain the horse, ensure you have someone with you that the horse is familiar with. When you need to restrain the horse, consider the following techniques.
- Use appropriate equipment (tack) that has been kept in good repair.
- Secure the horse using a halter and lead rope.
- When leading a horse, stand to one side and allow them to walk beside you with their head/nose slightly in front. Do not pull the lead rope or reins from the front.
- If you will be mounting or riding the horse, wear suitable protective clothing, including a helmet. Exercise a horse by walking it around the yard a little before attempting to mount.
- Make sure that inexperienced riders are not teamed with aggressive or nervous horses.

Animal grooming may become part of your daily requirements, it may even be a career path you choose. Regardless of the reason for grooming, it is important to remember that regular grooming is essential to maintaining good animal hygiene, especially with long-haired species. If you are grooming pets, you must observe the animal before you start to groom. You need to be mindful of:
- parasites
- infestations
- disease
- injury
- skin sensitivity
Should you find any of these upon your observation you need to inform the owner and discuss what treatment they may have in place (if they have one in place) and offer the suggestion to consult with a veterinarian for possible treatment.
Before we dive into grooming any further, you must have access to the appropriate equipment before carrying out grooming tasks. It is important to consider that some of these types of equipment will be exclusive to dog grooming salons, and they should already have it in full functioning order.
Some of the equipment may include (but is not limited to) any of the following.
- Shampoos and conditioners, depending on the breed, may require a special type of shampoo, for example, a de-shedding shampoo.
- Brushes.
- Combs.
- Clippers, either with a cord or cordless.
- Scissors: these may include thinners, straight cut, curved, and clunkers).
- Nail clippers.
- Hydraulic table or groom table: this is particularly important when you are working with larger breeds of dogs (imagine trying to lift a Saint Bernard up and into a wash tub!).
- Towels.
- High-velocity dryer, specifically for grooming for temperature.
- Noose or tether to restrain the animal during grooming (this is the lead that ties the animal to the table when you are grooming).
- Muzzle only if necessary, dogs particularly may become snappy especially when you are trying to clip their nails or trim paw pads.
When it comes to grooming, there are several benefits for the animal. Commonly, you will find dogs being groomed, as this can be a challenging task for pet owners to do at home. Some of the benefits of grooming may include some of the following examples.
- The removal of dead hair/skin.
- Skin stimulation.
- The maintenance of a healthy coat.
- Removal of dirt and elimination of odours.
- Support the treatment of skin conditions and infestations.
- The maintenance of claws at a safe length.
- Improve the animal's appearance.
- Helps to keep the animal cool during hot weather.
When it comes to grooming, you need to carry this out in a specific order. This diagram highlights the order in which grooming should take place.

Watch

The frequency of basic grooming will depend on the animal's coat; however, as most animals enjoy being brushed, daily grooming is recommended if time permits. You will also need to be mindful of the type of brush you use on the animal. There are several types of brushes used for animals and it is best you choose a universal brush or one specifically for the type of coat the animal has and what you are using it for. The brushes you may need include:
- soft bristle and pin brush
- comb
- slicker brush
- undercoat rake.
Each of these brushes has been presented in the following image slider.
The benefits of regular brushing include:
- Preventing long hair from becoming tangled and matted.
- Removing loose and dead hair (resulting in less moulting inside the house).
- Encouraging healthy skin by removing dead skin cells and improving circulation. This is especially true when using grooming tools such as Zoom grooms.
- Early detection of parasites, lumps and skin issues.
- Increasing the human-animal bond between owners and their pets.
When it comes time to carry out the brushing, you will need to follow a simple process.
- Choose the appropriate brush for the type of coat.
- Brush in the same direction as the coat grows to start at the head and work down the neck, kegs, and back to the tail.
- Dispose of any fur into the rubbish bin.
- Clean the equipment you have used, including wiping down the grooming table or station.
Once you have finished brushing the coat of the animal, you need to ensure you have continued to support hygiene and avoided any cross-contamination. This involves cleaning combs and brushes. When you are cleaning the brushes, ensure you have removed any hair on/in the brush or comb and then wash, followed by a disinfectant. You should always clean and disinfect brushes between animals to avoid spreading any possible parasites or contagious skin matter that may have been picked up during the brushing process. If the brush has missing teeth or any visible damage, you will not be able to use it. It will need to be reported, documented and removed from use until an alternative can be replaced.
Watch

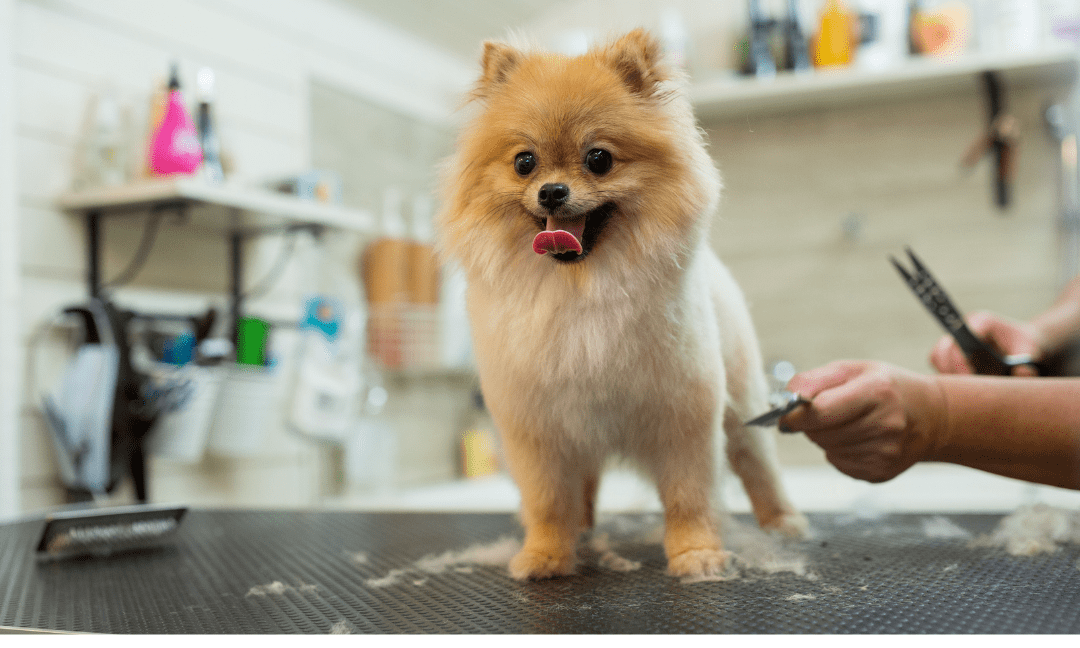
Clipping or trimming is generally carried out as part of routine maintenance of fur. It should be performed after brushing and bathing. Maintenance clipping is usually performed every 6 – 8 weeks.
If clipping is being performed for therapeutic reasons (matted/neglected coat), bathing beforehand may not be required or recommended.
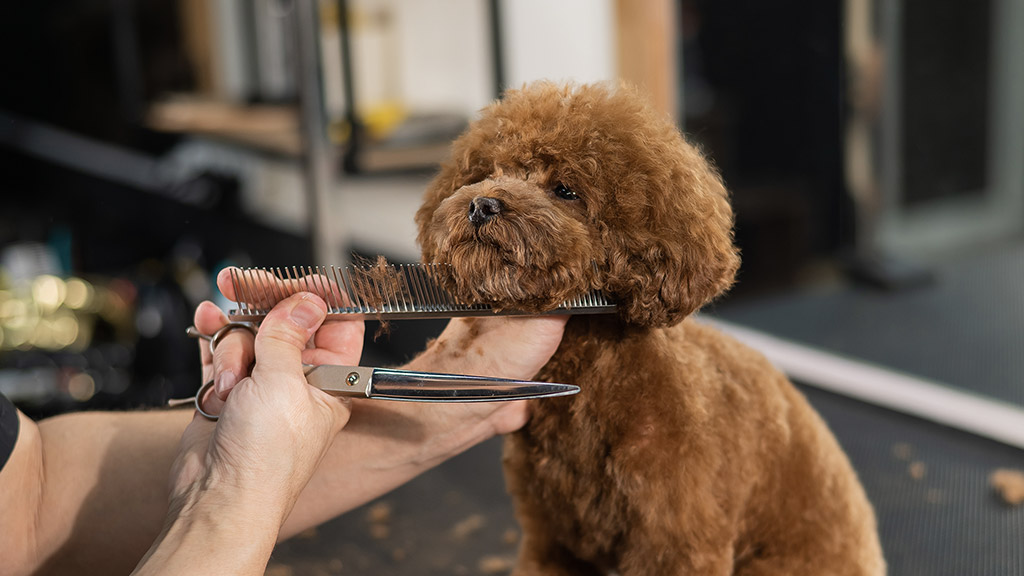
When you are clipping or trimming the animal, you need to be mindful of the equipment you are using and exercise caution because animals can be quite fidgety. If you are using thinning scissors close to the eyes or mouth, sudden movements can cause a hazard to both you and the animal. You also need to check the animal’s coat for clear and visible signs of matting or knots, as well as any injuries or skin conditions, including parasites.
When you are trimming or clipping, the process should be carried out as follows:
- Wear PPE, apron, and correct footwear
- Identify the type of animal you are grooming because some fur can grow back differently once clipped, so it is important to know which breeds you are working with so you can clip accordingly.
- Choose the appropriate size clipper blades for the dog or animal you are grooming.
- Sedate the patient if necessary
- Always use scissors or shears around the eyes, ears, mouth and feet.
- Use clippers around the legs, neck, back and stomach
- Dispose of any fur clippings as per relevant legislative requirements
- Clean all equipment used with the appropriate cleaning process and disinfectant.
Cleaning and maintaining equipment
Once you have finished clipping or trimming the dog or the animal you are working with, it is important to maintain the equipment. You need to look after it to keep it in good working order. When you are cleaning the clippers, there is a simple procedure that can be carried out when cleaning scissors or clippers.
- Brush to remove excess hair
- Wash scissors in water and detergent
- Use blade wash to wash/scrub clipper blades
- Disinfect blades
- Apply blade oil to maintain blade integrity
- Check the equipment for damage, if the equipment is not in proper working order, you will need to tag it and remove it from use. You will also need to notify your supervisor and document it in the appropriate register.
Watch

Cleaning the ears of the animal is also part of the grooming process. Dogs and cats can have wax build up in their ears just as people can, and this must be maintained. Remember, dogs have sensitive ears, so you need to ensure you are careful when you are cleaning the ear canals.
The following process outlines how you should carry out the ear-cleaning process.
- Wear appropriate PPE, including gloves and an apron.
- Check the ear for infection by looking into the ear canal for any redness or smell. It is normal for an ear to contain wax that does not have a smell.
- Apply a gentle ear cleaner to the ear canals and massage gently for approximately 20 seconds.
- Use cotton wool to gently remove any dirt or muck
- Repeat this several times until there is no more dirt or muck
- Dispose of any waste materials into the rubbish bin
Watch
Part of grooming also includes nail clipping. Nail clipping is required when nails become too long and interfere with everyday functions or create a risk of tearing.
The centre of the nail contains a 'quick', which has nerves and blood supply. Care must be taken to avoid cutting the quickly as this will cause discomfort and bleeding to the animal. Animals with white nails can be clipped with ease as the quick can be seen in the centre of the nail, but dark-coloured nails require a little more care as the quick cannot be seen.
Steps for clipping nails:
- Fully extend the claw/nail
- Trim in line with the footpad (if unsure trim back in small sections until you can see the pulp.
- Be sure to check dewclaws if present.
- Ensure you dispose of any nail clippings
Be sure to regularly check the animal to ensure there are no changes to their behaviour

- Sheath
- Quick
- Claw
- Cutline
Like any other equipment you use, nail clippers also need to be cleaned down; they are used on any other animal. The clippers will need to be wiped with disinfectant or an alcohol-based sanitiser. Once you wipe them down, you need to check them for any damage. You will not be able to effectively clip nails with broken or blunt clippers. When you find that clippers are not in working order, you need to notify the veterinarian or a supervising staff member to have them repaired or replaced.

In addition to brushing, you will likely need to bathe the animal. When it comes to bathing, animals are bathed for two main reasons: Therapeutic and Non-therapeutic.
- Therapeutic bathing is performed to treat or control a specific condition and may involve the use of a medicated shampoo. Medicated shampoos have a direct effect on the skin or the organism, for example, ringworm, fleas and their eggs.
- Non-therapeutic bathing is performed to assist in the maintenance of a healthy coat, remove dirt and control odours and requires the use of standard shampoo.
Animals should be bathed only when necessary as excessive bathing may lead to dry and itchy skin. Bathing for skin disorders must be guided by a veterinarian. It is very important that only high-quality pet shampoos are used, due to the pH of the skin.
When it comes to bathing and drying an animal, you need to follow a specific process to ensure you are bathing the dog adequately. Bathing can be carried out either in a surgical sink or a hydro-bath. Let us take a look at both of these methods of bathing.
Sink Bathing
Sink bathing is straightforward compared to the hydro-bath, which has several functions too. Sink bathing is a suitable form of bathing and is often carried out at many veterinary clinics, animal holding facilities and hospitals.
Bathing process
The following steps outline the bathing and drying process when using the sink bathing method. It is also important to consider that bathing does not come without precautions. You must consider safety when you are bathing and drying an animal. Safety precautions have been highlighted in the following process.
- Wear appropriate PPE this will include aprons, earmuffs, and sturdy shoes such as boots.
- Be prepared by collecting all the resources you need, including the correct shampoos (medicated, natural or normal), conditioners, towels and a dryer if using.
- Place a non-slip mat on the bottom of the sink, and erect any relevant signage for slippery or wet floors.
- Collect the animal.
- Turn on the tap to allow the water to get to the right temperature; this should be warm.
- Place the animal in the sink and ask another nurse or supervisor to hold the animal whilst you bathe them unless you can safely secure them
- Wet the animal all over.
- Place the hose down and lather a small amount of shampoo over the patient, avoiding contact with the head area, particularly around eyes and ears.
- Rinse the shampoo.
- Apply conditioner- this can be either wash-off or leave-in conditioner, depending on the animal
- Towel dry the patient.
- Plug the dryer into power and continue to dry the animal without causing too much stress. Continually monitor the animal for signs of stress during the drying process.
- Remove the animal from the sink and return to the housing area.
You should always be mindful of the animal as you are bathing them. In many cases, animals may not like the bath or the drying process and may become distressed. It is important you address the needs of these animals if it becomes overwhelming for them, you may need to cease bathing and drying and opt for a sponge bath and towel dry.
Once you have finished bathing, you need to clean up afterwards.
The cleaning process is straightforward unless the animal being bathed has an infectious disease. In this case, they would not be bathed in the common bathing area, and the washing would need to be kept separately.
When you are cleaning after a bath, you should:
- Place all used towels in the wash.
- Clean out the sink with hospital-grade disinfectant and dispose of all fur as per relevant legislative requirements.
- Clean all PPE and dispose of all non-reusable PPE
Fun Fact

Did you know that cat coats can take longer to dry than dogs?
Hydro-baths
Hydro-baths are baths with circulating water under pressure, specially designed for bathing dogs. There are benefits and disadvantages to using a hydro-bath instead of a sink or tub and should be considered based on the individual dog. Many dog grooming salons will be equipped with a hydro-bath and may be the preferred option. The following comparison table outlines both the advantages and disadvantages of using a hydro-bath.
| Advantages of a Hydro-bath | Disadvantages of a Hydro-bath |
|---|---|
| Pulsating jets massage coat and remove loose skin/hair. | Noise can scare the animal. |
| The height of the hydro-bath can reduce bending. | Need to monitor water temperature on heated units |
| Water can be recycled. | Heating water up takes time and consumes electricity |
| The animal can be walked in. | Heating water up takes time and consumes electricity |
| Twin tub units allow for changing from shampoo to rinse easily. | Recycling water means the dog is being bathed in the same water. |
| Sides contain water and reduce slip hazards. | Difficult to disinfect inside hoses and reservoirs |
Hydro-bath process
When you are using a hydro-bath, you should consider the following steps to ensure that the bathing is carried out effectively.
- Wear appropriate PPE, which will include aprons, earmuffs, and sturdy shoes such as boots.
- Be prepared by collecting all the resources you need, including the correct shampoos (medicated, natural, or normal), conditioners, towels and a dryer if using.
- Erect any relevant signage for slippery or wet floors.
- Fill the hydro bath chamber according to instructions with warm water and a small amount of shampoo.
- Close the lid to the water chamber and place the nonslip mat down on the bottom.
- Collect the animals and place them into the hydrobath, secure animals to either the side of the hydrobath or the wall and slide entrance closed.
- Start Hydrobath and wash the animal, avoiding contact with the head area, especially the eyes and ears.
- Empty the water chamber and rinse the shampoo off the animal with warm water.
- Apply conditioner and either wash off or leave in.
- Towel dry the animal.
- Plug the dryer into power and continue to dry the patient without causing the animal to stress.
- The animal may require Parasite control.
- Apply Cologne spray for extra fragrance.
- Remove the animal from the Hydro bath and return to the housing area.
Once you have finished bathing and drying the animal, you will need to ensure the hydro-bath and drying area have been properly cleaned. The post-bathing cleaning process is fairly straightforward forward, as outlined in the following process.
- Place all used towels in the wash.
- Clean out Hydrobath with hospital-grade disinfectant and dispose of all fur as per relevant legislative requirements.
- Clean all PPE and dispose of all non-reusable PPE.
- Report any aspect of the hydro-bath that is not in working order or that has caused damage to the supervisor. If necessary, consult the manufacturer and arrange for repair. Ensure you have documented this in the damaged equipment register.
Watch
Snakes and other reptiles regularly shed their skin as they grow. This is largely a self-regulated process; however, there are some care techniques you can practice and apparatus that you can use that may assist the process:
- Ensure there is adequate water in the enclosure to allow for the animal to soak itself.
- Spray a water mist into the enclosure daily to increase the humidity.
- Include some objects with rough surfaces, such as fake rocks or branches, so the animal can rub against them.
Before a snake sheds its skin, it may reject food and appear to have a dull colour tone and hazy eyes. These are all normal signs that shedding is imminent and shouldn’t be a concern. Once shedding has occurred, remove the discarded skin. It often contains faeces, so it is not always suitable for keeping as a souvenir. Ensure you always thoroughly wash your hands before and after handling reptiles. They can and often can spread infection, and this needs to be minimised as much as possible.
You should also consider, not all reptiles have the skin they are likely to shed, turtles or tortoises have a hard exterior shell. If you are grooming or cleaning these reptiles, you need to check the shell for any significant damage and consult with the owner or handler if they have noticed it.
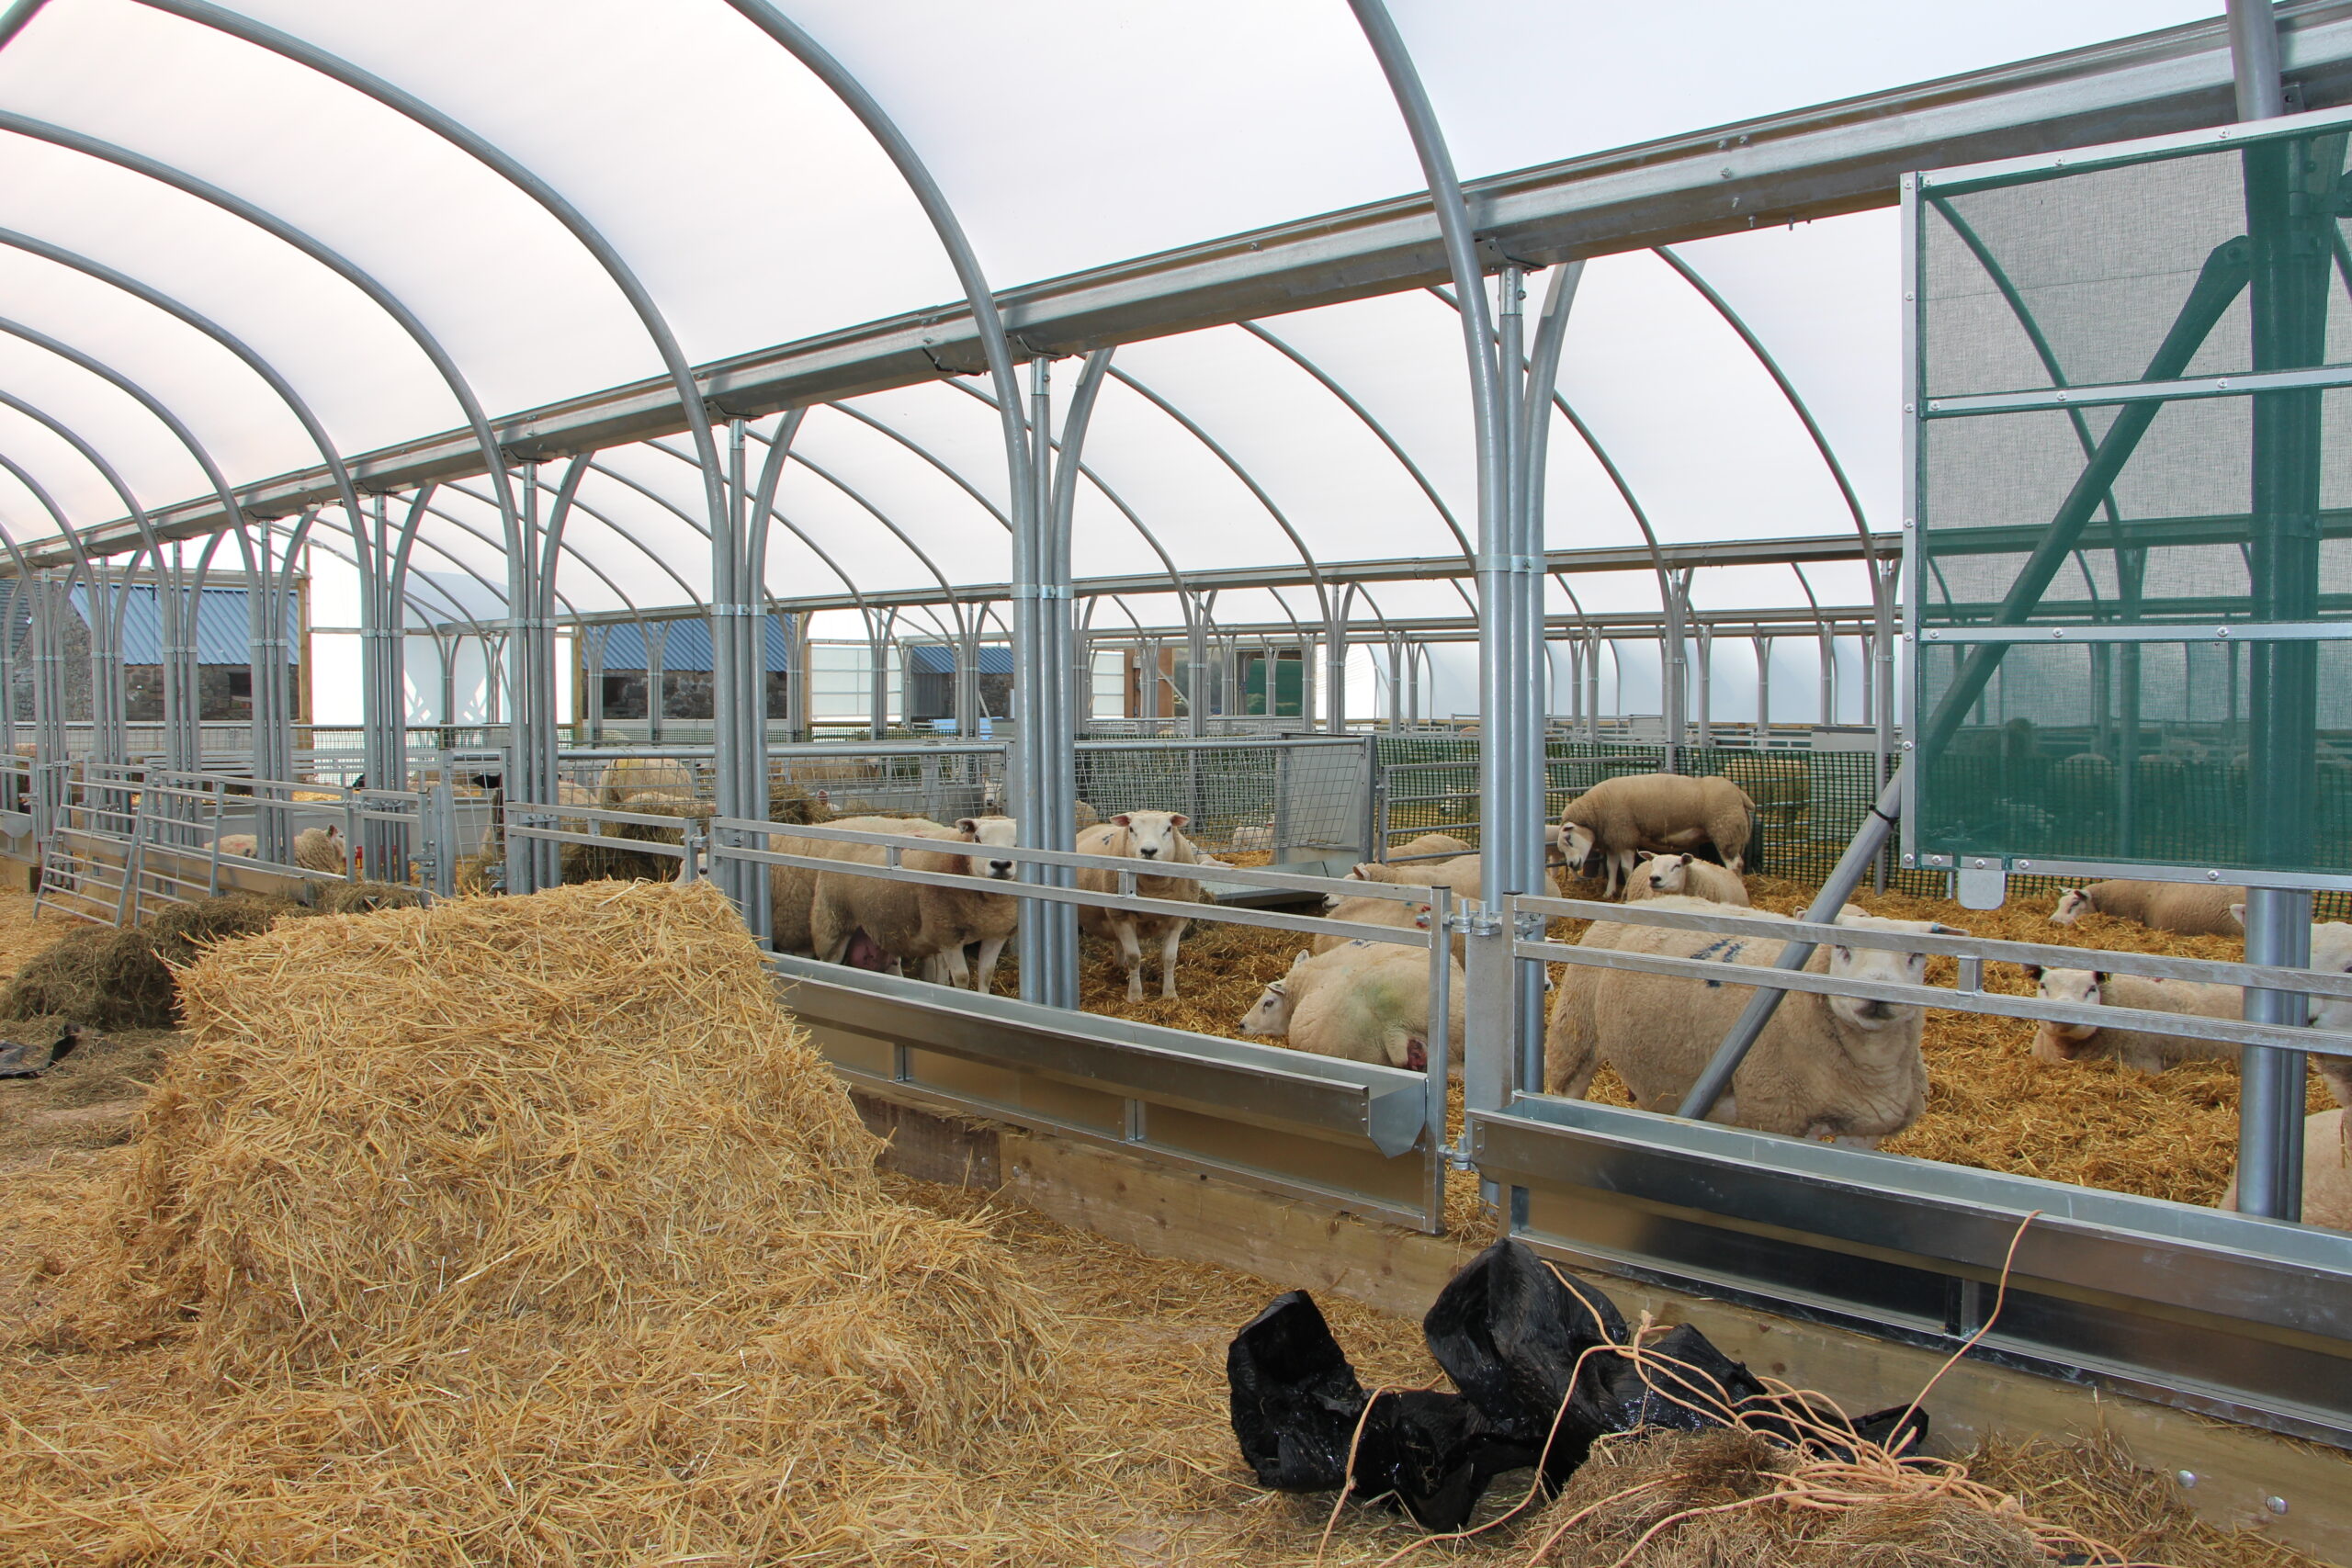
When working with animals, you may encounter various animal housing for different animals. One issue you may encounter is adjusting animal housing to suit animals dealing with weather conditions and climate change.
Some examples of strategies to assist animals are:
• Raise bedding off the floor to reduce cold air coming up through bedding
• Raise bedding to avoid the animal laying directly on the cold floor
• Provide indoor housing or enclosed housing such as a kennel
• Freezing ice cubes and placing them in the water to keep it cool during hot weather
• Providing a wading pool in hotter months
• Keeping windows closed at night in colder months if animals are housed indoors
• Allow plenty of ventilation in hotter months
• Air conditioners and/or heaters can be used indoors to create optimum temperature
• Add additional bedding or blankets in cooler months
Cleaning Animal Housing
As a dedicated animal care professional, part of your role involves ensuring the cleanliness and hygiene of animal housing. This responsibility is crucial for maintaining a healthy and safe environment for the animals. Regular cleaning helps prevent the spread of diseases, reduces stress for the animals, and promotes their overall well-being. By diligently cleaning and disinfecting their living spaces, I contribute to their comfort and health, ensuring they thrive in a sanitary and pleasant environment.
Different animals require different cleaning techniques and requirements. See the table below for an example of what this would look like.
| Dog | Horse | Lizard | |
| Cleaning products and equipment |
|
|
|
| Removal of Waste |
|
|
|
| Disposal of rubbish |
|
|
|
| Setting up housing |
|
|
|
Animal grooming refers to the regular care and cleaning of an animal’s body, fur, and skin to maintain its overall hygiene and appearance. Grooming is an essential part of animal care, particularly for pets, farm animals, and animals in care facilities like boarding kennels or shelters. Beyond aesthetics, it plays a key role in preventing skin diseases, infections, and discomfort caused by matted fur or overgrown nails.
Brushing and Combing: |
|
Fur Maintenance:
Equipment:
|
Bathing |
|
Hygiene:
Equipment:
|
Nail Trimming |
|
Preventing Overgrowth:
Equipment:
|
Ear Cleaning |
|
Preventing Infections:
Equipment:
|
Teeth Brushing |
|
Dental Health:
Equipment:
|
Hair cuts and trims |
|
Style and Health:
|
Anal Gland Expression |
|
Hygiene:
Equipment:
|
| Flea and Tick Control |
|
Parasite Management:
|