Nau mai, welcome. In this session, we continue to explore the topic of pharmacy technician ethics and professionalism. A crucial component of maintaining both ethical standards and professionalism is your ability to deliver pharmacy technician services to the Māori community while upholding the principles of Te Tiriti o Waitangi. This will be our focus for the next two sessions.
We will discuss:
- the meaning of equity in relation to health services
- Te Tiriti o Waitangi - the document, its purpose, history, and areas of conflict
- applying the principles of Te Tiriti o Waitangi to your practice as a pharmacy technician.
Working ethically and professionally
Equity
Let's begin with a recap of the concept of equity. Answer the following question to remind you of how that term is used.
Taking what we know about the concept of equity, what do you think it means in relation to healthcare services? Take a moment to consider what you know or have heard about health equity in Aotearoa New Zealand:
- What does equitable healthcare look like?
- What does equitable healthcare look like in pharmacy?
- How can equitable healthcare be achieved?
Read through this infographic from the Ministry of Health (MOH) about what is needed to achieve equity in health and wellbeing, then answer the following four questions.
Unfortunately, currently, in Aotearoa New Zealand, healthcare equity has not been achieved to the desired extent. It is acknowledged that healthcare inequities exist that result in poorer health and lower life expectancy. The populations who are most affected are Māori and Pacific people. Read this news report on health inequities between Māori and Non-Māori. You might like to make your own notes about the key points.
As a pharmacy technician, it's essential to understand and appreciate the health inequities that your pharmacy customers experience. By appreciating individual customers' challenges and levels of advantage, you can respond accordingly to ensure you provide equitable and appropriate services within your role and scope of practice. For Māori patients, this will involve providing services in accordance with Te Tiriti o Waitangi.
![[ADD IMAGE'S ALT TEXT]](/sites/default/files/%E2%80%9CThe_Signing_of_the_Treaty_of_Waitangi%E2%80%9D%2C_%C5%8Criwa_Haddon_-_Flickr_-_Archives_New_Zealand.jpg)
Journal post
You may already know quite a bit about the history, principles, and modern-day application of Te Tiriti o Waitangi.
Spend some reflective time now noting down:
- what you currently know
- anything you would like to know.
When completed, post it to your journal. You might like to record your thoughts in summary sentences, lists or in a table (like the one below) that you can copy/paste into your post.
| Te Tiriti o Waitangi | |
|---|---|
| What I currently know Facts, ideas, things that I have read, learnt, experienced, my understanding |
What I would like to know Gaps in my knowledge or understanding, what I wonder about, what I want to know more about |
Note: We’re going to ask you to return to this journal post next week (after providing you with more information about this topic) to give you the opportunity to review, revise and consolidate your new learning about Te Tiriti o Waitangi. Read the information below to find out how you can keep track of your journal posts.
How to return to a journal post:
Your journal posts are useful resources for you to keep and return to for review and preparation for your assessments. In order to do this easily, you need to access and store the web address for your journal posts. This will make it much easier than scrolling through them to find the one you want. We recommend keeping an index of your posts with links so you can quickly return to them.
Create an Index of Journal Posts:
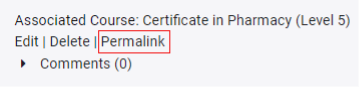
Follow the steps below to get the permalink to your post.
- After you save and publish your post, the page will reload. When it does, look for the text links at the bottom of your post that enable you to interact with it.
- You can edit, delete, or get a permalink to it (which is what we’re after now.)
- You can edit, delete, or get a permalink to it (which is what we’re after now.)
- Select the Permalink text link and the post will reload again.
- Copy the URL from the location bar of your browser:

- Paste it into a document you can use later to return to the post. You may wish to use this template.
And that's it! We recommend that you keep track of all your journal posts in this way as you move through the remaining weeks of study. When it comes time to revise and prep for assessments, your future self will love you for it!
Te Tiriti o Waitangi/ The Treaty of Waitangi
The Treaty is often described as the founding document of New Zealand. However, at the time it was signed, there was another document in place called the Declaration of Independence of the United Tribes of New Zealand – He Whakaputanga o te Rangatiratanga o Nu Tirene.
Watch: The Treaty of Waitangi (3:51 minutes)
- Mātakitaki mai, watch the video below to learn more about the events leading up to the writing and signing of the declaration.
- After the video, cement your learning by creating your own resource (using the Documentation Tool). This is a great way to build up your own portfolio of learning and studying materials.
Use the Documentation Tool below to create your learning resource.
Note:
In this week's session, there are a number of Documentation Tool activities (like the one you've just completed). We recommend downloading and saving the completed document to a specific folder on your computer so that you can find it easily when needed (like the permalinks for the journal posts). Investing a little time in being organised as you study will pay off in the long run. Also, if you have any questions about the content or questions in these activities, remember that you can chat with your peers and tutor for support.
Watch: Understanding Te Tiriti o Waitangi (5:20 minutes)
Several years after the signing of the declaration, two versions of Te Tiriti o Waitangi were written and signed, one in Māori and one in English. The video below gives an overview of the Declaration of Independence. It also explains why the Treaty came about and the differences between the Māori and English versions.
Te Reo Māori
Note: Below the video is a list of words that you will hear in the video. A link to each word in Te Aka, a Māori online dictionary, has been provided for you. You can read the definition and use of the word and listen to how it is pronounced by clicking on the speaker symbol next to the word.
You can go to Te Aka before or after watching the video.
Dictionary words:
- He Whakaputanga o te Rangatiratanga o Nu Tirene
- Taonga
- Reo
- Rangatiratanga
- Kawanatanga
- Tino rangatiratanga
Treaty Facts
How much do you remember about the Treaty? Use these activities to ensure you know the essential facts about these impacting documents in the history of Aotearoa New Zealand.
Te Tiriti o Waitangi in the present day
Since the 1970s, there has been a consistent and growing demand for the Treaty to have more recognition. Many people in Aotearoa have expressed the wish that the laws and rules of the country should honour and implement the principles that were agreed upon in 1840 and that the breaches of the past be addressed. This demand started within the Māori community but is gaining support across many New Zealand communities.
Did you know that Te Tiriti o Waitangi is not considered a law? Read the following excerpt from the Ministry of Justice website to find out the status of the Treaty.
The Treaty of Waitangi was signed in 1840 and was an agreement between the British Crown and a large number of Māori chiefs. Today, the Treaty is widely accepted to be a constitutional document that establishes and guides the relationship between the Crown in New Zealand (embodied by our government) and Māori.Citation: http://www.justice.govt.nz
Self-directed learning activities
The following SDL activities will help you summarise the learning in this section. It would be a good idea to make your own notes from these activities to add to the notes you have already created.
Activity 1
Read the following web pages on the NZ History website. You may like to make your own notes to add to the notes you have already created.
- He Whakaputanga - Declaration of Independence
- The Treaty in brief
Activity 2 (optional)
Watch the docu-comedy - Alice Snedden's Bad News: Healthcare Inequity. Please note that it contains strong language in places.
Activity 3
Post in the forum - What is ONE new thing you learned from today's session?
- Post what this was to the forum: SDL: What Have You Learned.
- Read your peers' responses - you may find that reading their learnings reinforces your knowledge as well.
Malo lava — well done completing this week's learning of Professional Practice.

Bula! Hello, and welcome back to our learning on compliance packaging. In our last session, we discussed the following:
- What compliance packing is and its purpose.
- The word compliance, its connotations, and alternatives.
- The oral contraceptive pill as an example of one type of compliance packaging.
In this session, we continue to look at how pharmacies assist patients to adhere to their medicine regimes and investigate the different types of compliance packaging.
Let’s recap what we know...
As usual, before expanding the labels below, get the most out of this activity by making your own lists to see how many of the points you remembered or came up with on your own.
- assist patients in adhering to a prescribed medicine regime.
- improve the safe administration of medicines.
- reduce the stress that can be associated with managing and remembering multiple dosage medication.
- empower patients to stay in control of their medicines and maintain independence.
- provide convenience and assistance with adherence when travelling.
- elderly patients and patients in residential care: These people often take multiple medications and can benefit from organised, easy-to-follow packaging.
- patients with chronic conditions: Those with chronic diseases such as diabetes, hypertension, or heart disease often have complex medication regimens.
- paediatric patients: Compliance packaging can simplify medication administration for parents and caregivers.
- patients exposed to polypharmacy: Individuals taking numerous medications simultaneously can reduce the risk of errors with compliance packaging.
- patients with memory issues: Those with memory impairments, like Alzheimer's disease, find it easier to follow a regimen with clear packaging.
- nurses and caregivers: Compliance packaging can make it simpler to ensure the person receives their medications correctly.
- patients with visual impairments: Packaging with large, clear labels can assist patients with visual challenges.
- frequent travellers: Travel-friendly compliance packaging is convenient for people who are often on the move.
- patients with busy lifestyles: Individuals with busy schedules find compliance packaging helpful in managing their medications effectively.
Previously, we discussed the many factors that contribute to patients not adhering to their prescribed medication treatments. We noted that some of these factors may be within or outside of the patient's control. A service that some pharmacies offer that can identify issues and factors associated with medicine adherence is a Medicines Use Review (MUR).
This service can only be provided by pharmacists who have completed the PSNZ MUR training or have completed specific postgraduate qualifications. Pharmacies receive funding to provide the service. To receive a free MUR, patients must meet certain criteria; otherwise, a cost may apply. To learn more, read the information and watch the video about the MUR service on this PSNZ webpage.
After conducting a Medication Use Review (MUR) with a patient, a pharmacist might propose the use of compliance packaging as a strategy to tackle medication-related challenges. Additionally, patients, their families, caregivers, or medical providers may recognise compliance packaging as a solution for medication management issues and request that the patient's medications be organised in this manner. This approach can help in overcoming obstacles related to medication adherence.
Types of compliance packaging:
Hard pack
A hard pack is also known as a pill organiser or pill box.
Let’s start with this Documentation Tool activity to learn more and create a resource for future study at the same time.
Sachet system
In this type of compliance packaging, a patient's medications are organised into individual sachets by a pharmacy that has a robotic packing machine.
Watch: Medicine Sachet System at Vivian Pharmacy (1:45 minutes)
Watch the video below to learn about a sachet system used in a New Zealand pharmacy, and then complete the following activity.
Sachet packaging is also offered by online pharmacies.
Again, we’ll use the Documentation Tool activity so you can learn about this and store your findings in a format that is easy for you to review.
Blister packs
Blister packs, also known by the brand name Medico paks, are a type of compliance packaging that pharmacy technicians are involved in preparing.
Go to the medico pak webpage for pharmacists. Here, you can read about the features and advantages of this type of compliance packaging as well as the packing accessories and materials (blisters, seals, foils, and labels).
Make sure to read through the following sections:
- About Medico Pak
- How Does it Work?
- Advantages of Medico Pak
- Medico Products
Use the Documentation Tool to create another handy learning resource.
Assembling compliance packaging requires not only the prescribed medicines but also the specific materials for the packing system your pharmacy uses. You will have seen these materials pictured and described on the Medico Pak webpage and in the photo in the last learning activity. In essence, a plastic sheet with pre-formed blisters is filled with the medications prescribed and sealed with a backing seal or foil.
Blister packaging of medications may be prescribed by a doctor or be requested by a patient or their whanau/carer.
Your pharmacy will have its own SOPs for blister packaging, but the following are general principles and suggested steps.
Hygiene and Environment
As always, it is important to start any pharmacy procedure with a clean and tidy environment to minimise any cross-contamination and ensure the medications are hygienically prepared. Therefore, you will prepare the designated space for compliance packing as per your pharmacy’s SOPs.
This may involve:
- clearing the bench space of all unnecessary equipment.
- wiping surfaces with a specified cleaning product.
- ensuring the floor space is clear of any unnecessary objects, clean and dry to avoid slips or falls.
- ensuring the area is well-lit for working.
The designated space for packaging must be big enough to separate packing, checking and storage of finished products. It will be an area away from public access and food. Packs should be sealed as soon as practicable after they are filled to avoid contamination with particles, dust, moisture, or dirt from the environment.
It is recommended that gloves are worn and tweezers are used when packaging. Before handling medication, you must thoroughly wash and dry your hands.
The steps from receiving a prescription through to collection
The following is a list of general steps to take. Your pharmacy will have its own SOPs that will reflect the best practice standards for assembling and dispensing this type of compliance packaging.
- Check Rx details are correct, legal and fulfil the pharmacy contract.
- Annotate Rx and stamp it with the pharmacy stamp.
- Calculate quantities to be dispensed.
- Enter information from the prescription to the computer system, remembering to annotate on the prescription “Dispensing Frequency Rule “ or something similar to this effect.
- Get each medicine from the shelf, count, and label as usual.
- Stick each 3rd part label onto the prescription.
- Leave dispensed medicines in containers with the original stock bottle “in a basket” for the pharmacist to double-check.
- Fill out the patient medical chart for a new patient if needed.
- Check existing medical chart, prescription, and labels on the dispensed medicines all match.
- Print the foil/s.
- Check the foil/s agree with the patient medication chart.
- Fill the blister pack/s.
- Fill in any extra documentation, e.g. CD register, patient log, etc.
- Initial “packed by” on the foil/s.
- Leave unsealed blister pack/s for the pharmacist to complete the final check.
- Pharmacist to seal and initial “checked by” on the foil/s.
- Final checked packs are ready for patient collection.
Self-directed learning activities
Activity 1
1. Medico Paks can be assembled by hand or by using an automated machine. You may have seen this machine in your work placement. To learn about automated compliance packaging, follow this link to Medico Pak and watch the video (click on the white arrow on the graphic).
2. Once you have watched the video, use the left-hand navigation pane to select and read through the following sections:
- About Us
- Faster than you can
- Why Alpaca
- Specifications
3. In a journal post, note down the advantages of using the Medico Alpaca for:
- The pharmacy
- The patients
After you've published your work, save the permalink to your Index of Journal Posts document.
Activity 2
Watch: Amneal Medico Pak (1:24 minutes)
-
For a summary of what you know about adherence and Medico Paks, watch the video below.
- In the discussion forum post a short summary about what you've learned about Medico Paks (2 - 3 sentences): SDL Medico Paks.
- Read your peers' comments and make note of anything that you didn't already know.
Well done! That’s another week done of Introduction to Dispensing.

Welcome back to Patient Care. In this session, we revisit dose forms and accessories, so there will be a lot of opportunities to revise and refresh your knowledge. You might also want to refer back to weeks 2-5 of this online course to refresh your memory of what you have learned.
To start this week, we're jumping straight into an activity! As you know, dose form refers to how a medication is physically formulated or presented for patient administration. Refresh your memory about the terms used in the activity below.
Create your own learning materials
In the following learning activities, there are several customers who need your help! You will need to apply what you have learned so far in your programme to assist them. You will also need to use your research, reading and comprehension skills.
Note:
As mentioned earlier, we recommend that you download and save the completed documents for each activity to an easily accessible location on your computer. This will make it a breeze to track the resources down later on.
Me tīmata tātou! Let's get started!
Review Dosages
At the start of this course, we looked at the meaning of different types of dosages, for example, toxic doses. This terminology is what is referred to as the dose-response relationship. In simple terms, the dose-response relationship is the connection between the dose of a substance administered and its overall response or effect on the body. You will learn more about this in detail later in this programme.
For now, let's revise this terminology with the following two questions.
Self-directed learning activities
Journal post 1
Answer the following questions in your journal:
- Do all people respond to medicines in the same way? Explain why or why not.
- What is meant by dose regime?
- What factors will a prescriber take into consideration when prescribing a route of administration and a dose regime for their patient?
As usual, publish your post. Remember to copy and keep the permalink in your Index of Journal Posts so you can return to this activity and revise it as you continue to learn more about this topic.
Journal post 2
Carry out your own research about the scenario below and upload your results to your journal.
14-year-old Sam Smith has asthma that gets worse during the cold and flu season.
1. Research the following:
- A preventer he could be prescribed
- A reliever he could be prescribed
2. For each medication you have chosen, report on the following:
- Name of medicine
- Active and inactive ingredients
- How the medicine affects the body, including the onset of action and the duration of action? Is the effect local or systemic (pharmacodynamics)?
- Dose form
- Route of administration, including instructions for use
- Typical dose and frequency of administration (dose regime)
- Side effects
- Care and advice: How to store this medication, accessories available, general self-care advice including prevention strategies and when to seek medical attention.
Once you have published your journal post and saved the permalink, you can pat yourself on the back for completing this week's online content. Ka pai. There was a lot of time for reflection and review in this section. We hope this work has given you confidence in your learning.
