Whilst you may have interacted with various parts of the IT team during your first few days at UP, we want to ensure that you know how to use our helpdesk system to log an IT support ticket.
Logging a helpdesk ticket ensures your requests:
- are logged
- do not get lost
- can be directed to an appropriate member of the team to resolve
- can be followed throughout the lifecycle of the ticket and not just when it gets resolved
To log a job simply go to the Helpdesk Portal. You may be asked to log in using your UP Education credentials.
Once you have logged a helpdesk ticket you will be notified of any updates via email and you can go back to the portal at any time to check on the status of your ticket.

How to log an IT ticket in the helpdesk system
Step 1
Go to the UP Education Helpdesk Portal.
Step 2
If prompted, Sign in using your login credentials.


Step 3
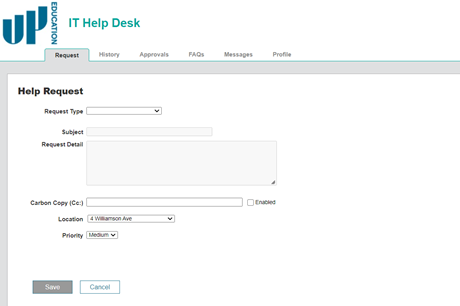
Select a Request Type. Being more specific assists in directing your issue to the appropriate IT Staff member.

Step 4
Enter a Subject and Request Details for your ticket. Including all relevant information helps get your issue resolved faster.

Step 5
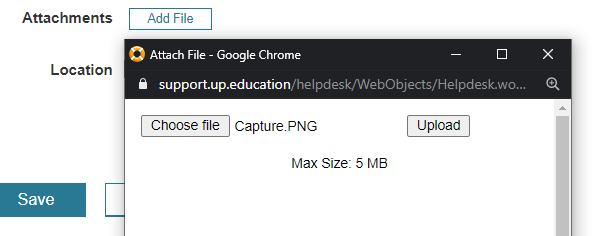
You can add screen captures or other files using the Attachments section.

Step 6
If your request is urgent you can adjust the Priority.

Step 7
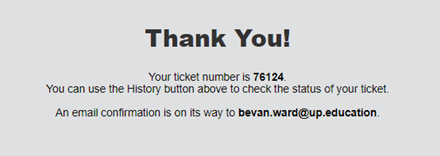
Once complete click ‘Save’ and you will be shown a confirmation window with your assigned ticket number.

You will also receive an email confirmation of your submitted ticket.

Step 8
You will be emailed updates to your ticket and may be asked for more information. You can simply respond to the email notifications you receive, and the ticket will be updated.
Step 9
You can click on the link on the ticket notification at any time to see the full history of the ticket.

