
Throughout this topic, we will be going over all areas of the Content Management System (CMS). There will be a range of both written and short video-based guides to get you through each step.
Locating topics on the CMS can seem a little daunting at first (like anything you learn for the first time), but it is really quite simple, and once you do it once or twice, it will be as simple as any other protocol you follow currently. Below is a step by step written guide followed by a short video clip to assist you through.
- Go onto the Content Management System website
- On the top right hand corner of the page select ‘Login’
- Enter your user name and password. Note: User name is your first and last name e.g. Lian Bray
- On the top left hand corner of the page select ‘content’
- Type in topic name under ‘title’ for the purpose of this exercise, type in ‘skycity’
- Set content type to ‘topic default’
- Click ‘filter’
- Read the list below to see which one is relevant and select the ‘title’ applicable
You have successfully navigated to a topic- well done! ?
NB:
- LD’s will be working in topics on most occasions, so the conent type should be set to ‘topic default’ - Be careful not to select ‘topic’ alone, as it may not give you a results for your search.
- To navigate to a different topic, you can change the numbers at the end of the URL (this is called the node) e.g. If it is 123, you can type in another number to bring you to another topic faster. I’d suggest not using this method until you are more confident with the system.
Insert activity here.
Once you navigated to the right topic, you will be able to edit content including adding sub-topics. To edit the content, (following on from the navigational steps in previous sub-topic), then click on ‘edit’
NB: There must be only one (1) person on a topic at one time. Having more than one (1) person may cause some inconsistencies and work may not be properly saved.
The first part of the topic is called a body- It is vital to include a couple of sentences to introduce your topic within this section. By leaving this area incomplete, you may experience malfunctions and loss of content, this will not be something you want to happen to you (especially after spending several hours on a particular topic).
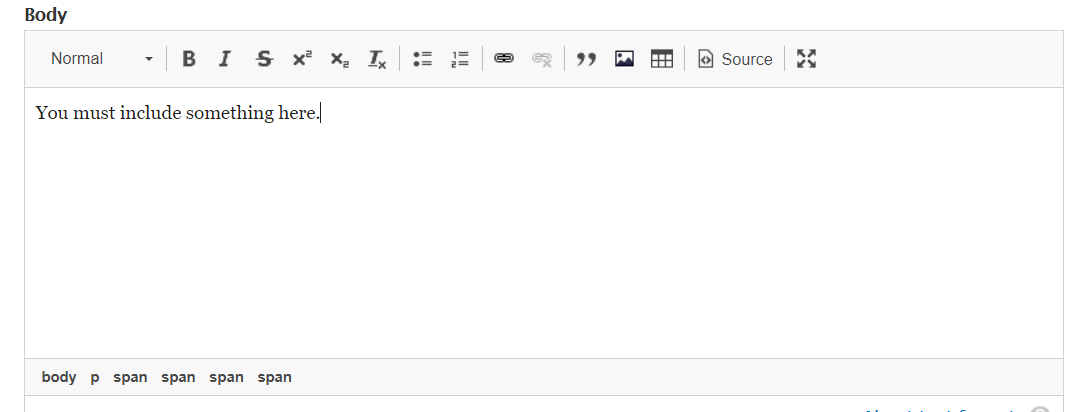
If you scroll through the topic, you will notice that there is only one (1) space for the title (topic name) at the very top.

The subsequent spaces below the body will be your sub-topics in the area indicated as summary.
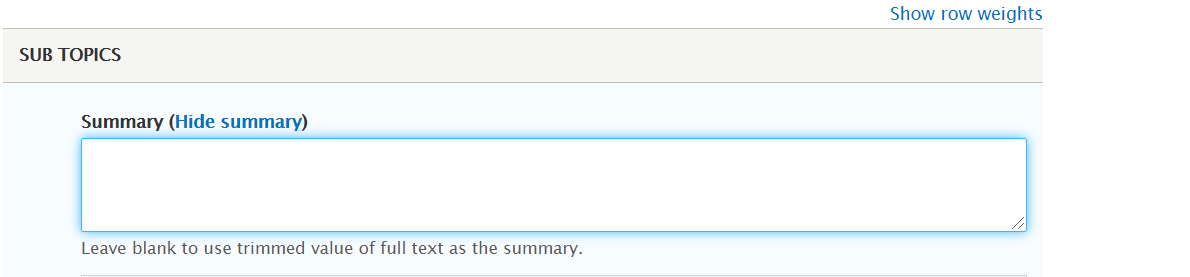
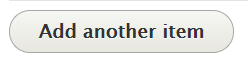
You will have ample areas to include additional sub-topics if you scroll down to the end and click on ‘add another item’
Before moving content into the CMS, it will most likely be in draft form in a word document, so there are a few shortcut keys which may be very helpful to you during the time you need to migrate everything online. Below are some of the basics you are most likely to utlise.
| Copy | Ctrl and C |
| Paste | Ctrl and V |
| Italics | Ctrl and I |
| Hyperlink | Ctrl and K |
| New page | Ctrl and N |
| Select all | Ctrl and A |
| Cut selected item | Ctrl and X |
| Lock screen | Ctrl, Alt and Delete |
Insert activity here.
Once all your content is all within your topic, this is your chance to make any modifications, check spelling or grammer, add suitable images and when you are ready you can work in source to add HTML (HTML coding is completely optional while you are learning).
Below I will include a short description of each of the symbols you see at the top of each box.

• Typographical emphasis- This is the strengthening of words in a text with a font in a different style e.g. B- Bold, I-Italics, S-Strikethrough.
• Text formats- You will be required to select an appropriate format ranging from normal and heading 1-6. As an LD you will apply only normal and heading 3 or 4 in most situations (this requirement may be subject to change at any point).
NB: Subtopic titles are converted to Heading 2, Topic titles are converted to Heading 1 (This is the largest font size)
• Superscript and Subscript- A subscript or superscript is a character (such as a number or letter) that is set slightly below or above the normal line of type. It is usually smaller than the rest of the text. Subscripts appear at or below the baseline, while superscripts are above. Subscripts and superscripts are perhaps most often used in formulas, mathematical expressions, and specifications of chemical compounds and isotopes, but have many other uses as well.
• Remove format- Sometimes when you paste content into the CMS, it might appear in a different format which doesn’t blend in. If you highlight the text and press on this button, all characteristics will change into the standard font you are working with.
• Bullet points/numbered lists- Typography symbols to introduce items in a list.
• Hyperlinks- This is a word, phrase, website or image that you can click on to jump to a new document, a new section within the current document or a specific website.
• Quotations- A quotation is the repetition of a sentence, phrase, or passage from speech or text that someone has verbally said or written. This specific selection will highlight the quote and place speech quotation marks around it so it stands out amongst the rest of the text.
• How to attach images- It is important to attach images as a file, do not copy and paste images into the CMS as the system in the background will not properly recognise it the source code.
When inserting an image into the CMS, there is a certain step to step process. See video and written steps below:
Video steps
Insert video here.
Written steps
- Insert images tab
- Select Upload
- Select add file
- Select an image to use
- Click on Open or Choose (depending if using Apple or Windows)
- Select image to apply to CMS
- Press ‘select’
• How to add videos-
When inserting an video’s into the CMS, there is a certain step to step process when copying it from Youtube. See video and written steps below:
Video steps
Written steps
- Locate the topic/subtopic you want to include video and press ‘source’
- Copy and paste snippet (below) where you want the video positioned
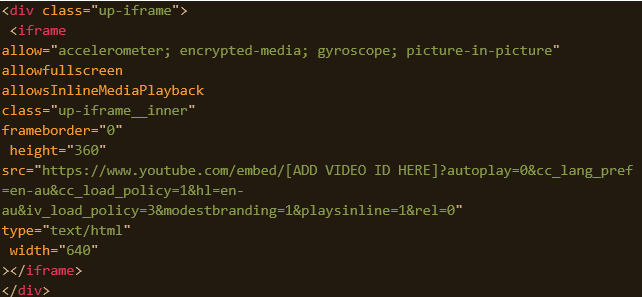
3. On another page, locate the video you want to use
4. Locate and copy unique ID (located in URL after equals sign, in the share URL and also in the iframe embed)
5. Paste unique ID into section of snippet, where it says [add video ID here]
6. Select source to get out of source
7. Great- your video should show immediately!
• Table- This is an arrangement of data in rows and columns. Once you click on the table icon, it will bring up a box where you can modify to suit your needs e.g. how many rows, and how many columns you want, headers, height, width, alignment etc. Generally, LD’s would only editing the number of columns and rows required.
• Source- This is for the LD who is comfortable with coding syntax and using HTLM coding. You might start off learning how to add a video (as described previously), and then build on that knowledge as you build your confidence with the system. Further learning will naturally unfold throughout your journey with UP!
Insert activity here.
How to revert to older versions 
There may be times when you will need to restore an older version of your work, or maybe it’s just to skim over anything you wanted to verify, whatever the reason you cannot break the system!
To revert a document or even just to check over your previous work, click on ‘revisions’ which is located very closely to the ‘edit’ button your pressed to make changes. Once you get to the revision page, it will have a list of different revisions which occurred for this topic. It should have the date and time of the changes, and the name of person who made the edits/amendments. If you want to view what it looks like before reverting, you can just click on the date and time on the far left first to have a good look through.
If you are happy to revert to another version, return back and over to the far right, you can click on ‘revert’
How to clone content
 Cloning is defined as a way to produce a copy or imitation. In some instances whether you need to repurpose, use content which may be helpful for another project (whatever reason) it will be useful to understand how to clone.
To clone, simply press ‘clone’ on the same bar as the ‘edit’ function and once changes are made, hit save- its that simple!
NB: The topic title for the clone will have ‘Clone of’ Infront of the original topic name, so it will be easy to differentiate between the original and clones e.g. Clone of Content Management System (CMS).
Re-ordering content on the CMS
![]()
When you are editing content in your topic, you might find that certain subtopics flow better in a specific way- this may require you to move them around. There will be a symbol (which looks like a cross with arrows on each end). Place your mouse over this symbol and drag it accordingly, it’s as simple as that!
Previewing and saving

I would encourage saving your work throughout the process of editing to ensure things do not get ‘lost in space’ It hasn’t exactly occurred, but that’s not to say it won’t ever.
A preview button also allows you to have a good read through everything without having to see all the back end options in edit mode. If you want to see how it looks from a student view, you will need to jump onto the Learning Management System (LMS) which will be discussed more in the following topic.
DID YOU KNOW?
A common misconception is that, in the student view you need to include the transfer protocol for the link to be valid, this is not true. Hypertext Transfer Protocol is not required when including web links.
Here is a corrected way to display links http://www.example.com.au
See video below for more information
Insert video here.
Insert activity here.
Using source for HTML coding
The best way to learn about coding is through action, so rather than explain it in text I will show you a little video with how it looks like in the CMS. It's important to select 'source' before attempting any of the below coding types following. It will not work if you apply it in the normal edit mode.
In my text which follows I show you an example of each different style and then place the code which you can use yourself when you are ready :-)
Check out the video below!
Insert video here.
In the last few pieces to wrap it up, I will be showing you some coding you could apply when making edits within the CMS.
Image place holder
If you are still yet to include your activities within the CMS, you can use a place holder in the activity area (like a bookmark) to ensure the spot is not missed when you need to go back in to add it in. See example below:
Insert activity here.
<div style="padding:24px;margin:24px 0;background-color:#fff;font-size:32px;font-weight:700;text-transform:uppercase">
<p>Insert activity here.</p>
</div>
Borders
Borders create a line around the area which assists specific information to stand out among the rest.
Here is an example within the CMS:

<div style="padding: 1.5rem; border: 0.0625rem solid rgba(0, 0, 9, 0.09); border-radius: 0.25rem; margin: 1.5rem 0; background-color: #fff; font-style: italic;"><!-- Job ads go here -->
</div>
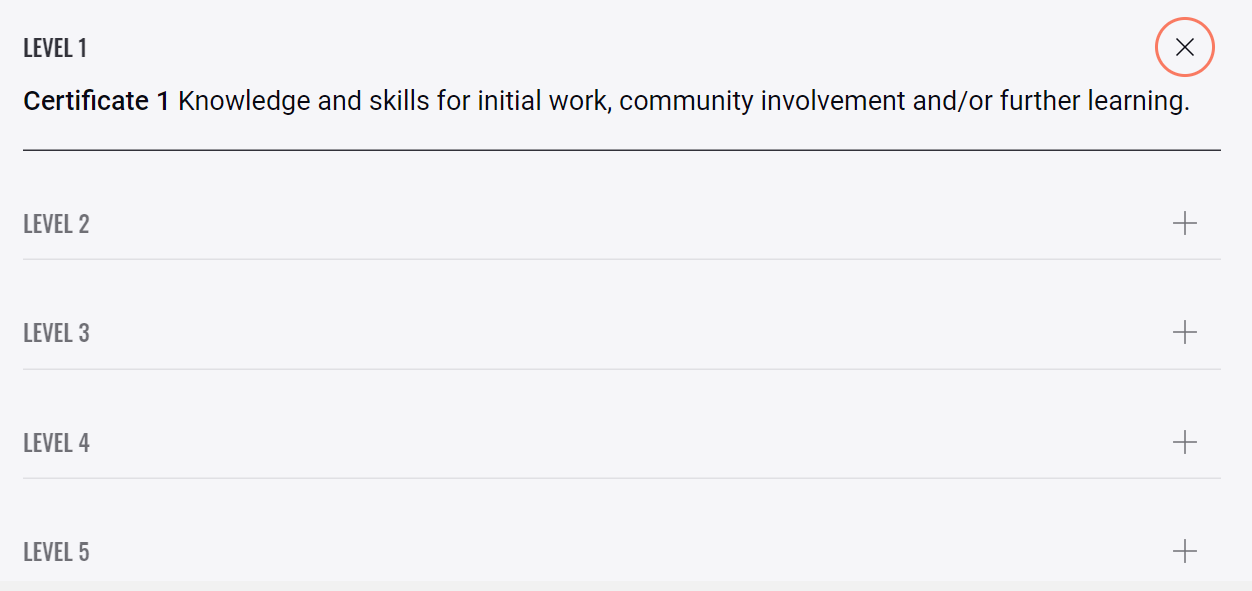
Accordion (UpDS v0.1.0 AKA ‘Elvis’)
The function is similar to a drop down selection. Ideally you should have a range of information for this to function at it's best.
Check out this video for a quick tutorial:
Here is an example within the CMS:
<div class="up-accordion"> <button aria-expanded="false" class="up-accordion__btn" role="button"> <span class="up-accordion__label"> <!-- *** ADD YOUR ACCORDION LABEL BELOW THIS LINE *** --> </span> <svg aria-hidden="true" class="up-accordion__icon up-icon" height="64px" viewBox="0 0 64 64" version="1.1" width="64px" xmlns="http://www.w3.org/2000/svg" xmlns:xlink="http://www.w3.org/1999/xlink"> <defs> <mask class="up-icon__mask"> <rect class="up-icon__mask up-icon__mask--visible" height="64" width="64" x="0" y="0" /> <circle class="up-icon__mask up-icon__mask--hidden" cx="32" cy="32" r="18" /> </mask> </defs> <circle class="up-icon__tint" cx="32" cy="32" r="20" /> <g class="up-icon__strokes"> <line class="up-icon__stroke" x1="32" y1="24.5" x2="32" y2="39.5" /> <line class="up-icon__stroke" x1="24.5" y1="32" x2="39.5" y2="32" /> </g> </svg> </button> <div class="up-accordion__inner"> <!-- *** ADD YOUR ACCORDION CONTENT BELOW THIS LINE *** --> </div> </div>
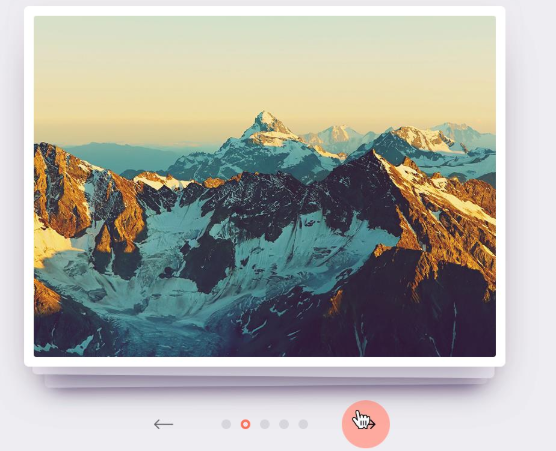
Image Sliders (UpDS v0.2.0 AKA ‘Moon Landing’)
Image sliders allow the LD to have a range of photo's for a specific area of content. The student is able to flick through a varied choice of images.
Here is an example within the CMS:
<div class="up-img up-img--slider up-img--16x9">
<span class="up-img__number" unselectable="on"><strong class="up-strong">1</strong> of <strong class="up-strong">12</strong></span>
<div class="up-img__outer">
<div class="up-img__inner">
<!--
INCLUDE THE BELOW PATTERN ONCE PER IMAGE, THEN ADD IMAGE ALT TEXT AND SOURCE
<div class="up-img__slide">
<div aria-label="ADD IMAGE ALT TEXT HERE" class="up-img__src" data-background-color="#ededf0" data-src="https://cms-lucent.baseux.com[ADD IMAGE SOURCE HERE]" role="img"></div>
</div>
-->
</div>
</div>
<div class="up-img__controls">
<button class="up-img__btn up-img__btn--prev" role="button" title="Previous">
<svg aria-hidden="true" class="up-img__icon up-icon" height="64px" viewBox="0 0 64 64" version="1.1" width="64px" xmlns="http://www.w3.org/2000/svg" xmlns:xlink="http://www.w3.org/1999/xlink">
<defs>
<mask class="up-icon__mask">
<rect class="up-icon__mask up-icon__mask--visible" height="64" width="64" x="0" y="0" />
<circle class="up-icon__mask up-icon__mask--hidden" cx="32" cy="32" r="18" />
</mask>
</defs>
<circle class="up-icon__tint" cx="32" cy="32" r="20" />
<g class="up-icon__strokes">
<polyline class="up-icon__stroke" points="28 28.5 24.5 32 28 35.5" />
<line class="up-icon__stroke" x1="24.5" y1="32" x2="39.5" y2="32" />
</g>
</svg>
</button>
<div class="up-img__list"></div>
<button class="up-img__btn up-img__btn--next" role="button" title="Next">
<svg aria-hidden="true" class="up-img__icon up-icon" height="64px" viewBox="0 0 64 64" version="1.1" width="64px" xmlns="http://www.w3.org/2000/svg" xmlns:xlink="http://www.w3.org/1999/xlink">
<defs>
<mask class="up-icon__mask">
<rect class="up-icon__mask up-icon__mask--visible" height="64" width="64" x="0" y="0" />
<circle class="up-icon__mask up-icon__mask--hidden" cx="32" cy="32" r="18" />
</mask>
</defs>
<circle class="up-icon__tint" cx="32" cy="32" r="20" />
<g class="up-icon__strokes">
<polyline class="up-icon__stroke" points="36 28.5 39.5 32 36 35.5" />
<line class="up-icon__stroke" x1="24.5" y1="32" x2="39.5" y2="32" />
</g>
</svg>
</button>
</div>
</div>
Quotation marks
This is a quote
This is rarely required, but it is available in case there is a malfunction with the quotations function not working.
<!-- For quotes with < 100 characters -->
<div class="up-blockquote">
<blockquote class="up-blockquote__quote">ADD QUOTE HERE</blockquote>
<cite class="up-blockquote__citation">ADD CITATION HERE</cite>
</div>
<!-- For quotes with > 100 characters -->
<div class="up-blockquote up-blockquote--compact">
<blockquote class="up-blockquote__quote">ADD QUOTE HERE</blockquote>
<cite class="up-blockquote__citation">ADD CITATION HERE</cite>
</div>
Child List
A child list is basically when you want to include points under a parent list, and it does not directly align. From my example below, it hasn't appeared how I would have liked, but it should ideally form an indent.
1. Parent list
Move to next line and press ‘tab’ to create indent (e.g. below)
- Child list
- Child list
Press shift + tab to revert to parent list (e.g. below)
- Parent list
OR in source mode, you can apply it like so:
- <ol>
- <li> List item
- <ul>
- <li>Child list item</li>
- <li>Child list item</li>
- </ul>
- </li>
- <li>List item</li>
- <li>List item</li>
- </ol>
Check out this video for a quick tutorial:
Insert video here.