So, you’ve got your morning coffee, settled at your desk, fired up your laptop…what’s the first thing you open? Likely Outlook, then Teams or visa versa. It would also be great if you could get in the habit of opening Asana (and Sharepoint). Asana is your go-to place for the progress of your course build.
Asana is a collaborative project management tool that the Course Development and Digital Design teams use for smooth, efficient, and timely course builds. In a nutshell, it’s how to keep track of projects, assign and complete task, and earn some unicorns!
So, what's it all about?
Firstly, you'll read through the basics of navigating, then we will do some face-to-face training on how we use Asana here at UP.
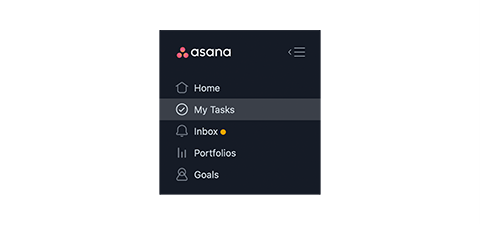
Think of Asana as a fancy to-do list, where you can keep yourself and your projects organised. You can get started navigating through Asana by using the menu items on the left, here you will see:
- Home
- My Tasks
- Inbox
- Portfolios
- Goals (we're not using this feature just yet)
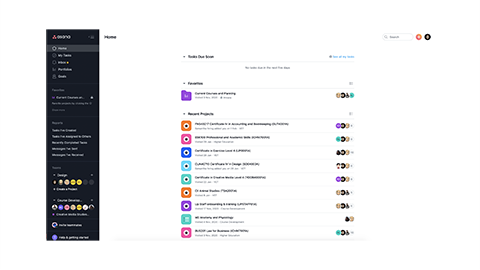
This is where you will land each time you start up a new Asana session. On this page your most important projects will appear, so you don’t have to search for them each time.
The structure has been separated into three areas:
| Tasks Due Soon | This shows you, in chronological order, which of your tasks are due for completion within the next 5 days. |
|---|---|
| Favorites | These are the projects or portfolios which you have marked as favorite. |
| Recent Projects | These are the projects which you have recently viewed. Nothing can be removed from this view, but it will be constantly changing as you work across different projects. |
To access your favorites or recently visited, simply click the tile or list item and you will be taken to that project.
But wait…Favorites, how do I do that?
Let’s start with the elephant in the room – Favorite. My fingers type it wrong each time but it’s to keep consistency with the Asana labeling.
To make a favorite, search for and select the project or portfolio and click the star icon next to the title. Easy, now it will appear on the sidebar and also on your homepage.

Next, you’ll see My Tasks, these are tasks that have been assigned to you to complete. Unlike Tasks Due Soon on the Home page, which is what’s coming up in the next 5 days, My Tasks have been prioritised into four sections to help you stay organised.
| Recently assigned | By default, this is where any task assigned to you will appear. From here you can move them to other sections to help keep you on track. |
|---|---|
| Today | This is where you can put the tasks you are working on today. |
| Upcoming | This section is good to use for tasks you will be working on this week. |
| Later | Use this section for tasks to be worked on next week and beyond. |
Just like an accordion the Today, Upcoming and Later sections are all collapsible, to help keep you on track and focussed. As priorities change, the tasks can be drag ’n dropped between the sections. Also, if these titles don't gel with how you personally like to work, you can change them to reflect your workflow better.
My Tasks doesn’t need to link with the Due Dates of projects. This section is for your planning, they are tasks for you to complete to achieve the project outcomes.
Continuing down we get to your Inbox, this is a super important menu item as it is where all your Asana notifications will appear including:
- Updates on projects of which you are a member
- Tasks which you are a collaborator, and
- Tasks that are assigned to you.
Tasks you assign to yourself will not appear here, they appear in My Tasks. The Inbox shows updates done by other team members.
When you click on Inbox a window will open consisting of a left and right pane.
The left pane shows all items in your inbox, appearing in order with the most recent at the top. This is also where you can mark the task as a follow-up, make it unread, send to archive, or give it a thumbs up.
When you click on the notification on the left, it will display the full detail in the right pane.
Quick tip
To stop your inbox from becoming a complete blur, it's a great idea to archive your messages. You can do this as you go or in one bulk archive.
To archive as you go, click on your Inbox and select the filing cabinet icon.

To bulk archive your entire Inbox, click the meatball icon and select Archive all.

Also, see the orange dot against the Inbox menu list, this shows that there is a new notification waiting for your attention.
While getting used to working in Asana it would be a good idea to turn on your Outlook email notifications, so you are aware when something has arrived in your Asana Inbox and needs your attention. These can be disabled once you’re more familiar and checking your Asana Inbox comes more naturally.
Turn on notifications from your Inbox by clicking the meatball menu and choosing Manage notifications.

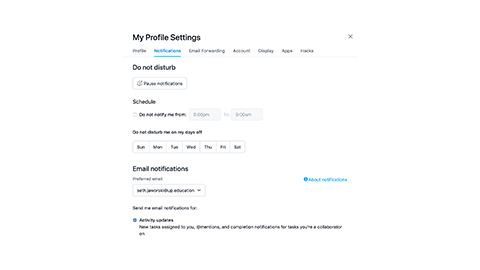
This will take you to your profile settings, where you can set up which updates you would like to receive:
| Activity updates |
Various actions would trigger this notification, such as:
|
|---|---|
| Daily summaries |
This will be a summary of which tasks have been recently assigned to you and which tasks you have due soon (within the next 5 days). |
| Weekly summaries |
These are the status updates for projects within Portfolios. |
A Portfolio is where you can view all important projects in one place. Specifically, you will be able to see all the projects for each school/enterprise. For example, there are Portfolios for ICB, NZMA, and Yoobee – a few of the schools we are currently developing courses for.
By making a Portfolio a favorite, it will appear on this page. When the specific Portfolio is opened you will be able to access all the projects or courses which you are a collaborator on.

Portfolios
This view is where we can get a high-level view of how the course build is tracking.
| Name | This is the name of the course or subject currently being developed. |
|---|---|
| Status | Detailed status updates are provided weekly. This view shows at a glance if the status is on track or at risk. |
| Task progress | As tasks are completed, it will track this by percentage. |
| Date | This is the start and end date of the whole project. |
| Team | This shows if we are working on this project fully in-house or in collaboration with an external team. |
| Partner | Which partner is this course being built for. |
| Owner | This will be the Lead LD on this specific project. |
Projects
Let's check out the UP specific view on the project main page:
| Task name | This is actually the development lifecycle. |
|---|---|
| Module # | As the name suggests, this is the module number being worked on. |
| Assignee | This is who will complete the task. |
| Due date | The date which the task is due for completion. Following consultation, the Head of Course Development and Course Production Manager will determine the overall start and end dates. |
| Stage - Learning | This is a drop-down menu to be a visual representation to show the stage of development for learning. |
| Stage - Assessment | Same as above, showing a visual representation of to show the stage of development for assessment. |
A note on Assignee: Only one person can be assigned a task, so it is always clear who is responsible for completing it. Tasks can be reassigned as much as needed, but the person doing the work must be the one that it is assigned to at the time.
Development lifecycle
Below is the structure of the course build lifecycle:
| Task name | Description | Assignee |
|---|---|---|
| Course development | What needs to happen to get the project up and running. |
|
| Course overview development | An overview is written for the whole course. |
|
|
Unit of Competency - code and name |
Shown at a module level with subtasks for:
|
|
As mentioned above, the task name has been built per module, using the UoC code and name. Within each module is a detailed checklist of subtasks. These subtasks can be ticked off as each is completed.
Please do not add any additional tasks or subtasks to these first 3 levels - Task name > Task > Subtask. Additional items you would like to remember to do can be added from level 4.
The structure has been set up in the above simple workflow.
When the Asana structure is built, all tasks will be sitting in To do. They will stay here until you start working on it, at which stage you'll move it to In progress. You will keep working through each of the subtasks, assigning them to other stakeholders as required, and ticking them off as they are completed.
When the task is 100% done, tick the whole task as complete and maybe get a unicorn!
Ahead of sending topics to Digital review, the LD needs to ensure that their content is as close to complete as possible. A spelling correction here or grammar fixup there is ok, but a whole new paragraph, image swap outs, or extensive change is a no-no. Once the topic comes back from digital, where feasible, your bespoke requests have been built, images sourced and finalised, the source code is perfect, and it will scale beautifully across all devices.
Process for adding Digital assets
- Insert your Shutterstock/Unsplashed images or screenshots of the images, tables, diagrams etc. into your storyboard. When it is migrated, the image will show in the LMS, so digital will see where the items are located.
- An image, table, diagram, etc which needs specific amendments to the content, layout, or format should be added into a comment in Asana for the specific topic. Into the Digital production task in Asana, add the screenshot to the comments and write the specific work required. When the Digital Producer sees the image in the LMS and Asana, they will know the work required.
It is only necessary to comment and screenshot when specific changes are to be made. There is no need to comment if:
- it needs licensing
- it needs to be rebranded to suit the UP style
- you're unsure of the quality or appropriateness
- you're unsure if the size is correct
The Digital Producer will know what to do with all of the above.
One last point when choosing Shutterstock or Unsplash images, it is only necessary to put in one option to be migrated with your storyboard. Pick the one you think is most appropriate and go with it (unless you are requesting an image slider that needs multiple images included).
Hot tip
Have Asana open at the same time as you're storyboarding. You can drop the image and comment directly into Asana (removing the need to comment in the storyboard altogether). At this point, the Asana ticket won't yet be assigned to a Digital Producer, so your requests will be parked until this changes.
Ready for Digital review
When your storyboard has been migrated, and you've done your final review, the parent Digital review task is then ready to be assigned to Daniel Maddison.
You will know your review has been completed when the Digital team marks the task as complete.
Digital sign off as complete, assuming the LD will be happy with it. If there is any rework to request, the LD can flick it back out of complete and comment in the task what they would like to open a discussion about.
Just a quick recap on the overall structure:
| Asana | UP | Example |
|---|---|---|
| Portfolio | Enterprise Level/School | NZIS |
| Project | Whole course | Certificate in Exercise Level 4 |
| Section | Progress | To Do, In Progress, Complete |
| Tasks | Course/Subject build | Course development, Module UoC name |
| Subtasks | Steps of the build | Learning development, Assessment development, Digital review |

Asana is the source of truth and our go-to place for the status of projects. The Head of Course Development and Course Production Manager regularly refer to Asana for the progress of projects, reporting to Executives and external Stakeholders on their progress, and the alignment to release schedules.
For this reason, it's important to keep Asana task and subtask progress up to date. When you start working on it, move to In Progress. If a subtask is being worked on by a colleague, assign it across to them. When a subtask is complete, tick it off as done.
There are a few other reasons, also, why we find these status updates important.
We would like you to be able to focus on your work, on your writing, on your creativity. Therefore, the information provided in these updates will lead to fewer questions we will have for you or your team, meaning less interruption.
Also, for the Head of Course Development, it shows a high level of professionalism when able to promptly reply to an Exec or stakeholder when asked for a progression update.
Status updates are provided weekly, currently, they are written by the Lead LD (or designated team member) and posted by the close of business each Wednesday.
Writing a great status update shouldn't be overly time-consuming. You will need to write the summary and specifics of what has been worked on, and it is also possible to set up a template so each week it will be there for you to drop in stats from the past week.
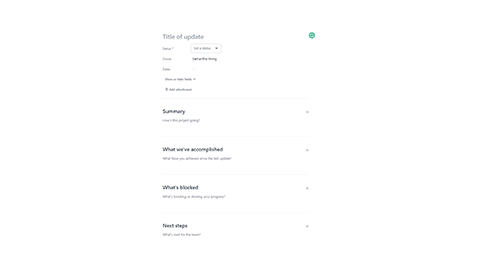
Let's take a closer look at the Asana structure and headings to use in your template.
| Title of update | This will automatically populate as Status Update - Date |
|---|---|
| Status |
The traffic light coding system is a great visual to show if a project is on track or not:
|
| Owner | Automatically populates to who the owner of the project is. |
| Dates | You will need to input the date range of that weeks' update. |
| Summary | Here is where you give a snapshot of what the team has been working on for the past week. |
| What we've accomplished | Here you can write a summary of the achievements of your team over the past week. Along with the written summary, utilise the Highlights section to drag and drop visuals into your update. Use Incompleted tasks by section, which to start with may just look like a lot of incomplete tasks but as the project progresses more and more will show completed on the graph. Also Completed tasks, is a great way to show whole tasks that have been completed (Just be aware that tasks, not subtasks will show here). |
| What's blocked | If there is anything that is a roadblock to your progress it is important to document it here. Alerting to issues as they arise means they can be dealt with accordingly. |
| Next steps | What is coming up for the team this coming week. |
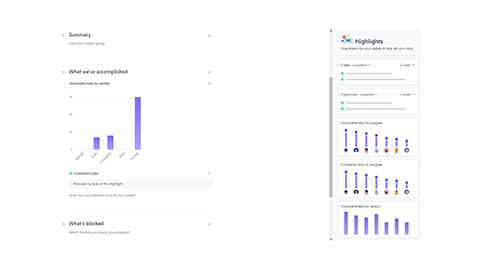
Remember you don't need to get caught up in too much detail. It is a summary of what has been completed, what is coming up, and if there are any blockers. Keeping everyone in the loop of how you are tracking and ensuring our Head of Course Development is ready to answer any questions sent her way.

