Who does not want a good set of abs? In this topic, we concentrate on the core (trunk) body. You will learn how to teach clients specific exercises:
- Abdominal curls (crunches)
- Oblique curls
- Reverse curls
- Back extensions.
Terminology and vocabulary reference guide
As an allied health professional, you need to be familiar with terms associated with basic exercise principles and use the terms accurately (and confidently) with clients, your colleagues, and other allied health professionals. You will be introduced to many terms and definitions. Add any unfamiliar terms to your own vocabulary reference guide.
Activities
There are several practical activities in the topic and an end of topic automated quiz. These are not part of your assessment but will provide practical experience to help you in your work and help you prepare for your formal assessment.
You will study images of each exercise and read the information on the major muscles, the equipment options, and the key coaching points and steps. You may wish to refer back to the following illustrations as you review each exercise. It is important you become comfortable with these aspects of the exercises, in a sense this information is the why, where, when, how of training. The more comfortable you become the more comfortable you will be able to make your clients when working with you.
As you describe these exercises time and time again (which you will) you will develop your own spin which works for you but, first, become comfortable with the following information. Practice, practice!
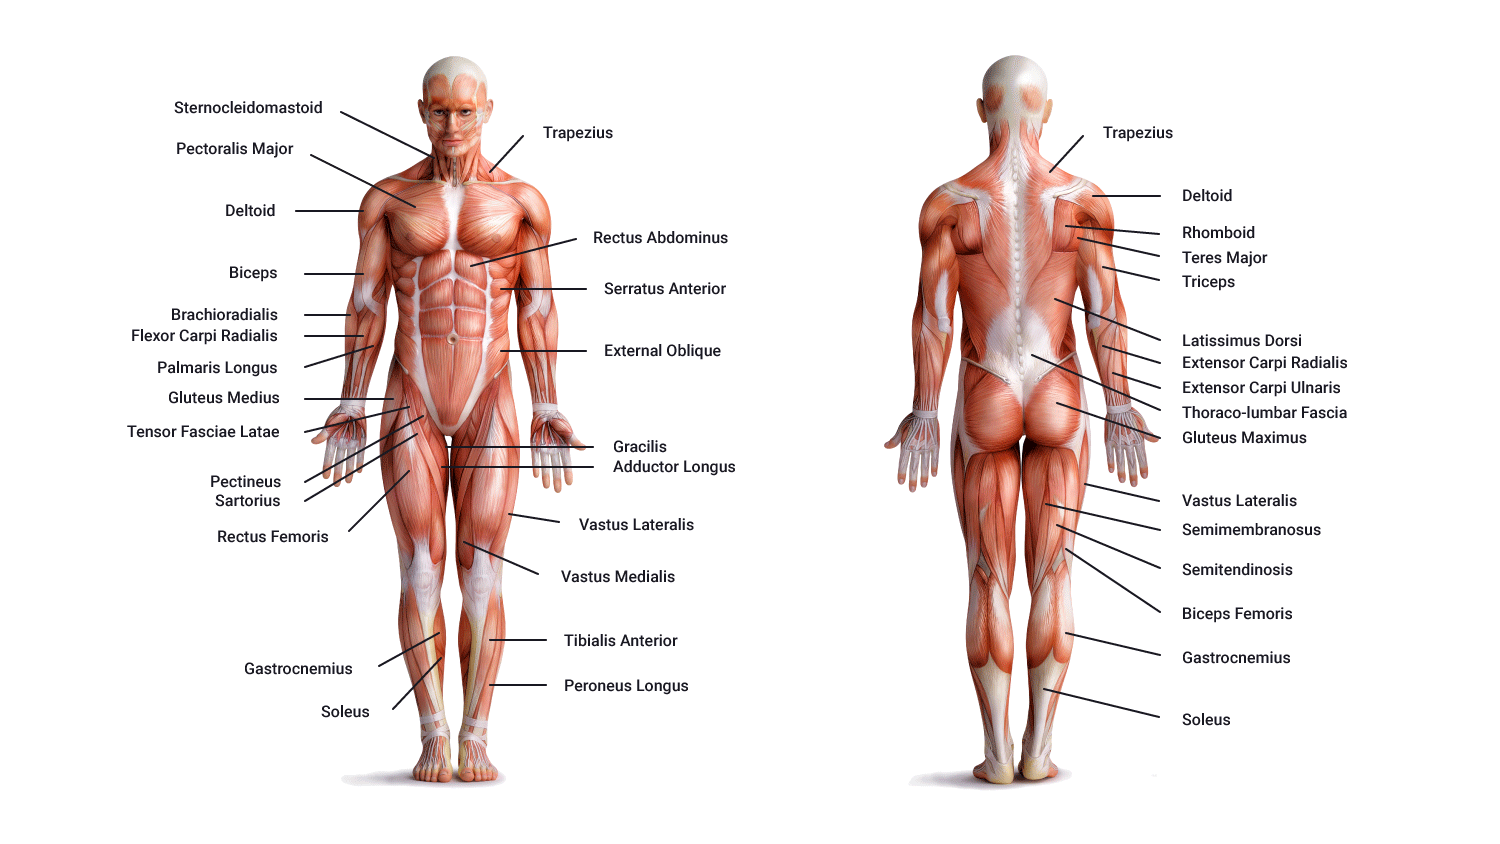
Illustration of the anterior (front) and posterior (back) views of the human body and main muscles
Before we get onto the exercises, let's look at some of the equipment that is commonly used.
Equipment you will probably use includes the following:
Before we look at each exercise and their specifics, let's first look at training posture. Having an awareness of our posture when we are training will lead to safe and effective exercising. This means, our bones, muscles, and joints should ideally be in their 'happy place' for optimal movement/stability/function and support.
Training posture can be described as having specific characteristics:
- Chin 'tucked in' being mindful of the cervical portion of the spine-retraction of the head. This will straighten the neck region.
- Eyes are looking straight ahead.
- Shoulders are 'back and down' (removing the rounded/shrugged shoulder posture and pulling out shoulder blades back into 'anatomical position'). This would be retraction and depression of the clavicles and scapula.
- Engage/activate the core. This is important for 'good/safe posture' when exercising as it stabilises the hips and supports the lower back along with giving the tummy muscles a 'wake up'.
- Neutral pelvis. This is important for good/safe posture' when exercising as it stabilises the hips and supports the lower back. See the image below which illustrates the neutral pelvis.
- Feet hip-width apart (typically ankles are in line with the ball and socket region of the hips). Note: This will be modified in some exercises where the shoulder-width distance of the feet is more appropriate for the exercise being performed.
- Knees in line with hips (ball and socket region) and approximately in line with middle toe.
- Feet pointing forward.
As a trainer, encourage your client to think about these points as they are performing the exercises. Some ways to activate the core include drawing in the belly button (sucking it in) as you would when on the beach and an attractive man/woman walks past (we all do it). This is also a handy way to describe this action to your client because using descriptors such as 'Activate your transverse abdominus' or 'Engage your core' will mean something to your colleagues but likely mean very little to your average client! Therefore, translating this into everyday words and something we can all relate to helps your client understands what you are asking of them (it will also ensure that when they train in their own time, they are doing it safely).
Neutral pelvis

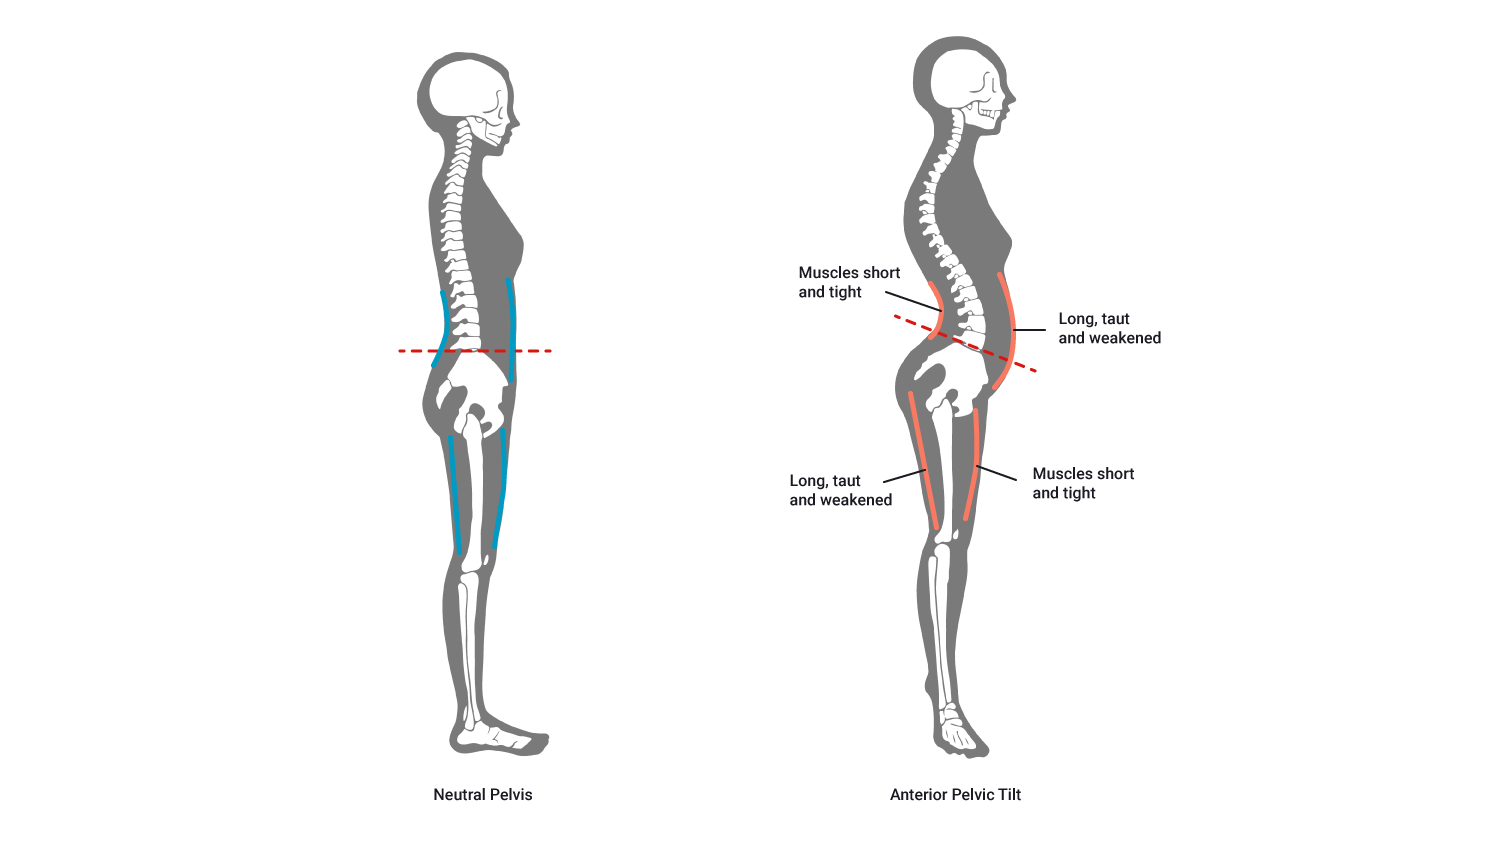
Neutral pelvis acts to ensure the posture of the lower region of the spine (lumbar and sacrum) and in their anatomical alignment, removing any 'poor posture' and ensuring the spine is efficient and safely aligned prior to and during exercise. When training, neutral pelvis can be tricky to maintain, particularly when getting tired. With this in mind, it is important to do a mental checklist of all the training posture points during an exercise and particularly between each repetition. This will soon become unconscious behaviour however in the early days, it is important to mentally run through the checklist and review each area of the body to assess if training posture is intact.
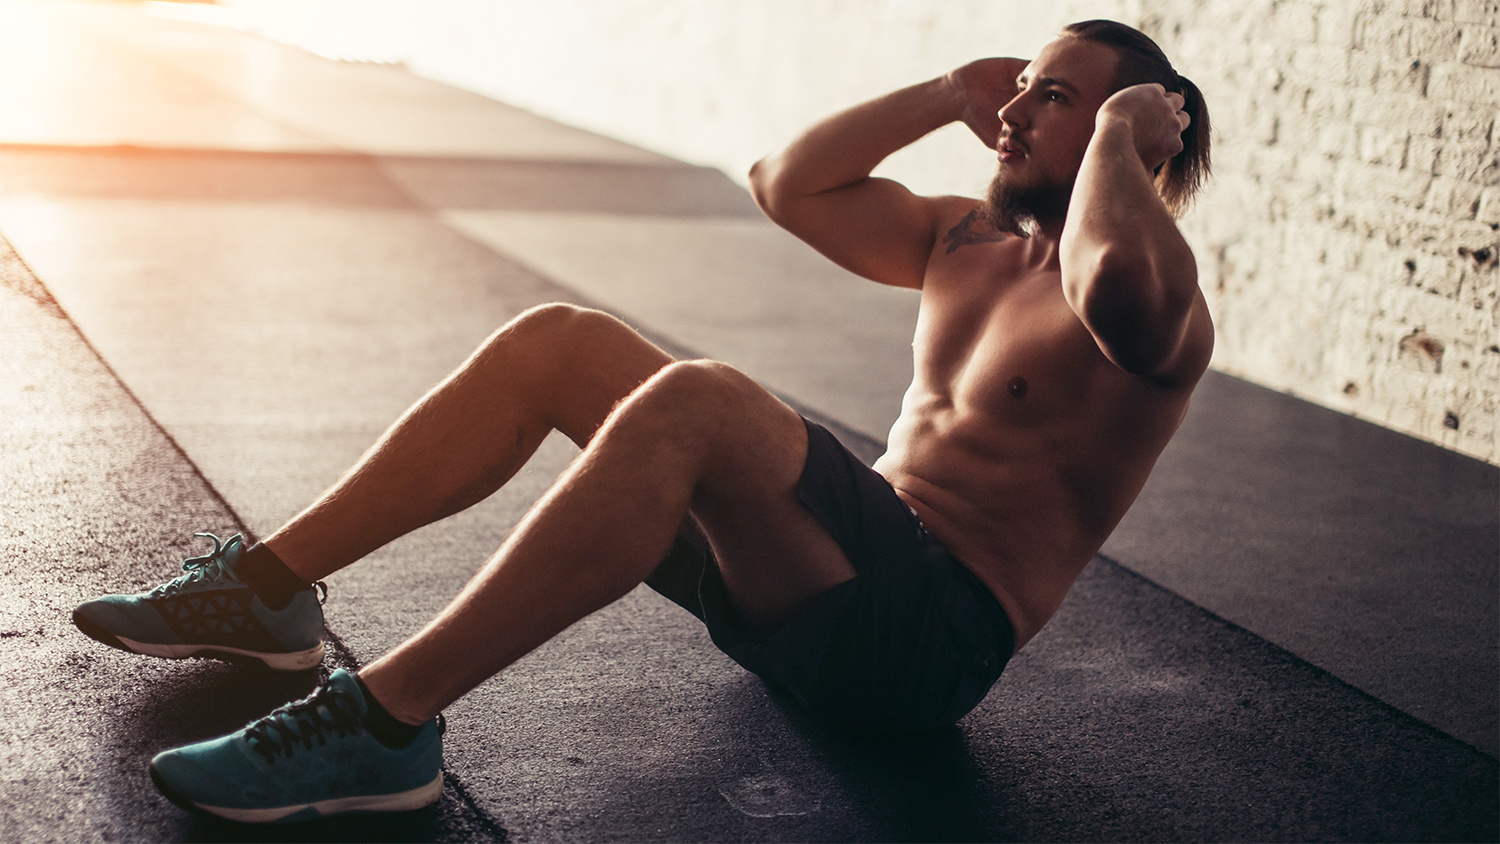
Abdominal crunches

View of sit-up
The following table provides information on the major muscles, variations, and equipment options.
| Major muscles | Variations/progressions | Equipment options |
|---|---|---|
| Rectus Abdominus |
Hands at side Hands crossed on chest One hand up Full sit up vs crunch Feet elevated |
Floor Machine Swiss ball BOS |
Key coaching points and steps
Ensure training posture is in place.
- For the crunch, just shoulders and upper back leave the ground.
- Do not put hands behind the head as you will pull with arms and flex the neck, rather, place fingers on temples on the side of the head.
- For full sit up, with fingers on temples, raise the upper body up away from the ground with fingers on temples and aiming to touch the thighs with the elbows.
- Ensure the spine leaves the floor, vertebrae by vertebrae rather than as one solid, straight-backed movement.
- Perform controlled movements up and down.
Notes
- Extending arms forward makes this easier for beginners.
- Having partner hold feet makes this easier.
- Working on an incline bench makes this exercise harder.
Standing abdominal/oblique twist
The following table provides information on the major muscles, variations, and equipment options.
| Major muscles | Variations/progressions | Equipment options |
|---|---|---|
|
Rectus abdominus Internal obliques External obliques |
Hands on side of head Foot up on the opposite knee One arm on the floor Both feet raised |
N/A |
Key coaching points and steps
Oblique Curl (supine)
- In the supine position (laying face up) adopt training posture (shoulders back and down, core engaged, chin tuck, and feet hip-distance apart).
- Place hands on the side of the head (do not place them behind the head/neck at risk of pulling on the neck) with elbows bent.
- Inhale, raining the spine vertebra by vertebra (think of peeling the spine off the floor vertebra by vertebra or bone by bone).
- As you progress towards the seated position, take your right elbow in the direction of the left knee (try and touch if possible).
- Exhale as you come to a seated position (or as close as possible).
- Lower the upper body, vertebra by vertebra in a controlled movement back towards the floor.
- Review your training posture, adjust as appropriate before the next repetition.
Variations of this exercise include:
- a single elbow to knee touch per repetition
- a double elbow to knee touch per rep (right elbow to the left knee and left elbow to right knee)
- holding a weight such as a medicine ball or barbell plate
- performing the movement with legs raised (advanced).

The following table provides information on the major muscles, variations, and equipment options.
| Major muscles | Variations/progressions | Equipment options |
|---|---|---|
|
Rectus abdominus Transverse Abdominus |
Up and twist |
N/A |
Key coaching points and steps
- Lie on back with legs elevated straight up and arms supporting alongside your body.
- Adopt training posture.
- Lift only just the buttocks and lower back off the ground (aim to use hands/arms to balance not to push buttock up off the floor.)
- Maintain training posture during exercise. Begin with this stage and when appropriate, attempt the more advanced version shown in the image where more of the torso leaves the floor.
- Review training posture and adjust where required before the next repetition.
The following table provides information on the major muscles, variations, and equipment options.
| Major muscles | Variations/progressions | Equipment options |
|---|---|---|
|
Erector spinae |
On the floor (hands on head or by sides), machine, on a bench, on Swiss ball or BOSU, alternate arm and leg. Adding a barbell plate, dumbbell, or medicine ball. |
N/A |
Key coaching points and steps
- Adopt training posture including hands placed on the side of the head or across chest where applicable (typically bench based extension exercises).
- Inhale and lift chest away from the surface (bench or floor). Begin with shoulders first, then vertebra by vertebra lift the remainder of your torso.
- Exhale as you gently and steadily raise your torso as far as comfortably possible.
- Gently and steadily lower your torso back towards the floor, vertebra by vertebra in the opposite order (that is, the lumbar region of the torso to thoracic).
- Review training posture and adjust where required before the next repetition.
In this topic, we concentrated on the core (trunk) body. You learnt how to teach clients specific exercises:
- Abdominal curls (crunches)
- Oblique curls
- Reverse curls
- Back extensions.