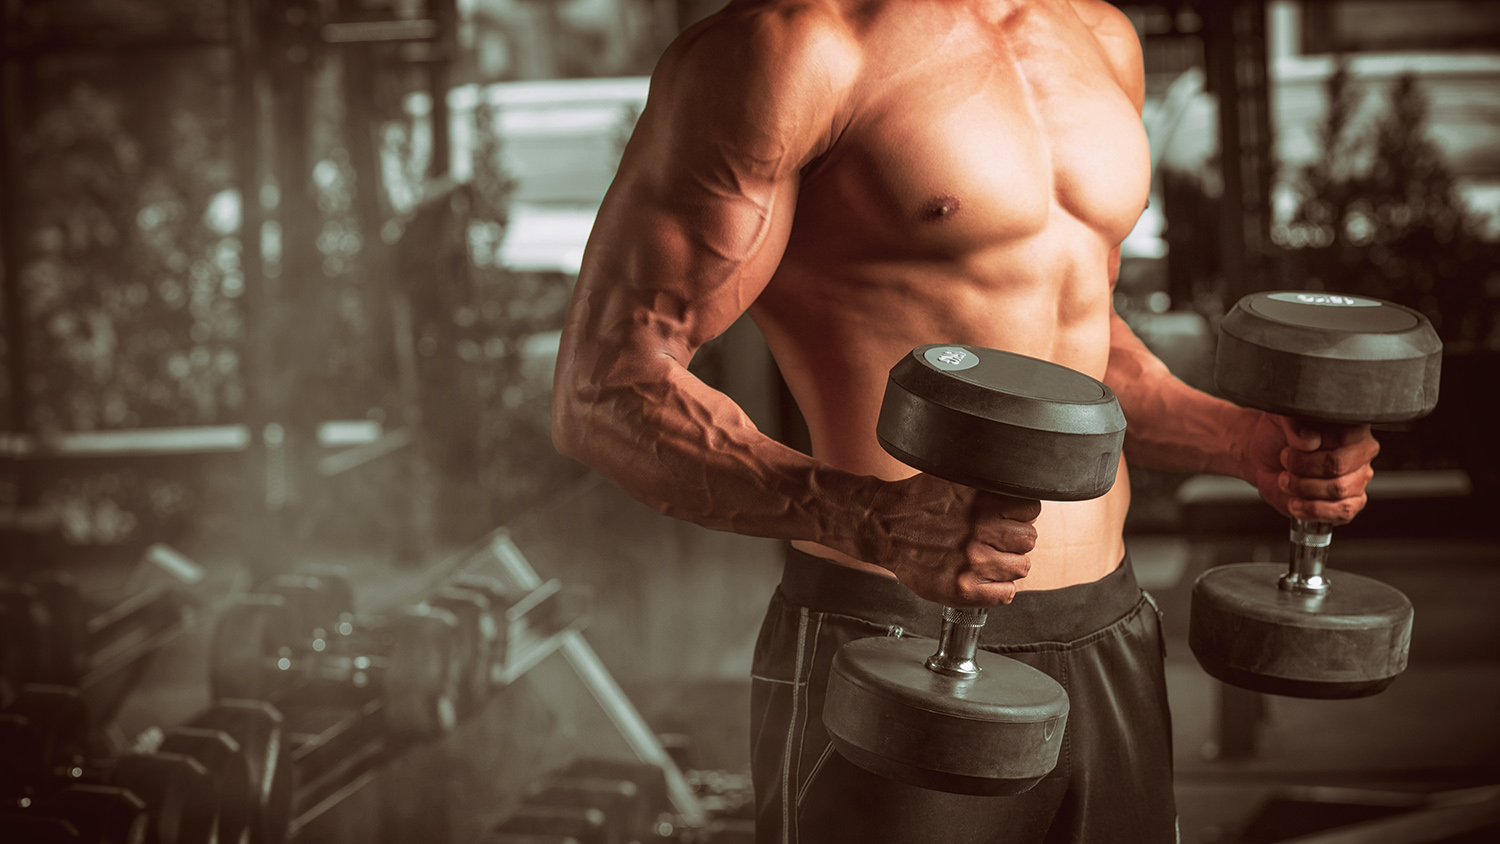
Healthy arms are critical to our wellbeing and ability to perform routine activities. In this topic, we concentrate on arm strength. You will learn how to perform and teach clients specific exercises:
- Biceps curls
- Triceps extension
- Triceps kickback
- Triceps push down
- Dips
- Forearm curls.
Terminology and vocabulary reference guide
As an allied health professional, you need to be familiar with terms associated with basic exercise principles and use the terms accurately (and confidently) with clients, your colleagues, and other allied health professionals. You will be introduced to many terms and definitions. Add any unfamiliar terms to your own vocabulary reference guide.
Activities
There are several practical activities in the topic and an end of topic automated quiz. These are not part of your assessment but will provide practical experience to help you in your work and help you prepare for your formal assessment
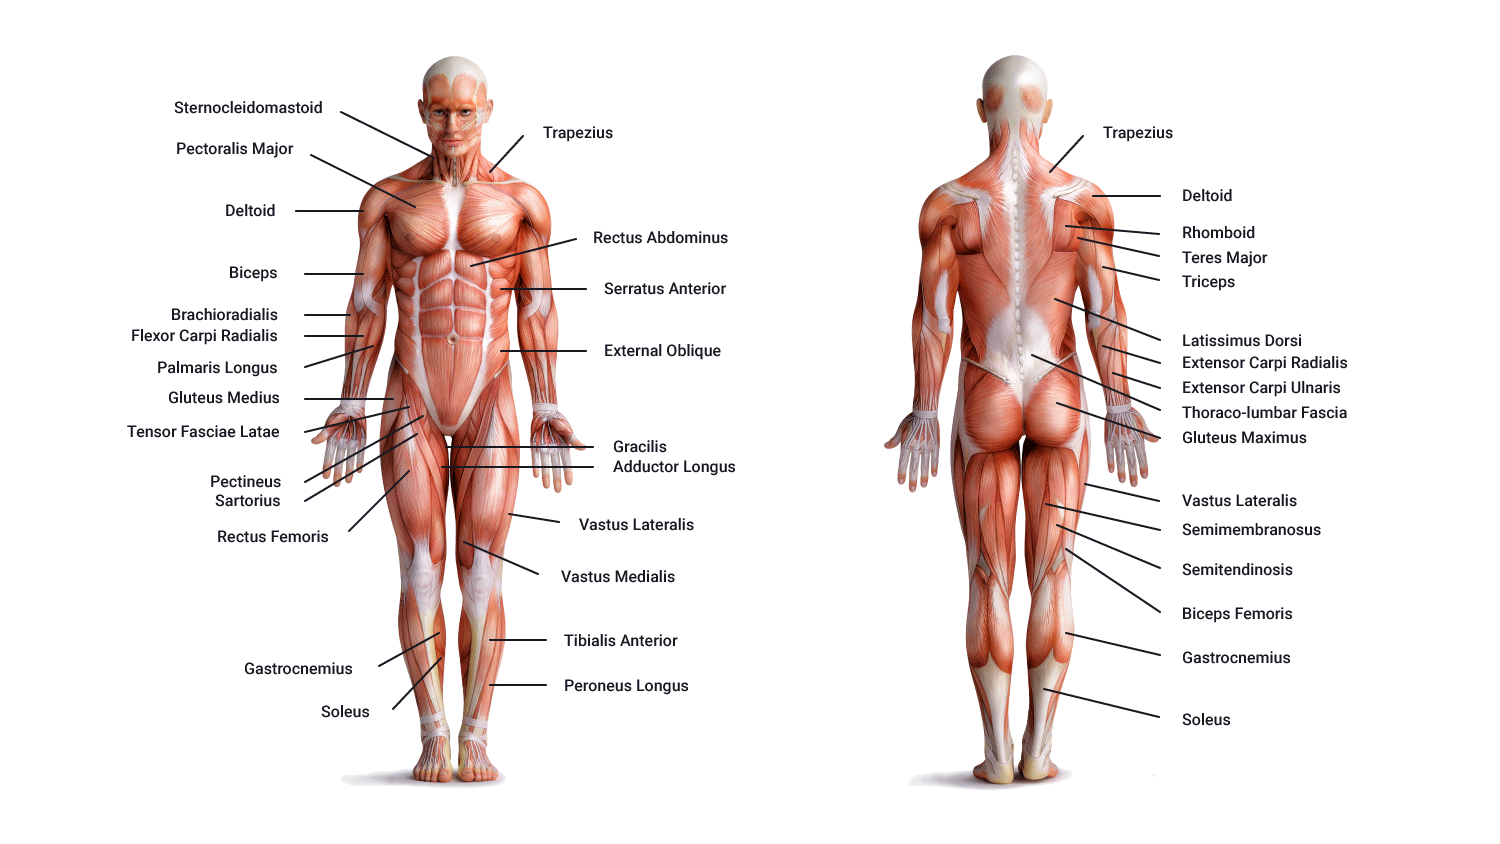
You will study images of each exercise and read the information on the major muscles, the equipment options, and the key coaching points and steps. You may wish to refer back to the following illustrations as you review each exercise. It is important you become comfortable with these aspects of the exercises, in a sense this information is the why, where, when, how of training. The more comfortable you become the more comfortable you will be able to make your clients when working with you.
As you describe these exercises time and time again (which you will) you will develop your own spin which works for you but first, become comfortable with the following information. Practice, practice!
Before we get onto the exercises, let's look at some of the equipment that is commonly used.
Equipment you will probably use includes the following:
Before we look at each exercise and their specifics, let's first look at training posture. Having an awareness of our posture when we are training will lead to safe and effective exercising. This means, our bones, muscles, and joints should ideally be in their 'happy place' for optimal movement/stability/function and support.
Training posture can be described as having specific characteristics:
- Chin 'tucked in' being mindful of the cervical portion of the spine-retraction of the head. This will straighten the neck region.
- Eyes are looking straight ahead.
- Shoulders are 'back and down' (removing the rounded/shrugged shoulder posture and pulling out shoulder blades back into 'anatomical position'). This would be retraction and depression of the clavicles and scapula.
- Engage/activate the core. This is important for 'good/safe posture' when exercising as it stabilises the hips and supports the lower back along with giving the tummy muscles a 'wake up'.
- Neutral pelvis. This is important for good/safe posture' when exercising as it stabilises the hips and supports the lower back. See the image below which illustrates the neutral pelvis.
- Feet hip-width apart (typically ankles are in line with the ball and socket region of the hips). Note: This will be modified in some exercises where the shoulder-width distance of the feet is more appropriate for the exercise being performed.
- Knees in line with hips (ball and socket region) and approximately in line with middle toe.
- Feet pointing forward.
As a trainer, encourage your client to think about these points as they are performing the exercises. Some ways to activate the core include drawing in the belly button (sucking it in) as you would when on the beach and an attractive man/woman walks past (we all do it). This is also a handy way to describe this action to your client because using descriptors such as 'Activate your transverse abdominus' or 'Engage your core' will mean something to your colleagues but likely mean very little to your average client! Therefore, translating this into everyday words and something we can all relate to helps your client understands what you are asking of them (it will also ensure that when they train in their own time, they are doing it safely).
Neutral pelvis
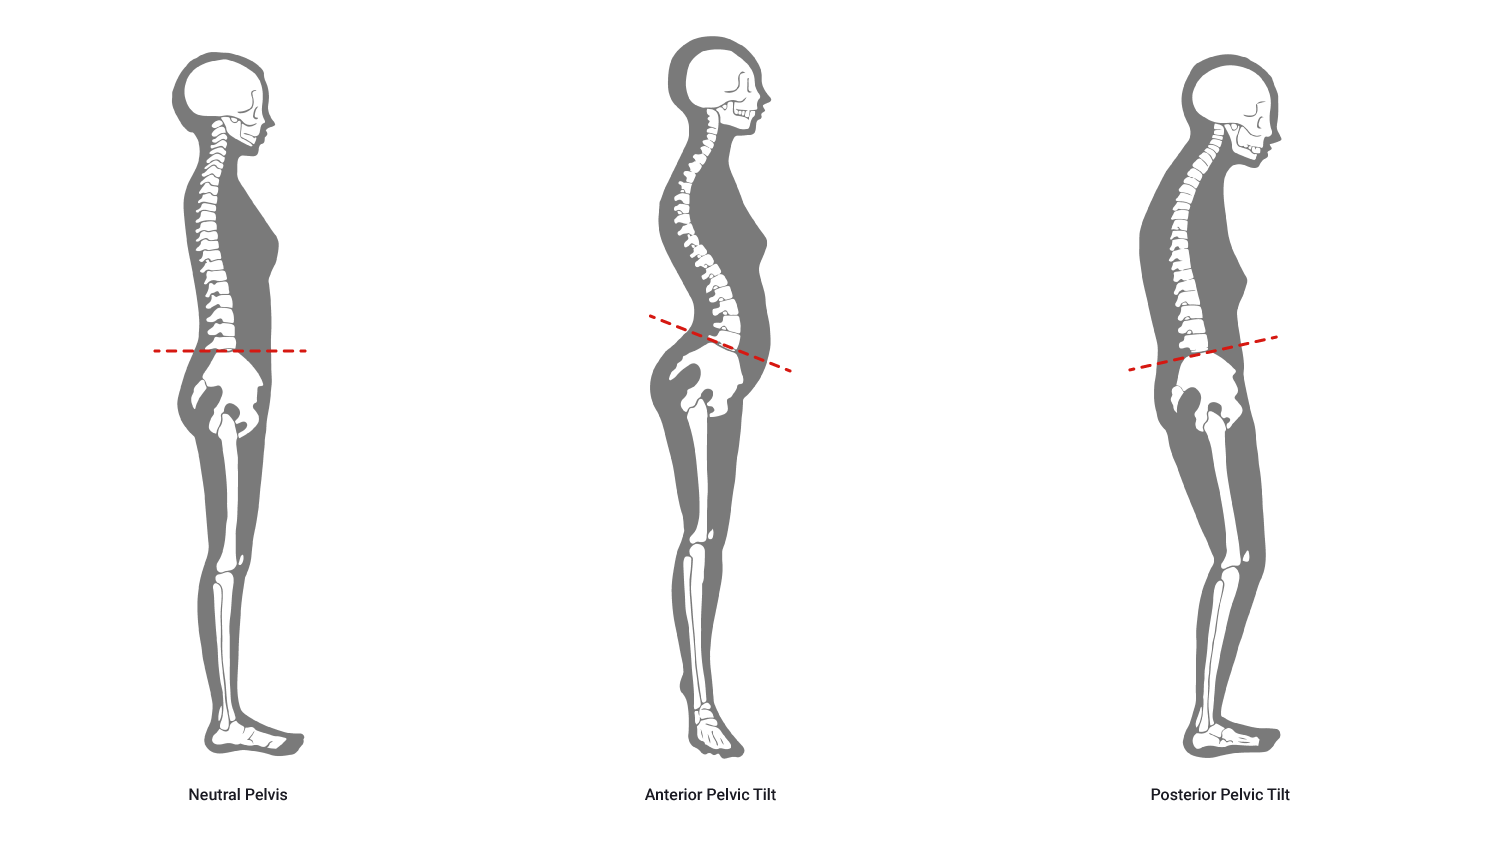
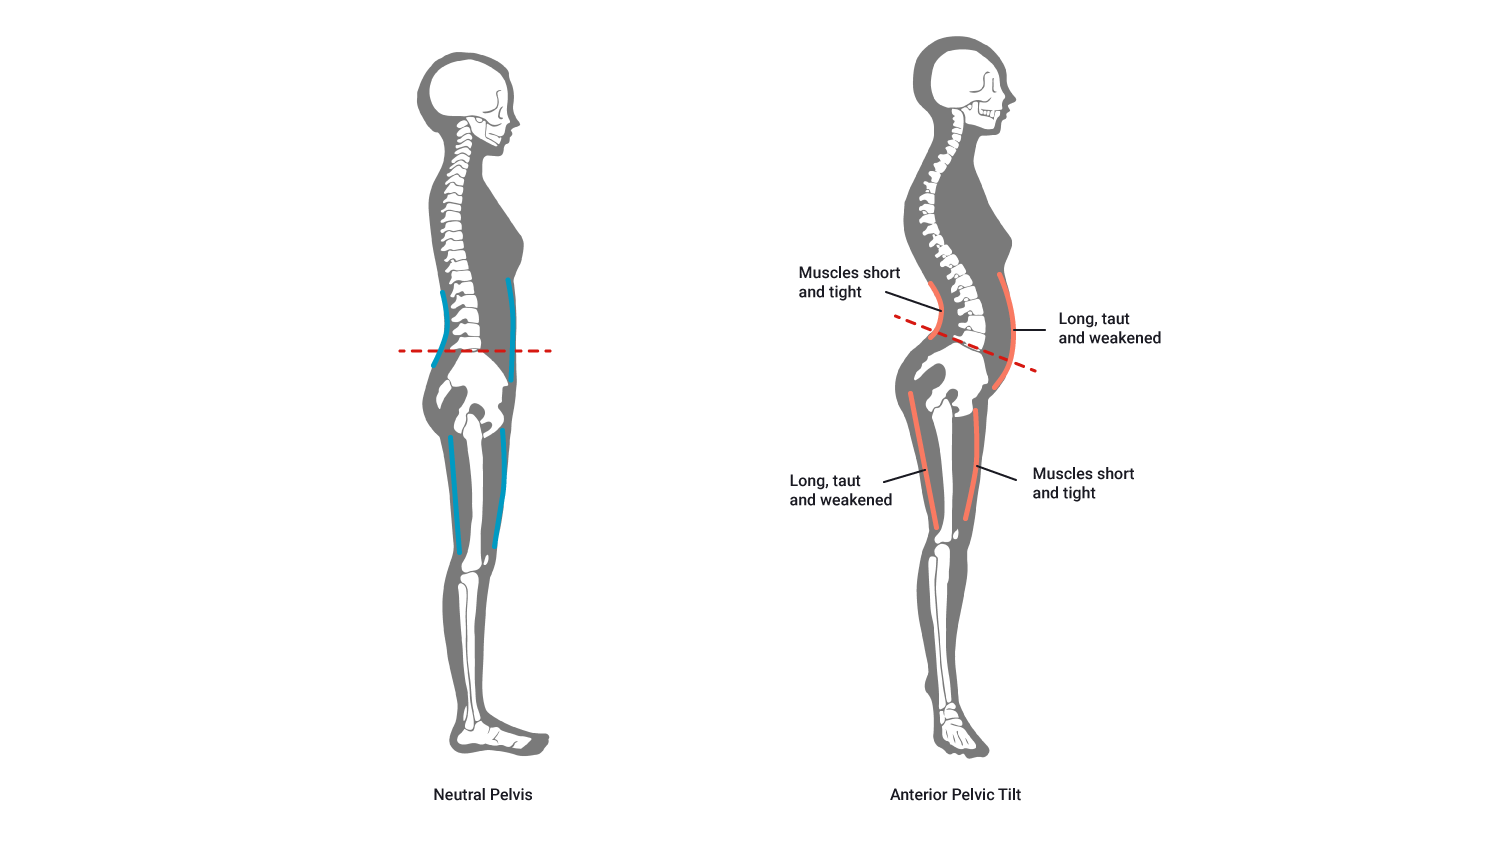
Neutral pelvis acts to ensure the posture of the lower region of the spine (lumbar and sacrum) and in their anatomical alignment, removing any 'poor posture' and ensuring the spine is efficient and safely aligned prior to and during exercise. When training, neutral pelvis can be tricky to maintain, particularly when getting tired. With this in mind, it is important to do a mental checklist of all the training posture points during an exercise and particularly between each repetition. This will soon become unconscious behaviour however in the early days, it is important to mentally run through the checklist and review each area of the body to assess if training posture is intact.
- Barbell bicep curl (Preacher bench)
- dumbbell hammer curl
- Single bicep curl (Cable)
- Seated single dumbbell bicep curl
The following table provides information on the major muscles, variations, and equipment options.
| Major muscles | Variations/progressions | Equipment options |
|---|---|---|
|
Biceps brachii Brachialis Brachioradialis |
Standing (try with back against the wall) Seated Preacher curls (isolates biceps well) Incline curls Reverse curls (good for strengthening weak wrists) Hammer curls (works brachioradialis muscle more) |
Dumbbell Barbell Band Machine Preacher bench |
Key coaching points and steps
- Whether standing or seated begin the exercise with weights or barbell down at the side.
- Adopt training posture.
- Inhale and bend the elbow, bringing wrist(s) towards shoulder until full flexion.
- Aim, with good posture, to avoid upper body movement which creates momentum (thereby assisting the movement, decreasing work required from bicep).
- Exhale and return to starting position, keeping elbows 'soft'.
- Review training posture and adjust where required before the next repetition.
Note:
- To avoid tendinitis and other elbow injuries, keep the elbow 'soft' when extended (that is, do not lock the elbow/fully extend the arm).
- To further target the brachioradialis muscle, rotate the forearm(s) at the elbow(s) before the forearm reaches fully horizontal.
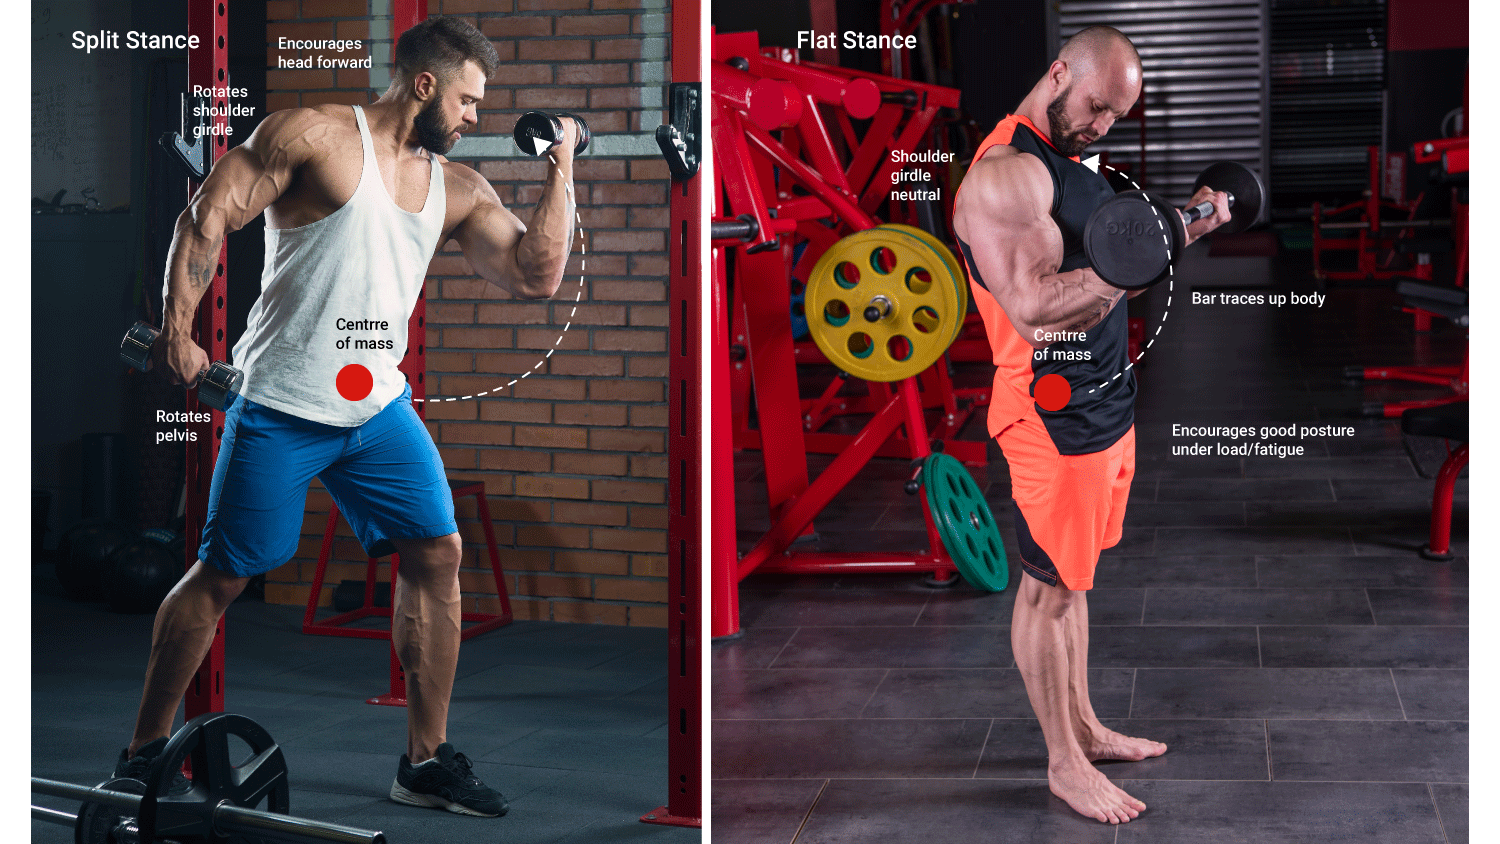
The following illustration shows the different stances that can be used to stabilise the body when training. These are appropriate for progressions (depending on the client's exercise ability). Compare the 'feet forward' vs 'feet together' stances.

The following table provides information on the major muscles, variations, and equipment options for this exercise.
| Major muscles | Variations/progressions | Equipment options |
|---|---|---|
|
Triceps brachii (made up of long, medial, and lateral heads) |
One/two arm triceps pushdown with cable Supine (lying face upwards) triceps extension (BB or DB) Cable machine triceps extension Overhead triceps extension (DB or BB) Triceps kickbacks Rope pushdown (engages lateral head of triceps more) |
Ropes Dumbbell Bench Barbells Cable machines |
Key coaching points and steps
Cables
- Standing at a machine with feet shoulder-width apart, with feet either parallel to each other or one slightly in front of the other.
- Place your hands on the bar/pulley ropes using an overhand grip.
- Adopt training posture.
- Inhale and pull the bar/pulley ropes down towards your waist in a controlled movement, keeping elbows fixed by the side of the torso (imagine they are bolted there and can not move).
- Exhale, controlling the movement in line with gravity, returning to starting position.
- Keep elbows 'soft' at the end of the movement.
- Review training posture and adjust where required before the next repetition.
Note:
- For all these exercises the upper arm must remain securely by the side and not allowed to travel excessively in order to isolate triceps.
- Using an underhand grip on cable pushdown exercises activates the medical head of triceps more.
- Hold an isometric contraction at the end of the movement for 1-2 seconds to add intensity.

The following table provides information on the major muscles, variations, and equipment options for this exercise.
| Major muscles | Variations/progressions | Equipment options |
|---|---|---|
|
Triceps brachii (made up of long, medial, and lateral heads) |
Triceps kickbacks Rope pushdown (engages lateral head of triceps more) |
Ropes Dumbbell Bench |
Key coaching points and steps
Bench (Dumbbells)
- Using a gym bench, position on foot flat on the floor with ankle, knee, and hip joint in one line.
- Place the other leg, bent on the bench with the knee directly under hip.
- Place hand on the bench with wrist, elbow, and shoulder in online.
- Grasp a dumbbell with the palm facing in (medially) and use the opposite hand and knee on the bench to support the back and maintain posture.
- Adopt training posture, chin tuck (neck alignment), core, flat back.
- Inhale and extend the arm at the elbow in a controlled movement keeping the elbow soft at the end of the movement. Keep back flat and abdominals contracted.
- Avoid swaying or twisting of the torso, aim to keep posture fixed and steady.
- Return the dumbbell to starting position ( elbow at an approximate 90-degree angle)
- Exhale at end of the movement.
- Review training posture and adjust where required before the next repetition.
Standing (dumbbell)
- Stand with legs slightly bent, one foot in front of the other, shoulder-width apart with dumbbell in hand, palm facing medially.
- Keep back straight, lean forward at the hips to approximately 45°, maintaining training posture.
- Inhale and extend the arm at the elbow in a controlled movement keeping the elbow soft at the end of the movement. Keep back flat and abdominals contracted.
- Avoid swaying or twisting of the torso, aim to keep posture fixed and steady.
- Exhale at end of the movement.
- Review training posture and adjust where required before the next repetition.
Note:
- For all these exercises the upper arm must remain securely by the side and not allowed to travel excessively in order to isolate triceps.
- Using an underhand grip on cable pushdown exercises activates the medical head of triceps more.
- Hold an isometric contraction at the end of the movement for 1-2 seconds to add intensity.
The following table provides information on the major muscles, variations, and equipment options for this exercise.
| Major muscles | Variations/progressions | Equipment options |
|---|---|---|
|
Triceps brachii (made up of long, medial, and lateral heads) |
One/two arm triceps pushdown with cable Supine (lying face upwards) triceps extension (BB or DB) Cable machine triceps extension Overhead triceps extension (DB or BB) Triceps kickbacks Rope pushdown (engages lateral head of triceps more) |
Ropes Dumbbell Bench Barbells Cable machines |
Key coaching points and steps
seated- Bench (Dumbbells or bARBELL)
- Using a gym bench, seated comfortably on the edge with feet flat on the floor with ankle, knee, and hip joint in one line.
- Grasp a dumbbell, placed between both hands, with the palms facing up (supine) in an overhead position, mindful of the angle of shoulder joints, and excessive strain.
- Adopt training posture, chin tuck (neck alignment), core, flat back.
- Inhale and flex the arm at the elbow in a controlled movement allowing the barbell to lower behind the head. Keep back flat and abdominals contracted.
- Avoid swaying or twisting of the torso, aim to keep posture fixed and steady.
- Return to dumbbell to starting position via extending the elbows whilst exhaling.
- Review training posture and adjust where required before the next repetition.
Note:
- If using a barbell, ensure the elbows stay in line with each other and avoid them "flaring out"
- If performing in the supine position on a bench, ensure 5 points of contact are maintained. Aim to lower the barbell towards the forehead ( without touching the forehead) and then extending the arms back to straight arms with soft elbows.
- For all these exercises the upper arm must remain securely by the side and not allowed to travel excessively in order to isolate triceps.
- Using an underhand grip on cable pushdown exercises activates the medical head of triceps more.
- Hold an isometric contraction at the end of the movement for 1-2 seconds to add intensity.
- Tricep dip (bench)
- Tricep dip (machine)
- Assisted tricep dip
The following table provides information on the major muscles, variations, and equipment options for these four exercises.
| Major muscles | Variations/progressions | Equipment options |
|---|---|---|
|
Triceps |
From bench From dip handles From ground Machine assisted |
Bench Machine (weighted and assisted) |
Key coaching points and steps
Bench (bodyweight)
This exercise can be performed using one bench (two benches would be an advanced progression).
- Sitting on the edge of a bench, place your palms on the edge with fingers wrapping underneath the bench.
- Adopt training posture.
- With elbows soft and firmly by the side of the torso, gently side off the bench.
- Inhale and control the body moving towards the floor in a controlled movement.
- Stay as close to the bench as possible and avoid increasing the angle between body and bench (imagine the back running up and down the edge of the bench during the movement).
- Exhale, pushing through the palms of the hands, elbows remaining firmly by the side of the torso (watch for elbows 'flaring' away from the body wings).
- Raise the body, extending the arms at the elbow keeping elbow 'soft' at the end of the movement.
- Review training posture and adjust where required before the next repetition.
Machine
- With the arms straight, arms and soft elbows grip onto the dip handles.
- Suspend body between two dip handles, feet off the ground (either via knees being bent on assisted machine or knees bent with legs behind).
- Inhale and lower the body towards the ground via flexing at the elbows (avoid elbows moving higher than shoulders).
- Exhale and, pushing through the hands, keeping wrists straight, push the body away from the ground (keeping elbows soft at the end of the movement).
- Review training posture and adjust where required before the next repetition.
Note:
- This exercise works the triceps and lower fibres of pectorals as well as the anterior deltoid.
- Resting weights on top of thighs or wearing a weight vest increases the difficulty of the dip.

Wrist/forearm extension
The following table provides information on the major muscles, variations, and equipment options for these three exercises.
| Major muscles | Variations/progressions | Equipment options |
|---|---|---|
|
Wrist flexors |
Sitting Kneeling |
Dumbbells Barbells Bands |
Key coaching points and steps
- Hang wrist over knee or bench end, with the remainder of the forearm firmly on the bench or knee.
- Hold dumbbells or barbells in hand with an overhand grip.
- Inhale and extend wrists in a controlled movement.
- Exhale, return to starting position (neutral/level) wrist.
- Avoid heavy weights with this exercise, wrist flexors are a small muscle group therefor need low weights to avoid strain or injury.
- These exercises strengthen the wrists, which are often vulnerable because of weak wrist extensors or flexors.
Wrist/forearm extension
| Major muscles | Variations/progressions | Equipment options |
|---|---|---|
|
Wrist extensor |
Sitting Kneeling |
Dumbbells Barbells Bands |
Key coaching points and steps
- Hang wrist over knee or bench end, with the remainder of the forearm firmly on the bench or knee.
- Hold dumbbells or barbells in hand with an underhand grip.
- Inhale and flex wrists in a controlled movement, allowing the bar to slowly and steadily close to the tip of the fingers.
- Exhale, roll the weight, steadily, back into the palm, close your grip and return to starting position (neutral wrist).
- Avoid heavy weights with this exercise, wrist flexors are a small muscle group therefor need low weights to avoid strain or injury.
- These exercises strengthen the wrists, which are often vulnerable because of weak wrist extensors or flexors.
Note:
- Wrist extensors are the extensor carpi radialis longus and brevis, extensor digitorum, extensor digiti minimi, and extensor carpi ulnaris.
- Wrist flexors are the flexor carpi radialis, palmaris lonus, flexor carpi ulnaris and profundus.
Healthy arms are critical to our wellbeing and ability to perform routine activities. In this topic, you learnt how to perform and teach clients specific exercises:
- Biceps curls
- Triceps extension
- Triceps kickback
- Triceps push down
- Dips
- Forearm curls.